
It’s Saturday and I was hoping to get a good day’s build in – guess what… didn’t quite go that way.
I didn’t get up as early as I was hoping and so didn’t get into the garage until around 11AM.
The first task however was a trip to B&Q (Lowes equivalent for our US readers) for some pipe lagging to protect the chassis tubing. It was going to be a while before we put the engine in but I wanted to make sure I had some available if needed.

I bought 15mm and 22mm. Either works with the 22 being a little lose but probably a better choice as the 15mm can “burst” off the tubing if knocked.
Back in the Garage
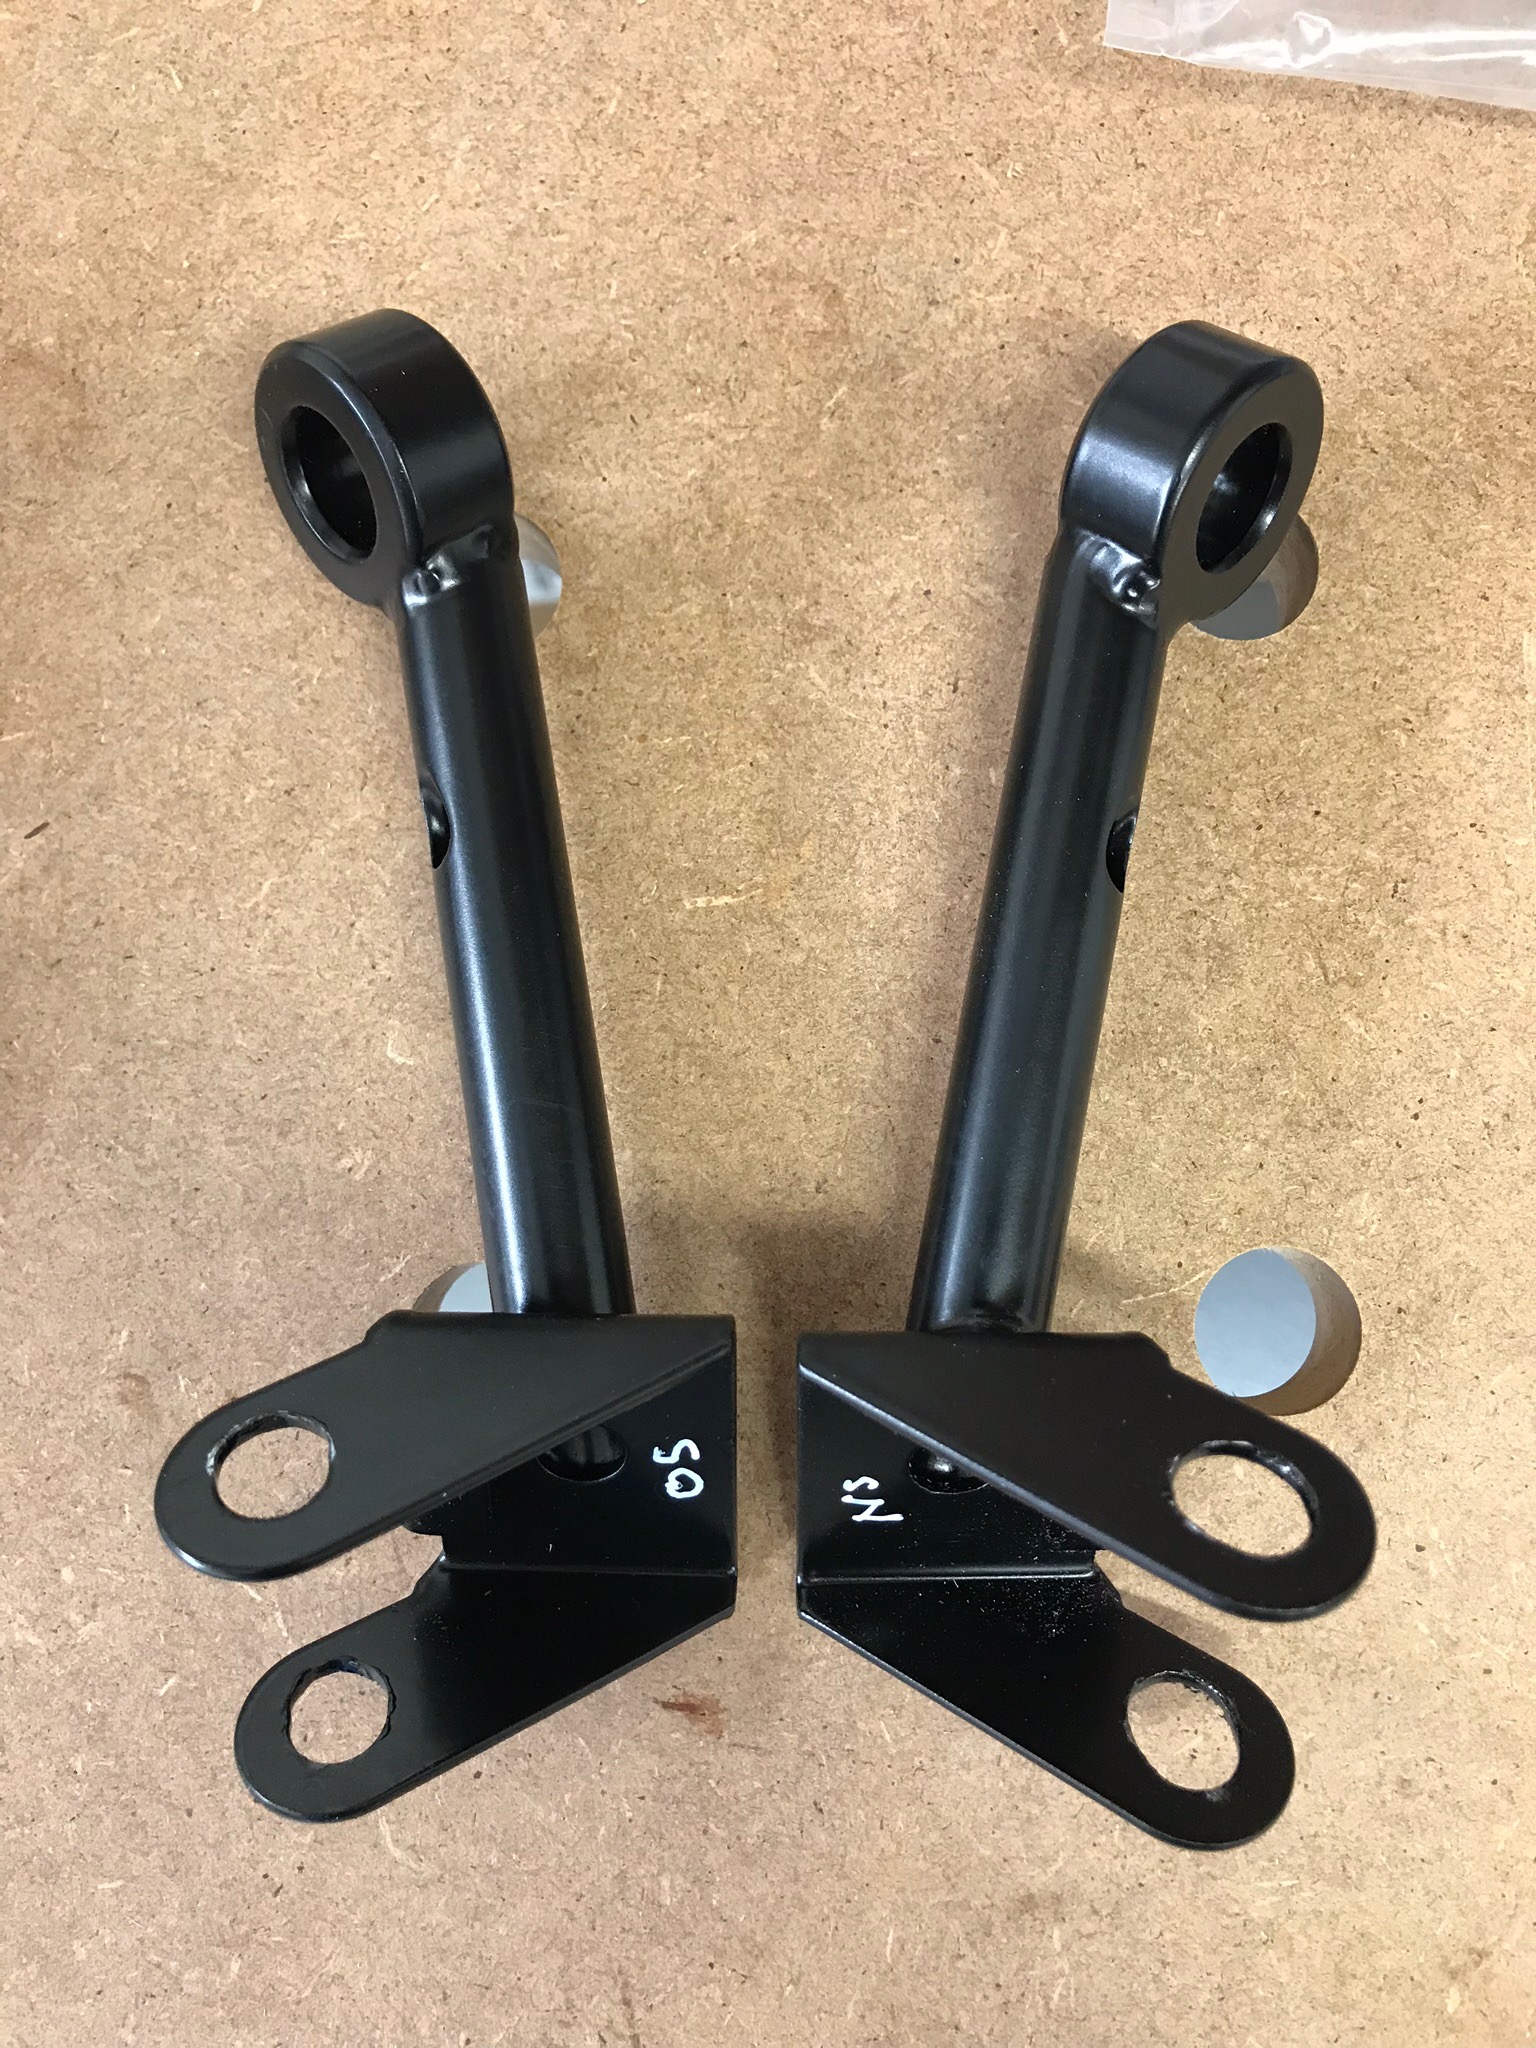
I’d decided that I needed to get the headlamps onto the car, mainly because the front mounting of the upper wishbone needs the headlamp stay attached as the bolt goes through the mount…. and I didn’t want to have to take everything apart again to put the stay on later.
This strategy certainly has risks associated with it. Having the headlamps on the car as the engine is installed provides another fragile component you have to be careful of with a 150Kg pendulum on a hoist. I’m not sure how this decision is going to play out but decided I preferred the “do it right, do it once” mentality of not having to redo things later.
I had the upper wishbones attached with just the rear mount from yesterday and I could offer up the headlamp stays to the front mount to see how they fit.
The stays have a flange on their lower side where they mount to the wishbone that is used to hook under the chassis mount. I’m not too sure why that’s there, perhaps other than to provide some retention of the stay if they were to be knocked. I guess that’s an IVA thing, if the car is in an accident then there’s more likelihood that the headlamp would be retained on the car instead of becoming a projectile.
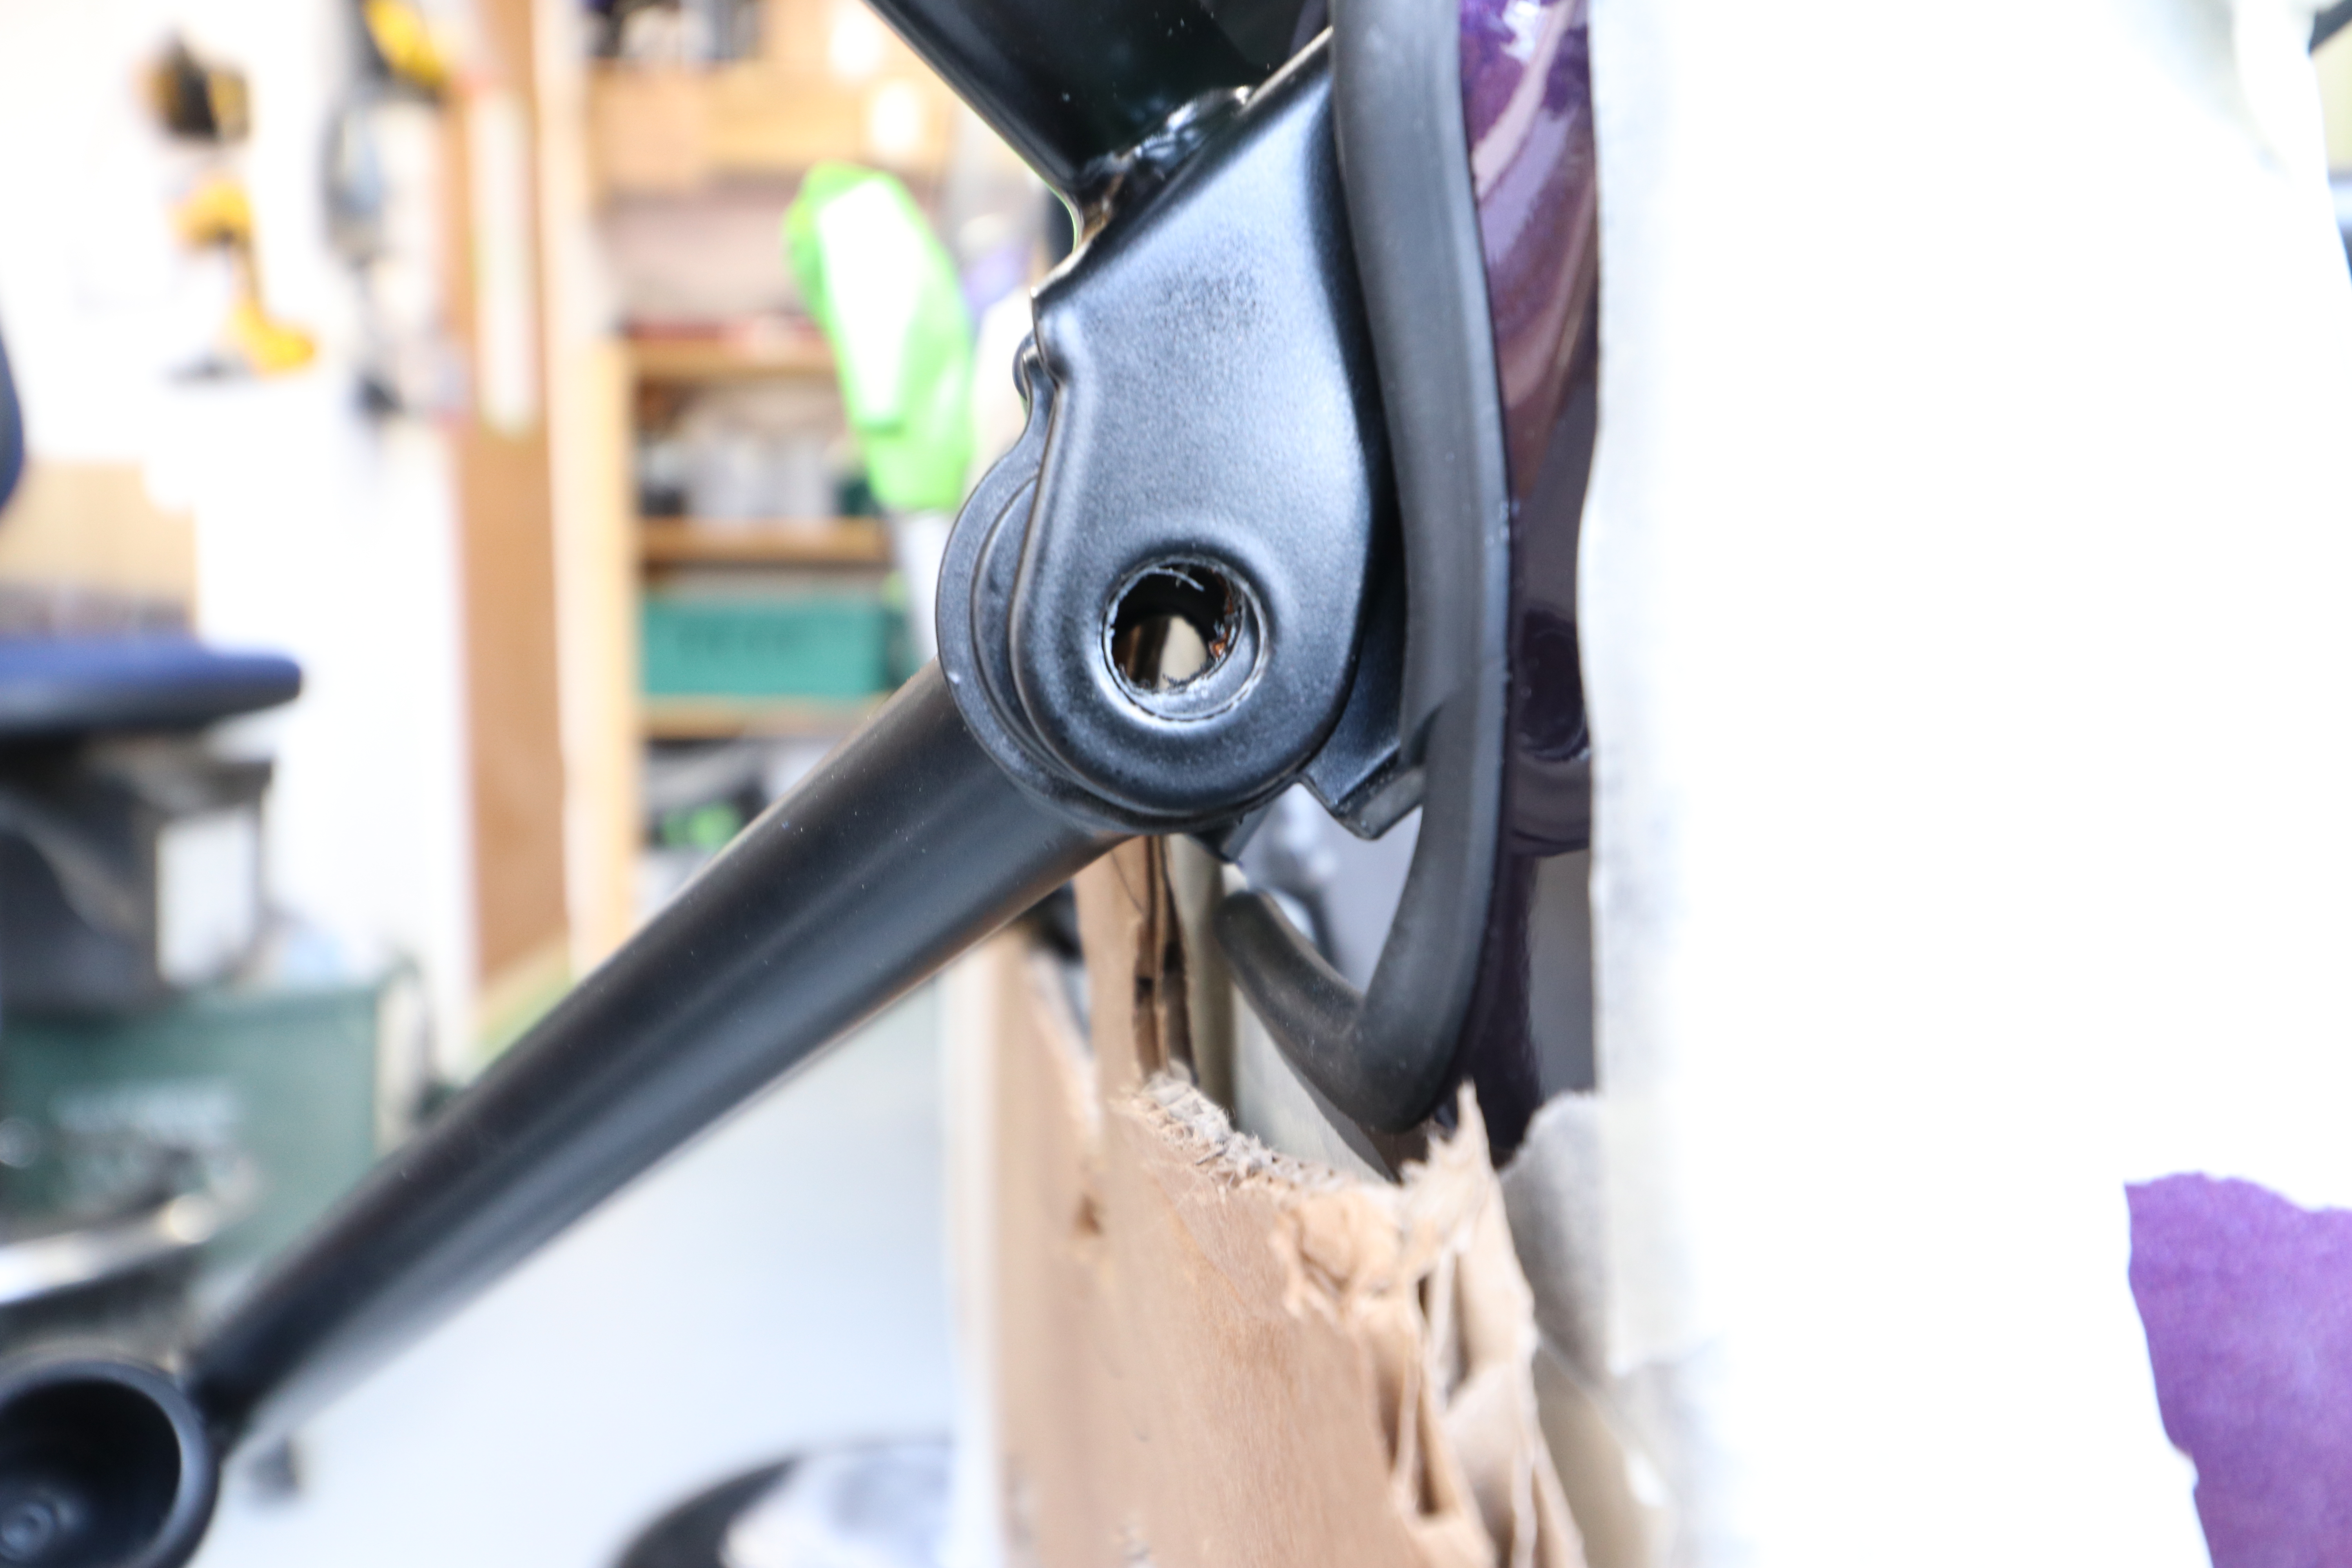
On offering the stay up to the car it was clear that the holes in the stays didn’t line up with the holes in the chassis and the wishbone.
What to do?
I thought there were two options. The first was to enlarge the holes in the stays to allow the mounting bolt to pass through. The only other thought was that the flange on the underside of the stay could be altered to allow the stay to slide on the chassis mount. I wasn’t happy about this second option, the flange had clearly been put there for a reason and it looked like I was going to have to modify it considerably, and it probably still wouldn’t do what I needed.
I also considered that adjusting the flange so the stay didn’t sit flush with the chassis mount would also adjust the angle of the stay. I put a level on the stay to check if it was level. It was, and I didn’t want to put it out of level with any changes.
It was therefore clear that I needed to open up the headlamp stay mounting holes. Out with the paint pen to mark up what needed to be removed on all four holes…
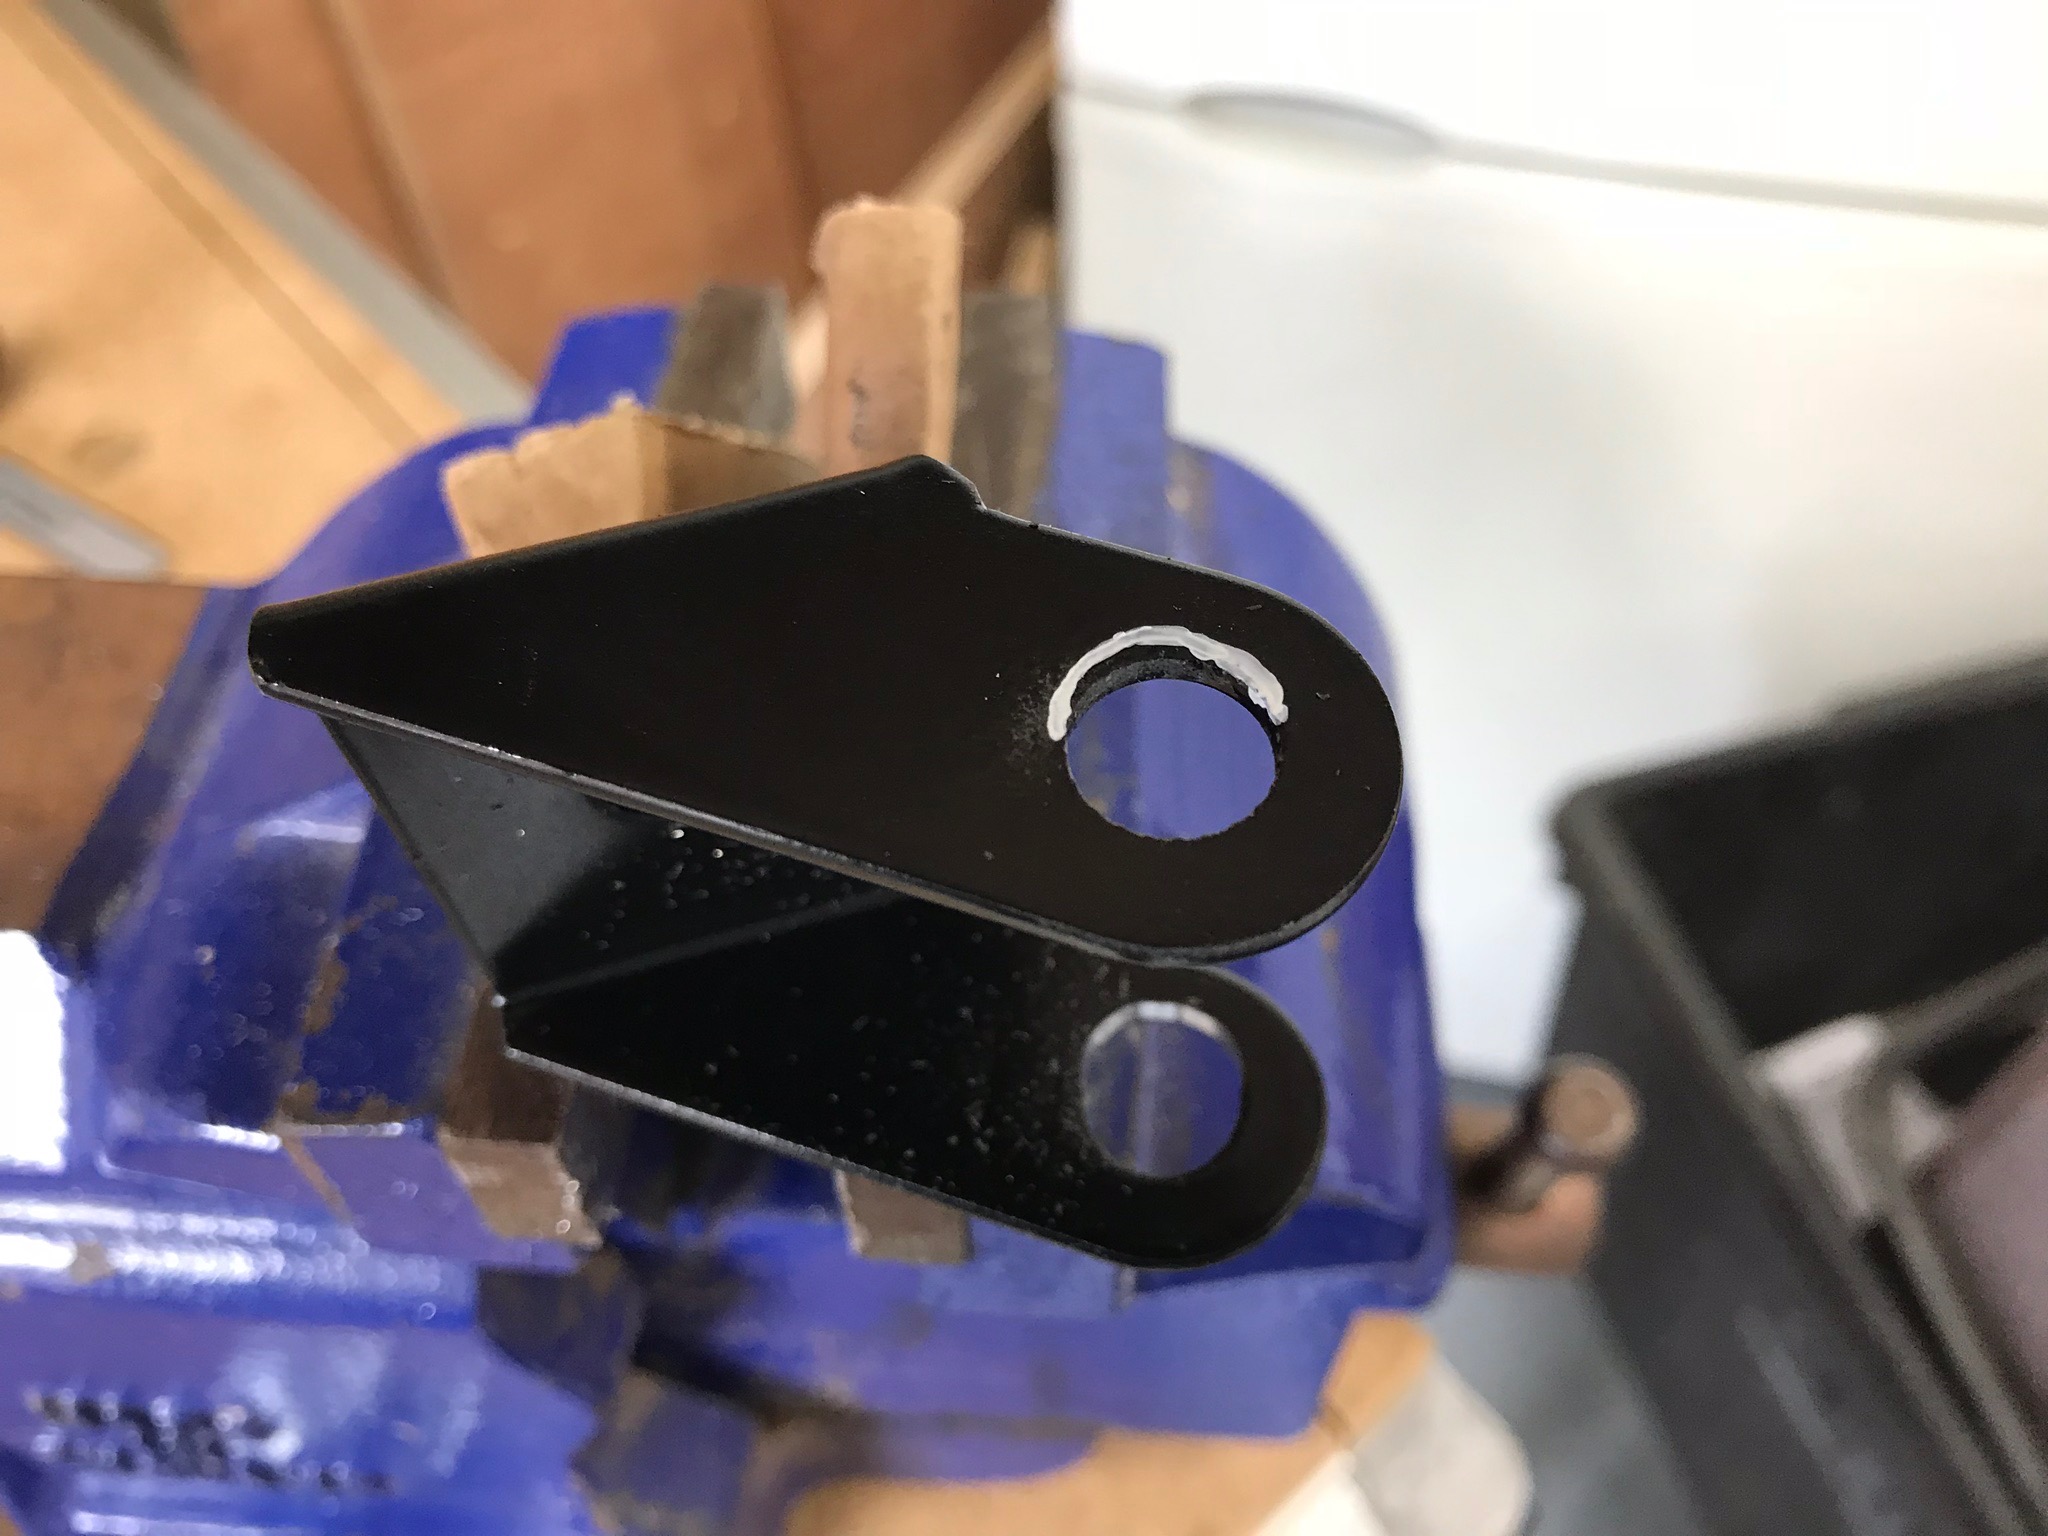
… and then the dremmel to remove the material.
Now I’d got headlamp stays that I could attach I also needed to protect them. A job for some black Smooth Hamerite but it needed a couple of coats and 4 hours between coats.
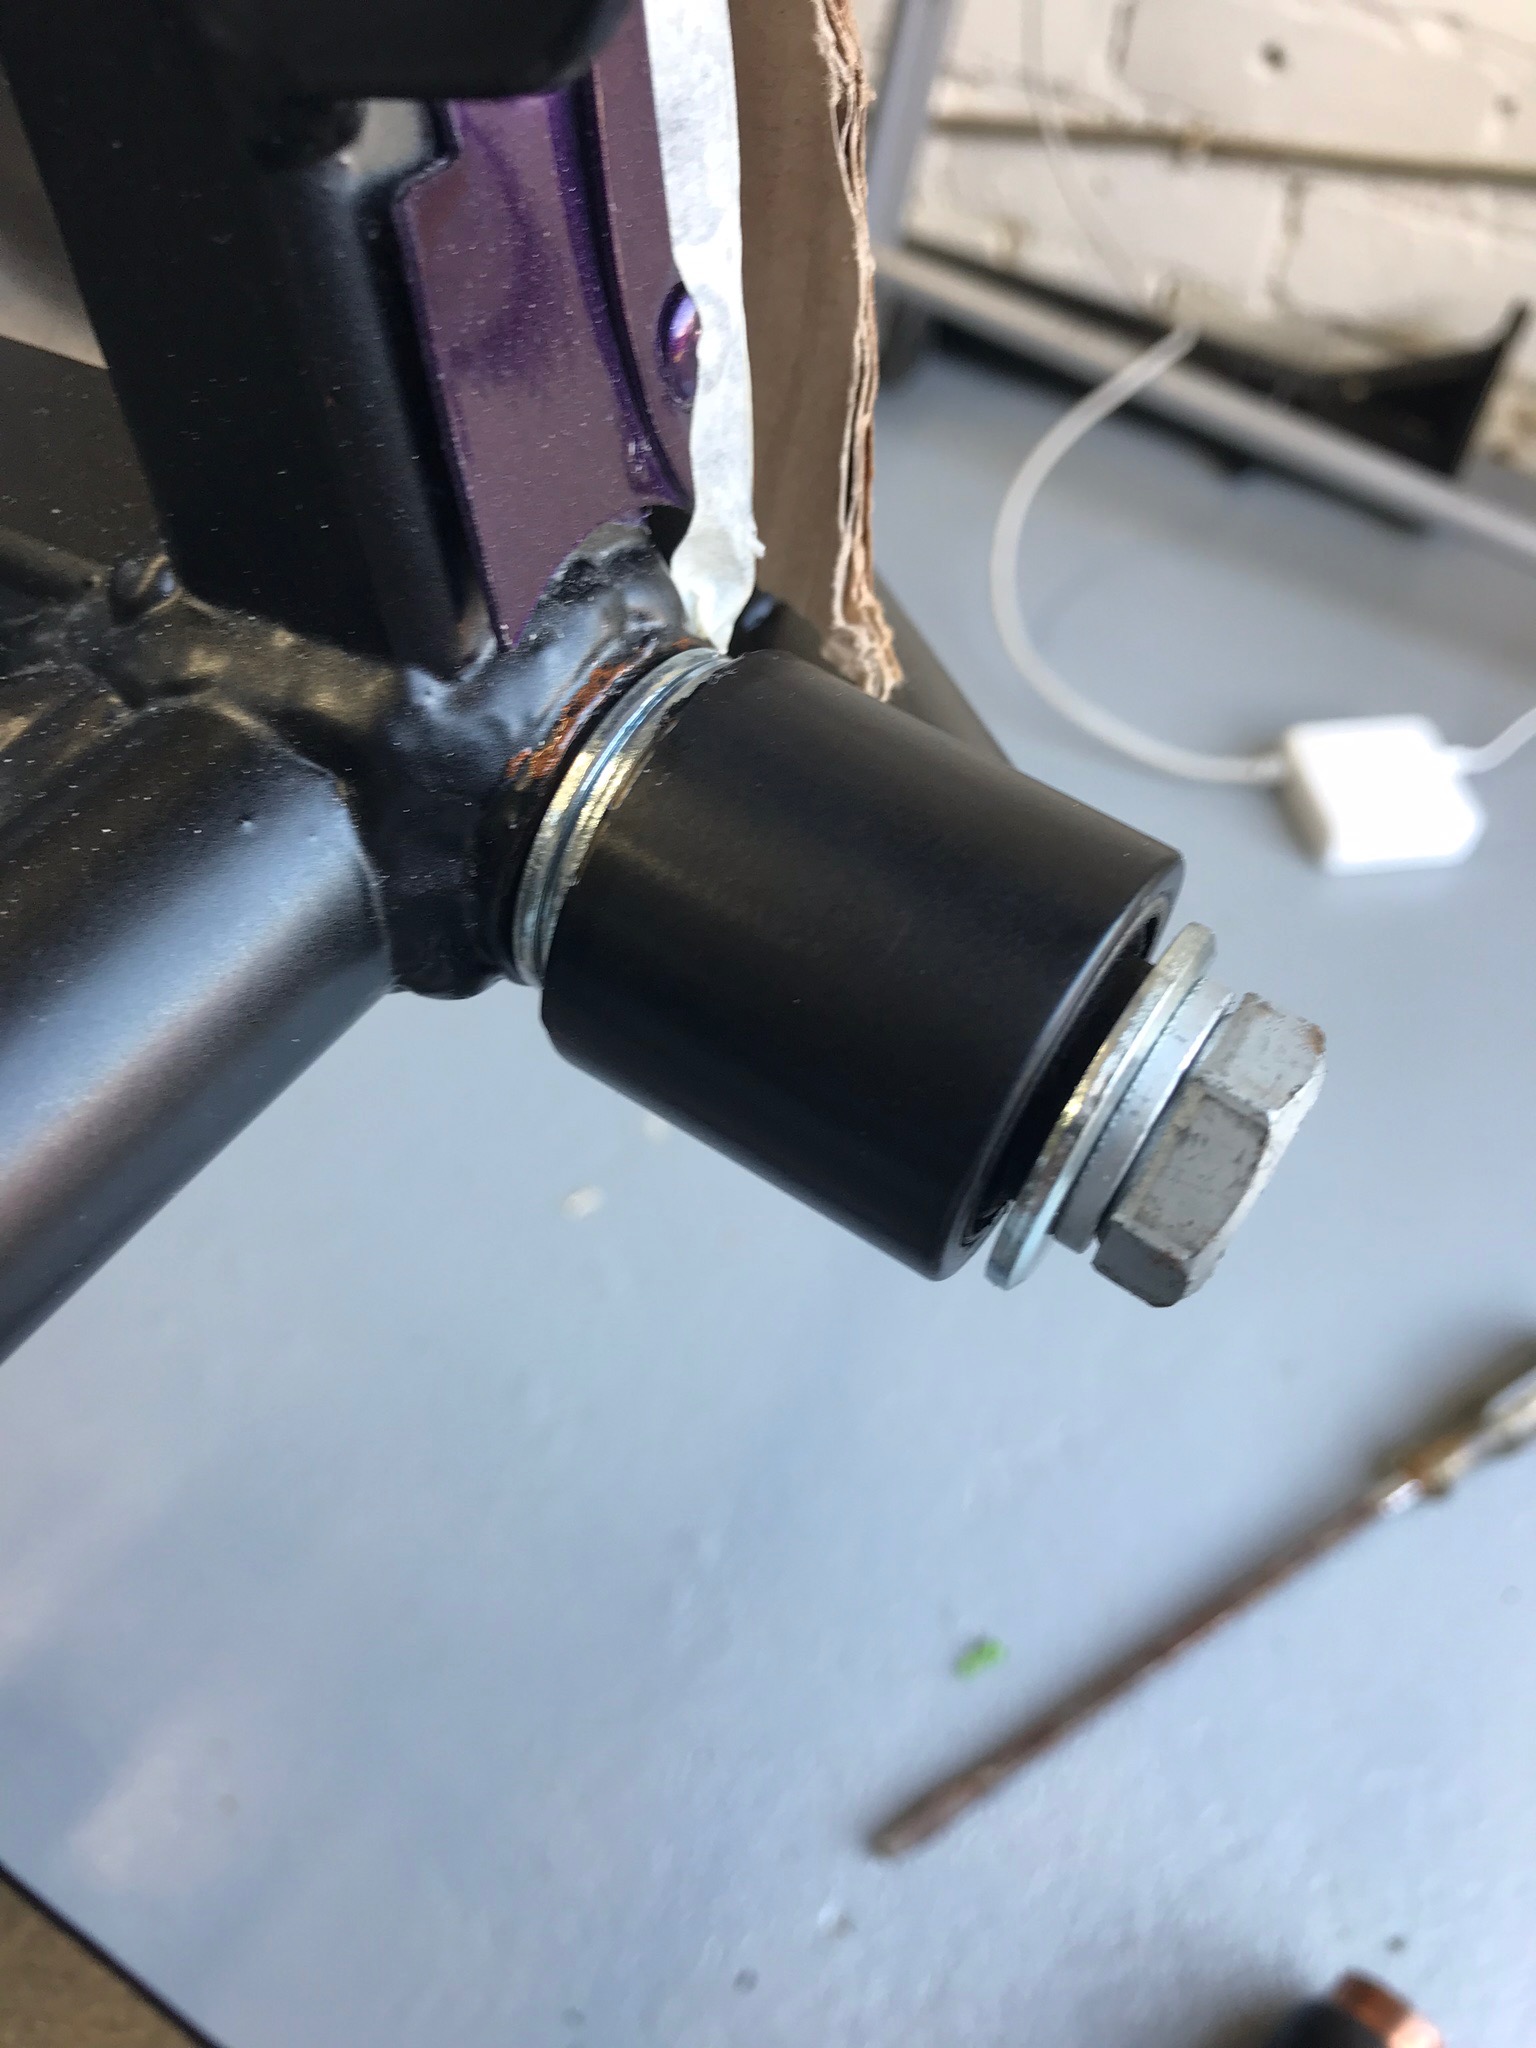
Front Nearside Lower Wishbone, Front Chassis Mount
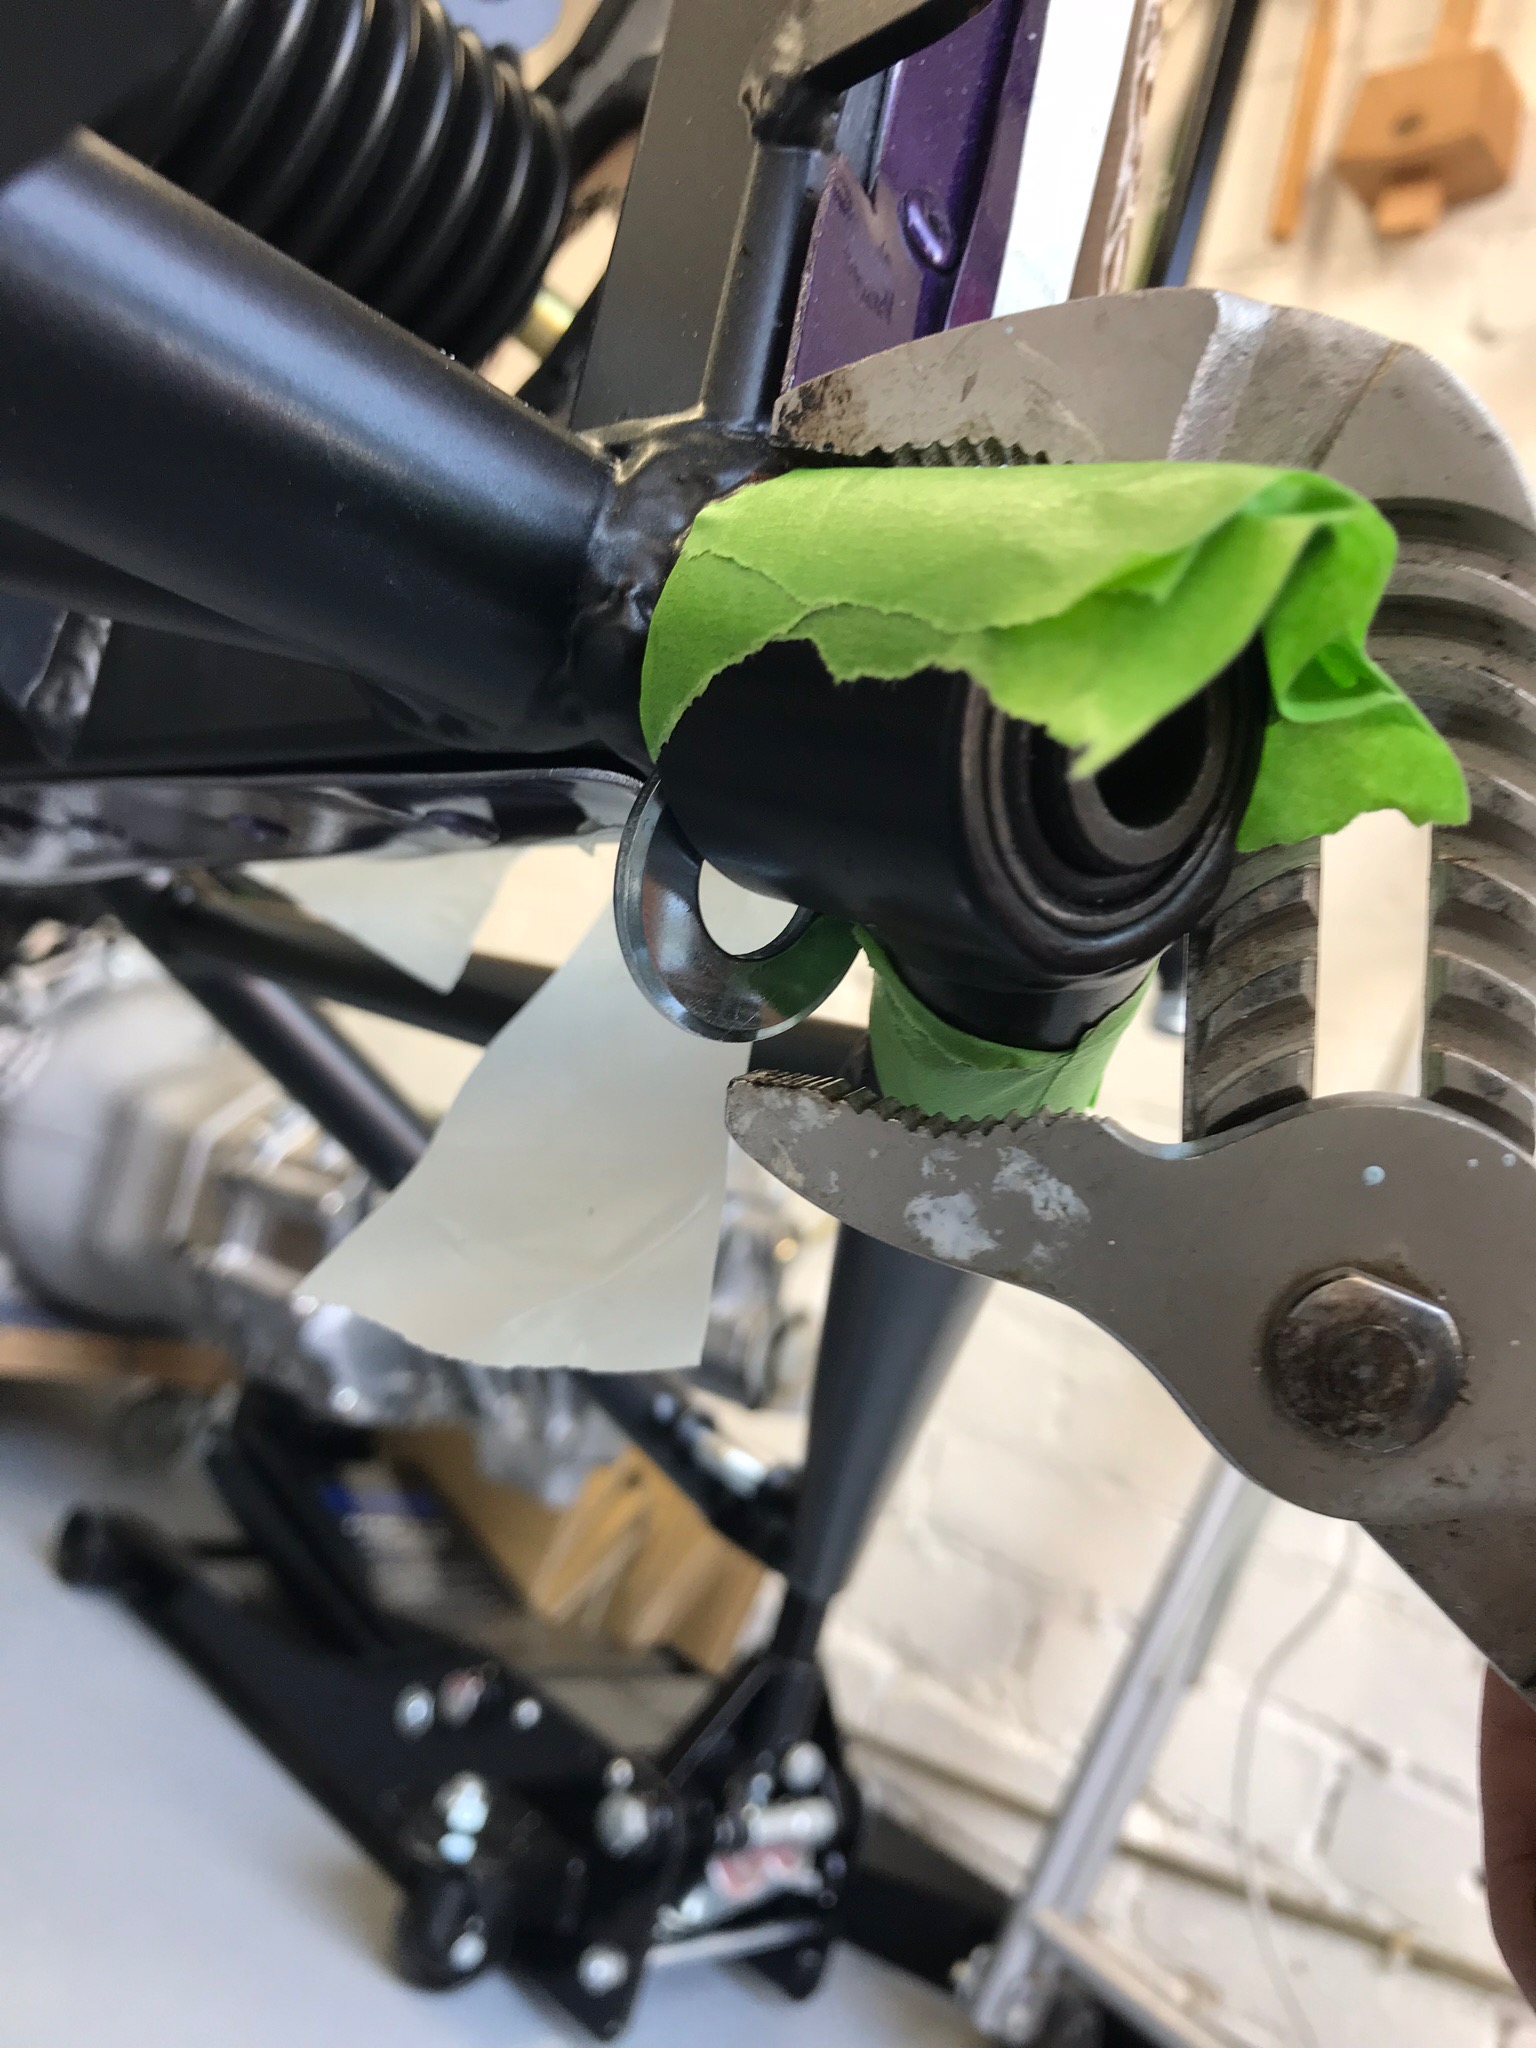
While the first coat of Hammerite was drying I turned back to the two plain washers that needed to be added to the nearside front wishbone that I couldn’t figure out yesterday.
I could see that one washer in the gap was snug, but could probably take something else in there with some persuasion. It then struck me that I might be have a thinner washer in my nuts and bolts box and that something thinner along with a supplied washer would be better than just one washer.
I found a M8 penny washer that was 1.5mm thick, 1mm thinner than the supplied washers. I thought I stood a chance of getting that in.
[envira-gallery id=”528″]
Now that I’d got some of the penny washer in, I thought: then why not try the second supplied washer. After a lot of pushing and persuading with a soft hammer, grips and piers success: I managed to get the second supplied washer into the gap.
It was now just a question of using grips and pliers to coax the second washer in to place and to get the bolt into the mount. I put plenty of masking tape on the chassis and wishbone to try and protect it from the jaws of the grips and any wayward slips.

Headlamps
The Hammerite on the headlamp stays was still not ready for a second coat so I moved onto the headlamps and indicator pods.
I followed Daniel Franch’s approach (with my own twist) from his Build Day Four – Headlight and Indicator Mounting.
The basic idea behind Daniel’s approach is to not use the plastic tubing supplied with the headlamps to run the wiring but to replace with heatshrink. The tubing can then be fed through the various nuts, hollow bolts and headlamp stays and provide much better weather protection.
Before we get into all of that though, I needed to put IVA trim around the two indicator pods, and that was the end of the day – it took a couple of hours to attach the IVA trim and meant I’d run out of time after I’d also applied a second coat of Hammerite to the stays.
As has been said by many others, the trim is applied by snipping excess material at the corners and sticking the trim to the pod with super glue every few centimetres. I found it best to fit the trim and once I’d gone all the way around I cut the trim with about 2cm of excess.
[image of trim on and 2cm of excess ]
I then pushed the trim into all the corners which reduced the excess but still meant I had to further trim it later on. Once the trim was fully into all the corners I cut the puckered material from the corners and then super-glued it all in place.
[envira-gallery id=”535″]
Sorry for the image quality of the work on the indicator pod IVA trim… I suspect Copper Ease on the lens!
I spent the rest of the day/evening catching up with blog posts. I’d got a few days behind and so pushed a few posts out that night.

Leave a Comment