
After feeling quite pleased with my progress to date I’d got to the point of thinking about applying for an IVA test. From what I can tell the process goes like this:
- Fill out forms 1c and 4
- Collect photos of build
- Get a copy of your invoice
- Submit two forms, photos and invoice through online application process:
- The link now seems to have changed to https://www.gov.uk/apply-vehicle-approval
- Get TAS number (mine arrived almost instantly by email)
- Wait for email about how to pay the £450 inspection fee, then pay it
- Wait for email to say “released for inspection”
- Call the tests centre and book appointment
- GET THE TEST DONE – and pass… hopefully
- Take with you all the invoices and documentation provided by Caterham
- Submit registration request along with supporting docs
- Wait for V5
At least that’s what I think needs to happen, I’ll update this page if it changes and I’ll do a post on the whole IVA thing when the time comes.
Anyway, back to the feeling good about where we’re at… two events happened this week to take me a couple of steps back.
Front Brake Calipers
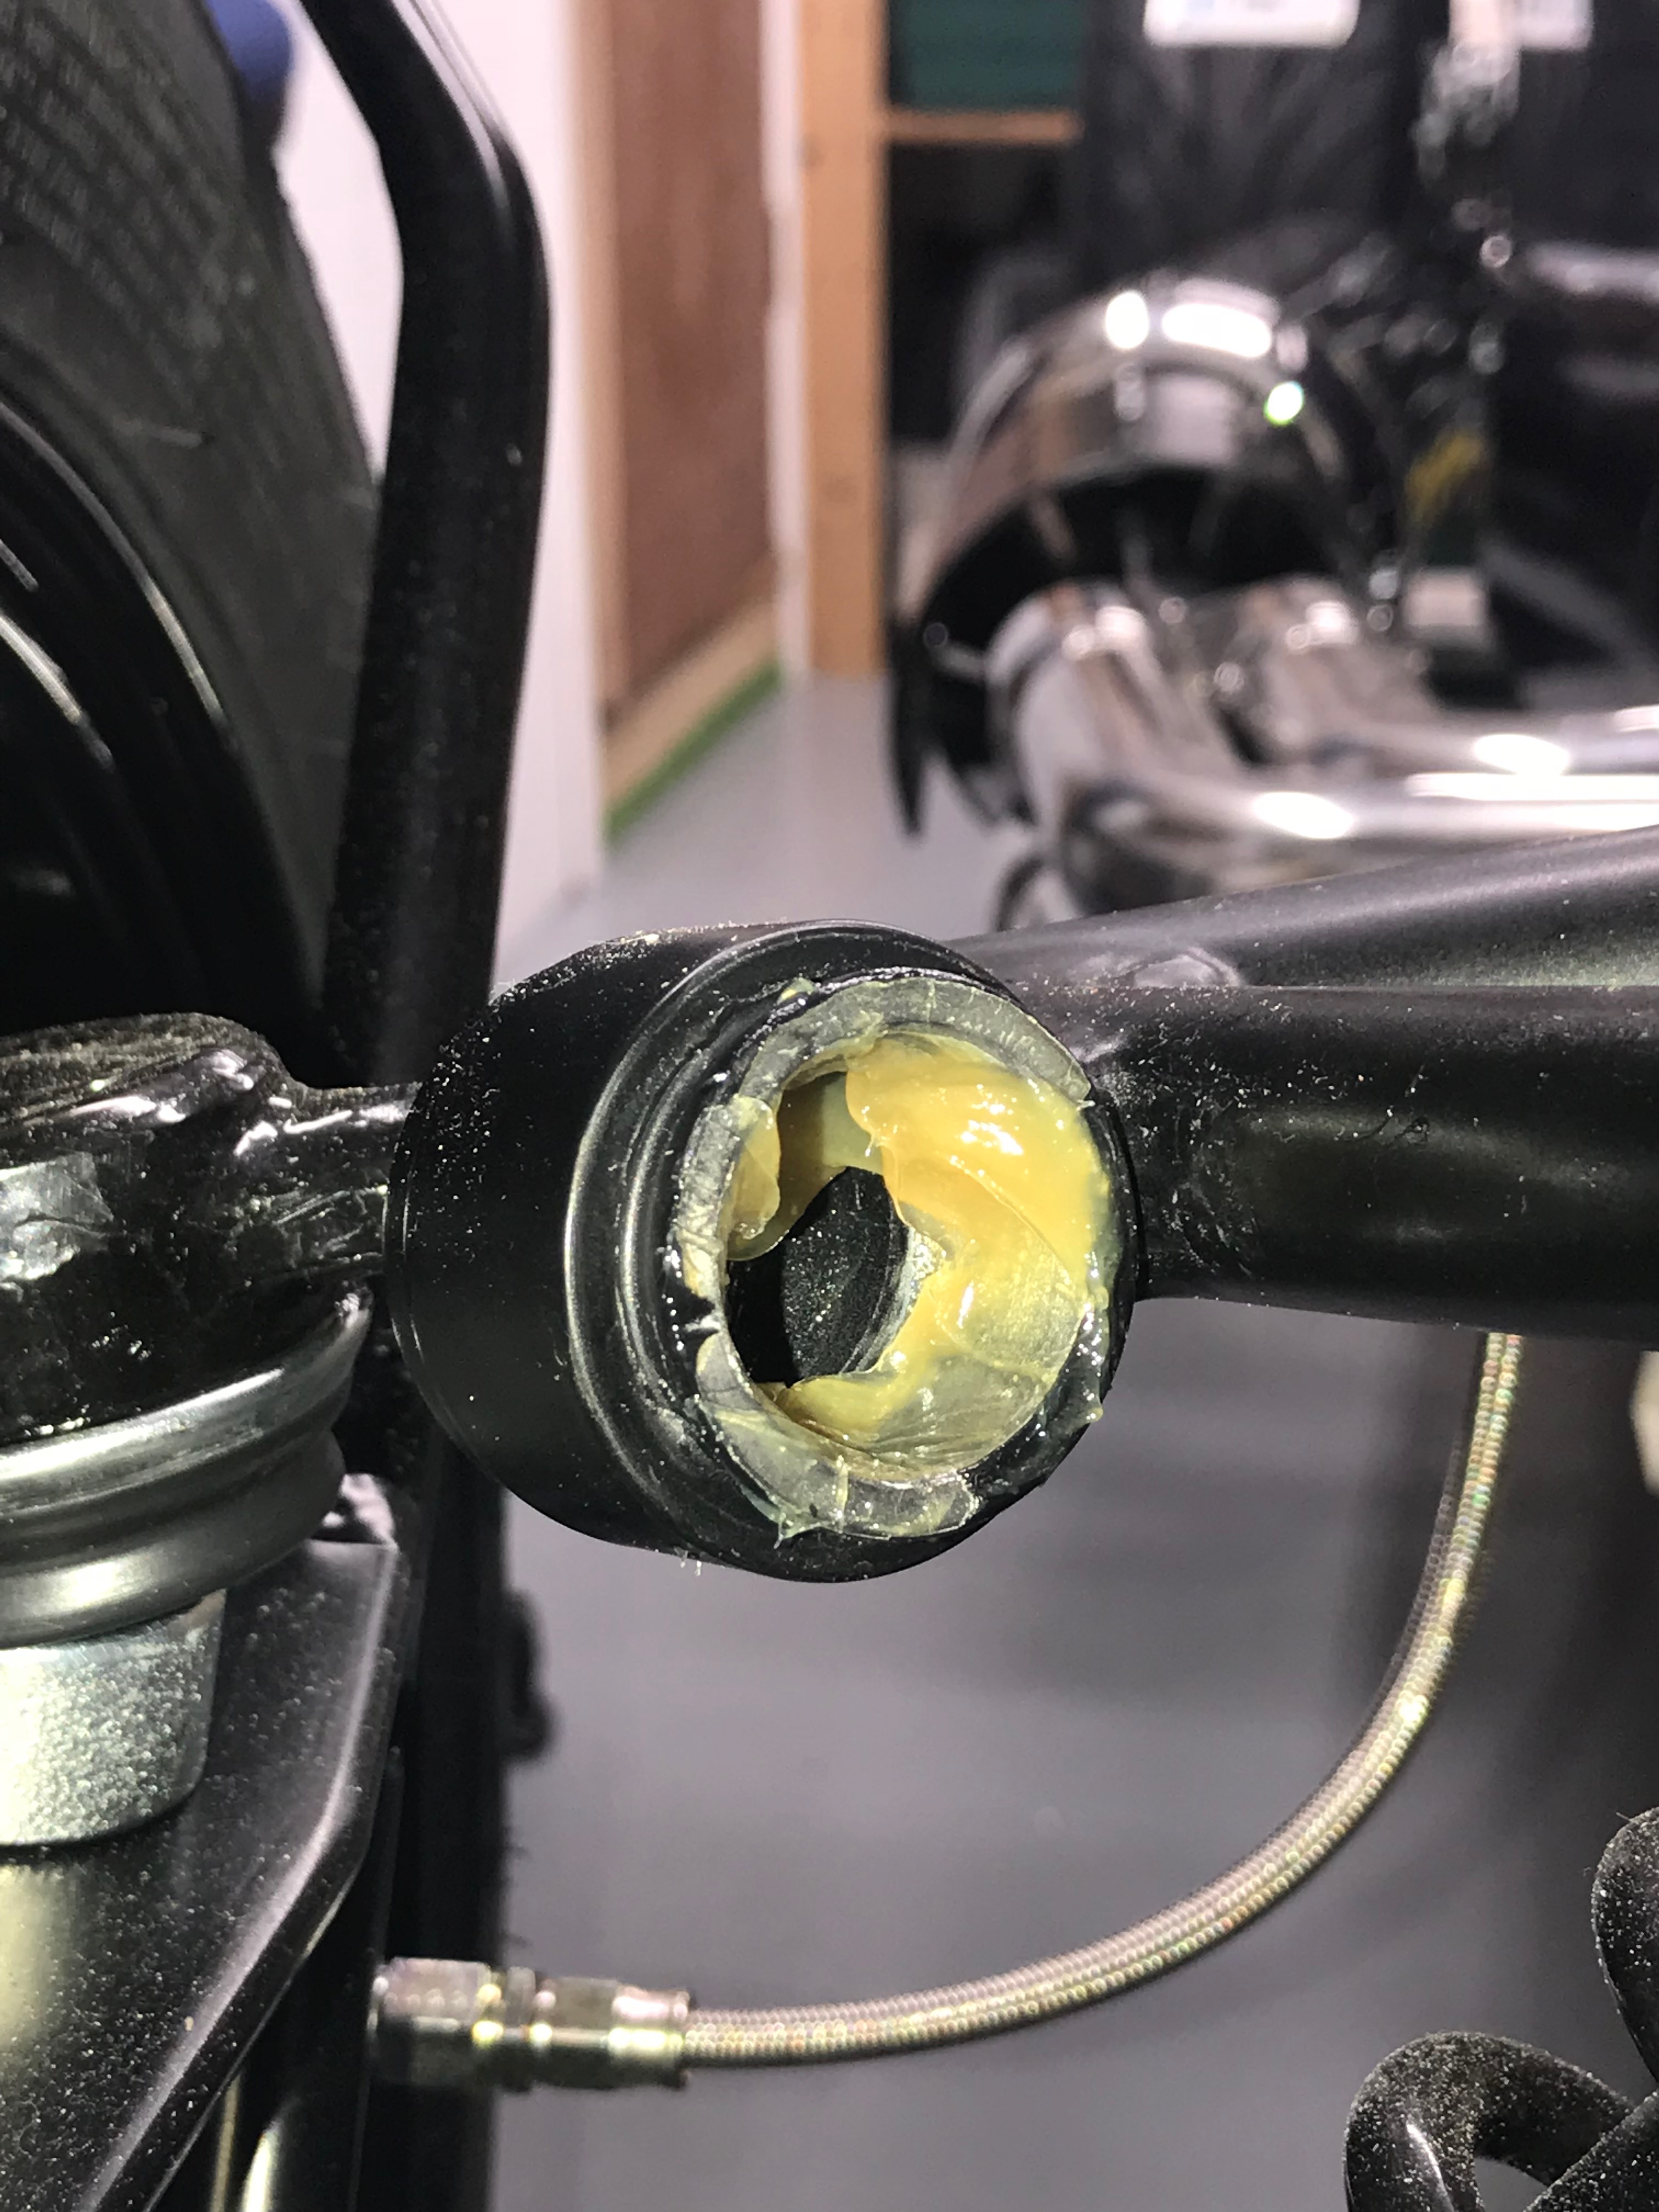
I got contacted yesterday by Andrew Pepperrell on Facebook who asked why I’d chosen to use the gold/bronze coloured brake hose couplings rather than the matt grey ones when building the front suspension.
There are two sets of couplings provided in the brake kit. I assume that maybe one set gets used on the regular brakes and one on the uprated brake, but that’s just a guess.
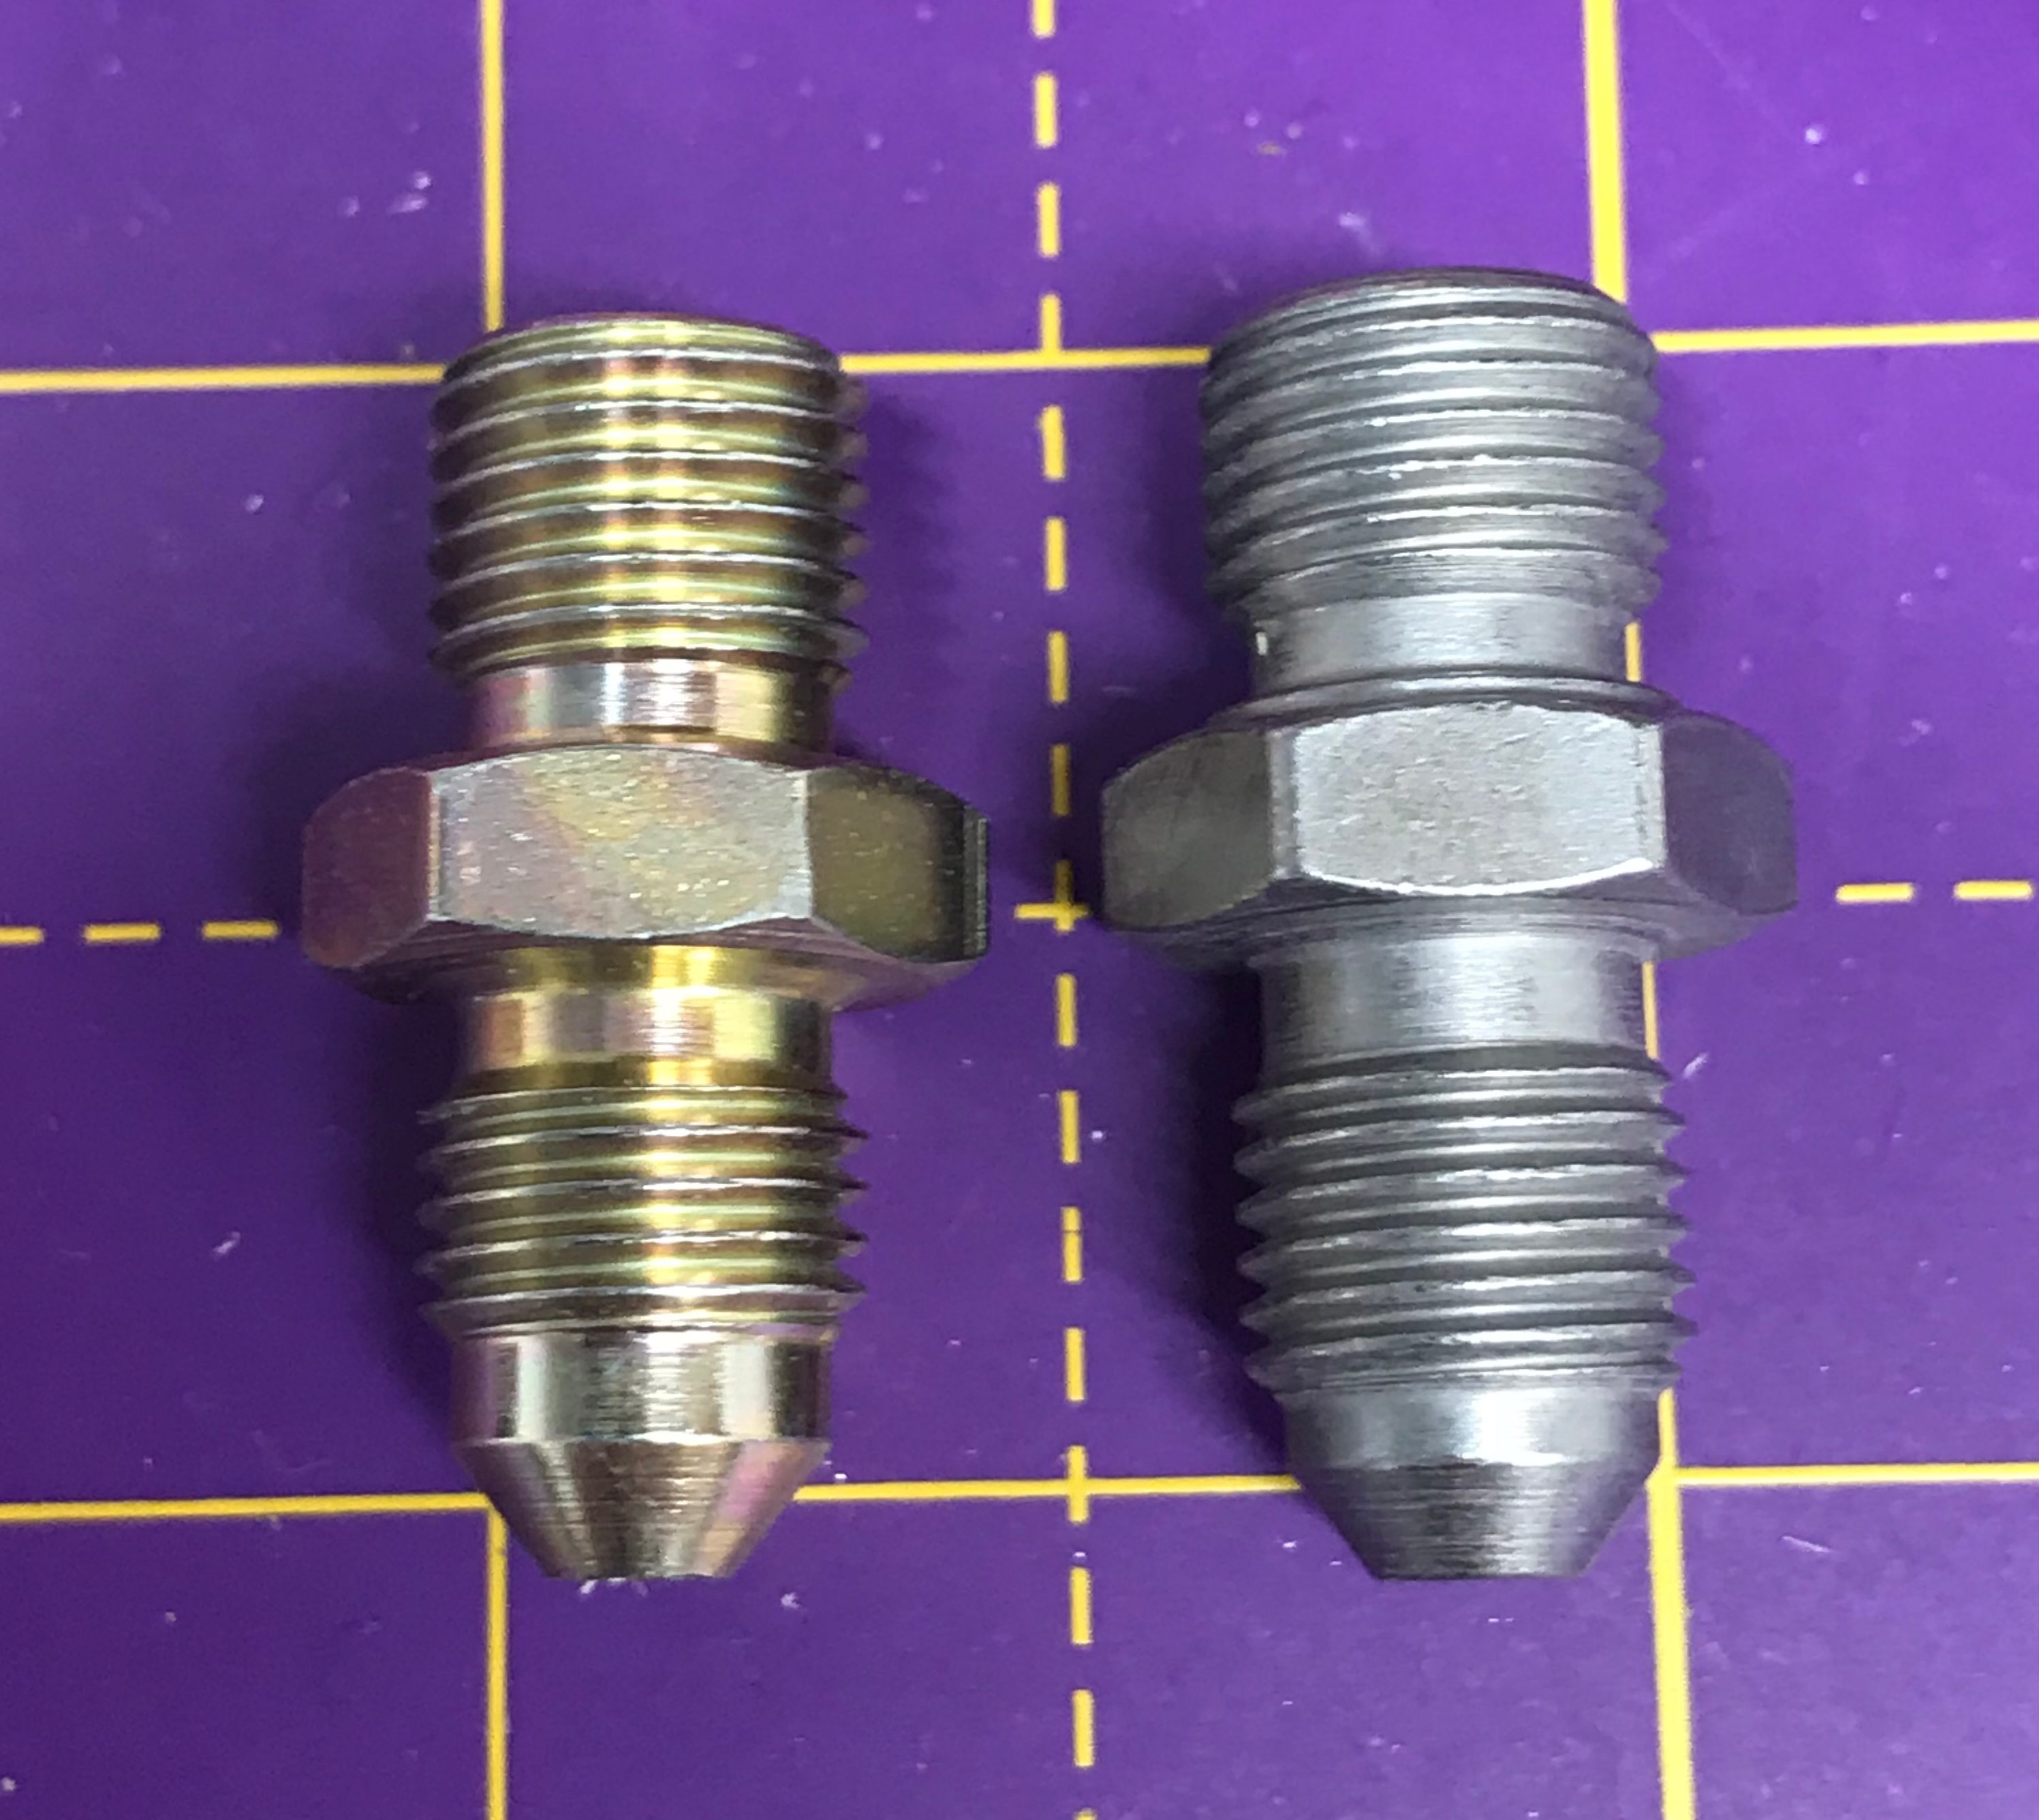
For some reason I decided to use the bronze coloured ones when I put the brakes together a few weeks ago. The coupling fits in the calliper thread and seems to tighten up fine but on retrospect is loose.
However, Andrew relayed a conversation he’d had with another builder, George Martin-Simmons, who had talked to Derek Howlett about this precise issue. Derek had told him to use the grey part.
So, I took the front brake hoses off the couplings to test out which worked best. And of course Derek, George and Andrew were right… the grey couplings fit slightly better in the calliper and are less loose in the thread. They’re around 0.5mm different in thread diameter and there’s also a lip/rim that the calliper copper washer fits snuggly over. All round makes more sense and who’s to argue with Derek!

So, disconnect both brake hoses from their callipers and swap out the couplings.
I’ve also now updated the post that details what I did when fitting the front brake callipers.
Switching these couplings over took about an hour, but not a big deal seeing as I’m nowhere near adding any brake fluid yet.
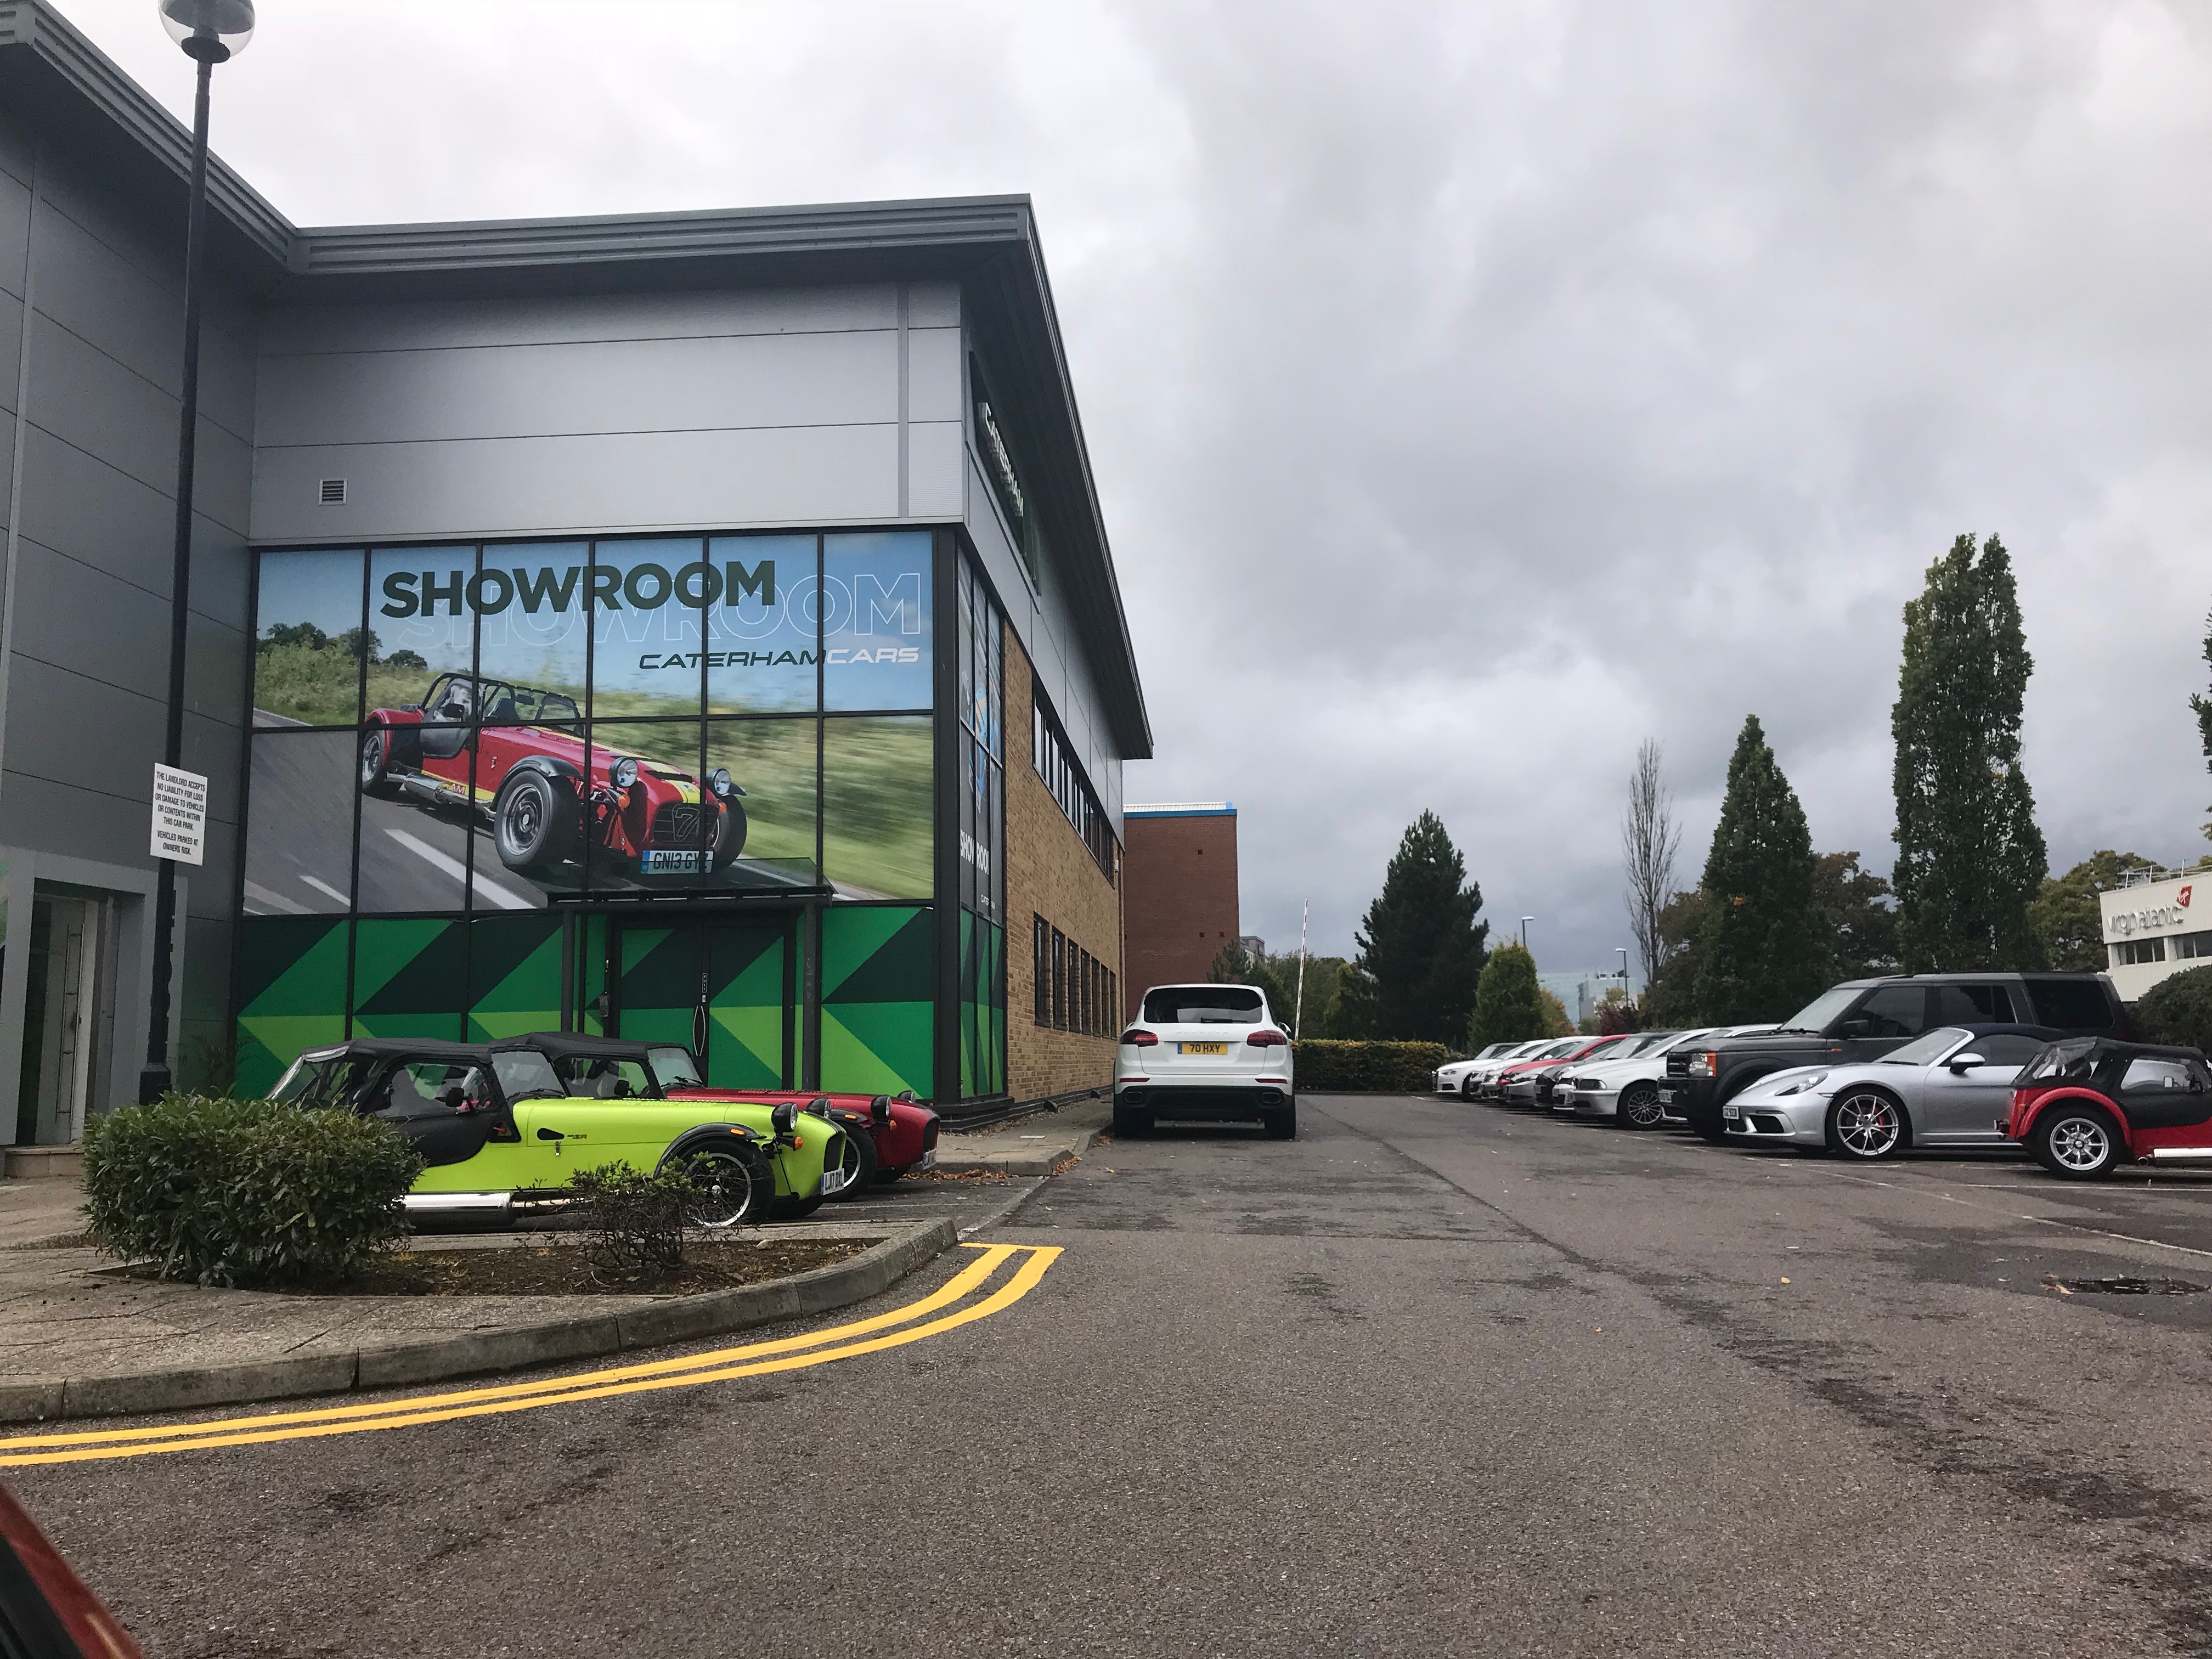
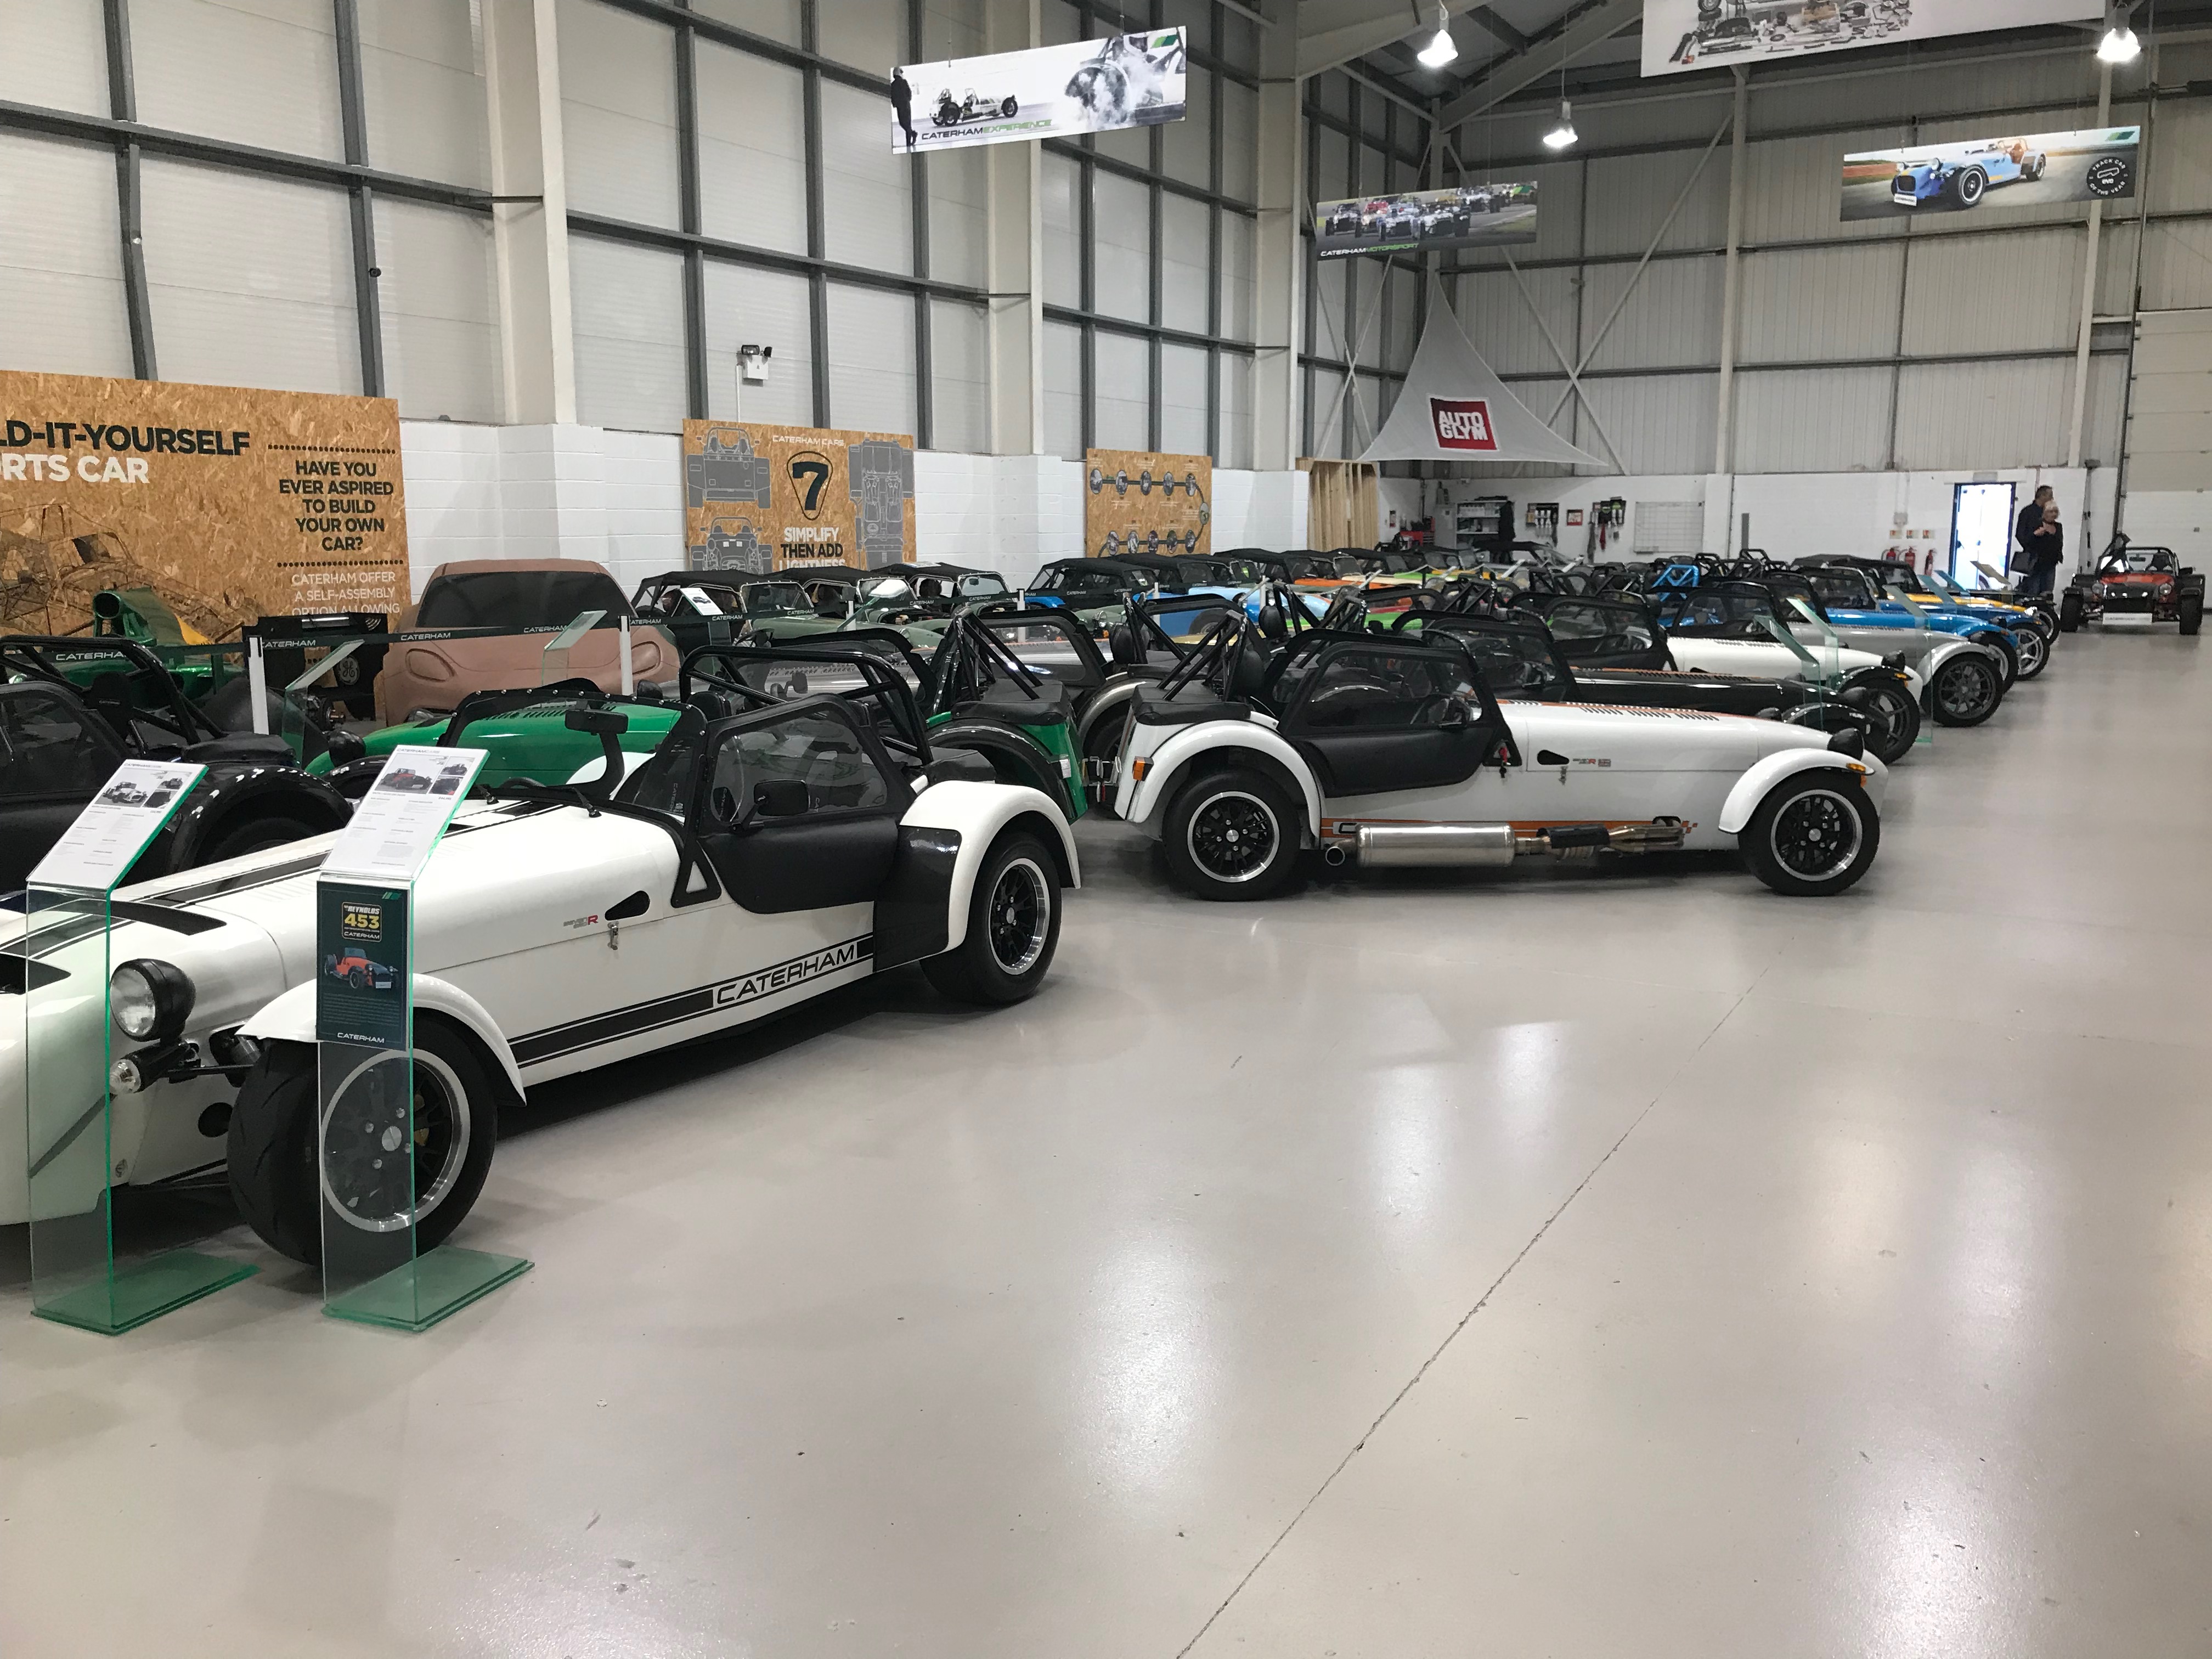
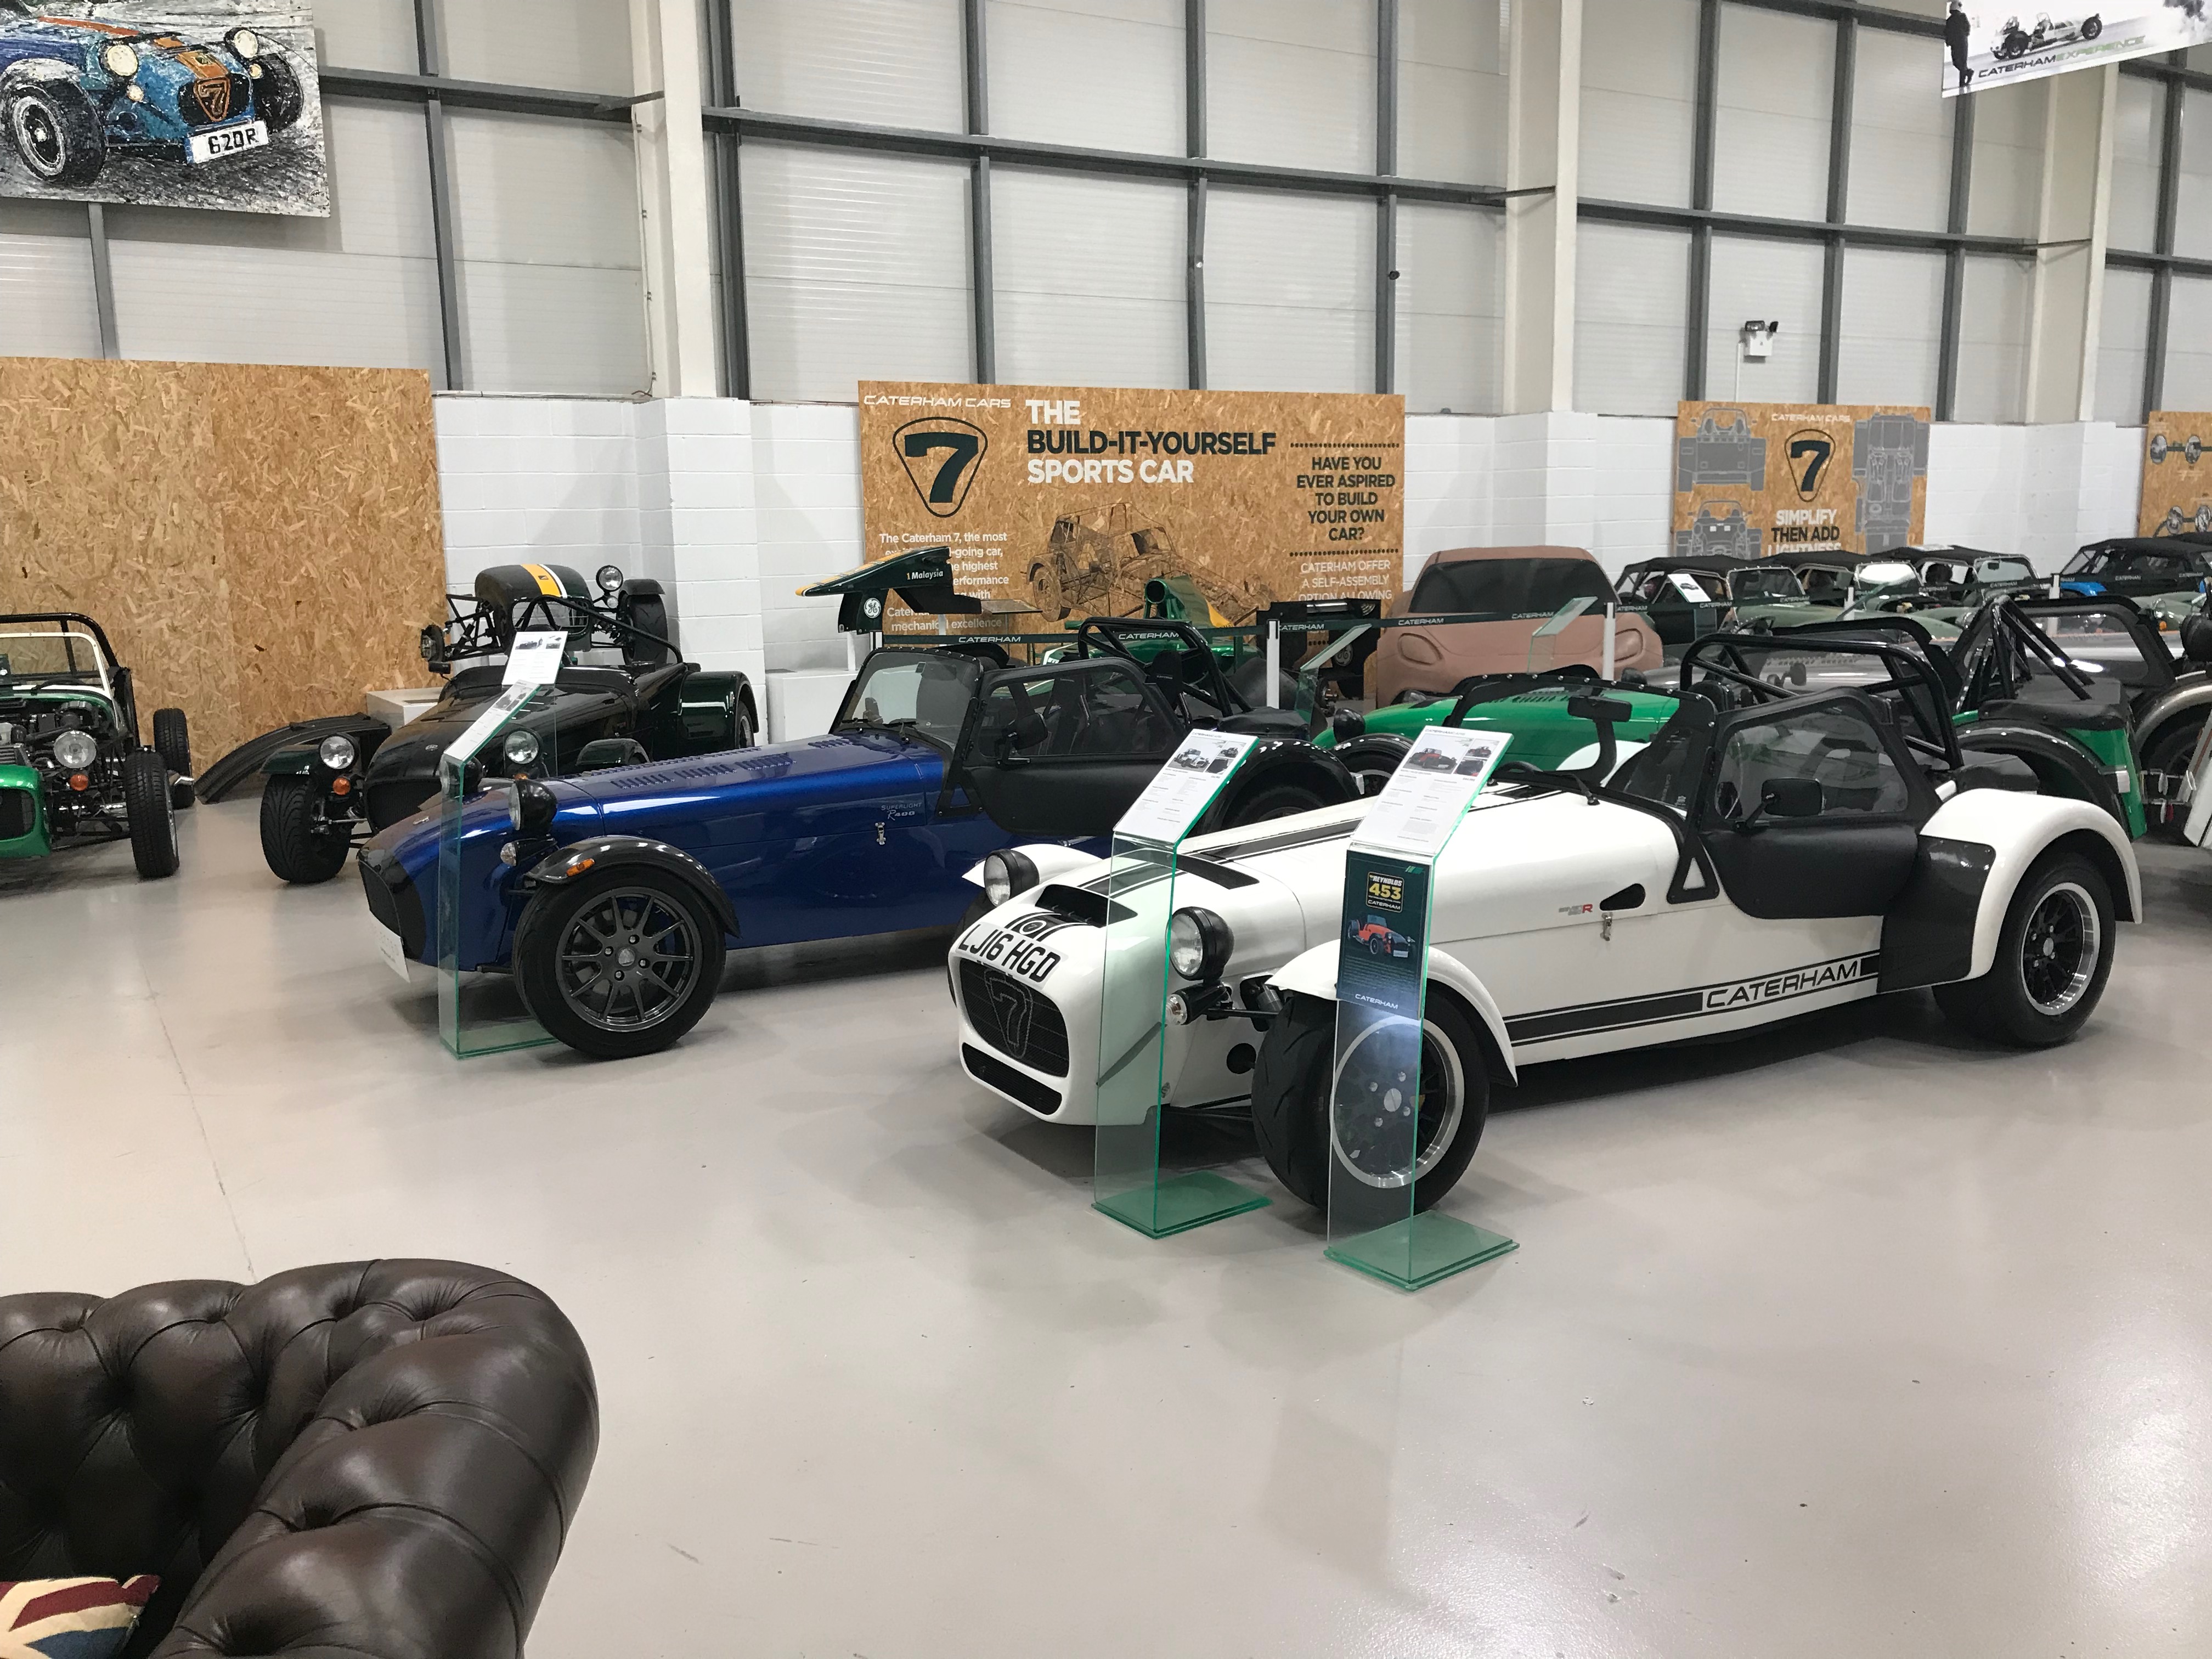
Trip to Caterham Showroom, Crawley
I’d been looking for an excuse to make the trip from Bristol to the Caterham showroom and the delay in getting the bonnet picked up and sent back for a respray was my cue.
Derek hadn’t managed to find a slot when the driver could come over to Bristol and pick up the bonnet. Obviously a thin aluminium bonnet is quite a fragile component and neither I nor Derek wanted to put it into the courier network.
So I decided to take a trip to Caterham early one morning.
My work days get busy when the US wakes up and anyway I was going to be able to do any morning and early afternoon conference calls from the car, so no time lost work wise.
I was keen to have a look around the various cars for sale, take some pictures and also, if possible, further my IVA application. I’d started the IVA process but got a bit nervous that I was going down the right track. So… I’d posted a question to the Catherm Tech Talk Facebook page and was told that I should have had a pack from Caterham… er… no pack for me! Other’s had also not had a pack with their car but gave me a couple of contacts to get the info from at Caterham.
This turned into a game of email tag and eventually I got to someone that could help (the first two names were out on maternity leave and sick leave respectively). So, if possible I also wanted to use my trip to the showroom to discuss and/or pick up any IVA related info I was going to need.

I got to Caterham mid morning and got to meet with Michaela who was helping me with the IVA docs while the others were on leave. She couldn’t provide all I was going to need but she did have filled out copies of the IVA application form 1c and the Amateur Build Declaration form 4. Comparing to what I’d done already they were very close but I was going to have to update my versions and I’m glad I went through the double checking process.
Once I’ve redacted the forms I’ll post them on here for others to see.
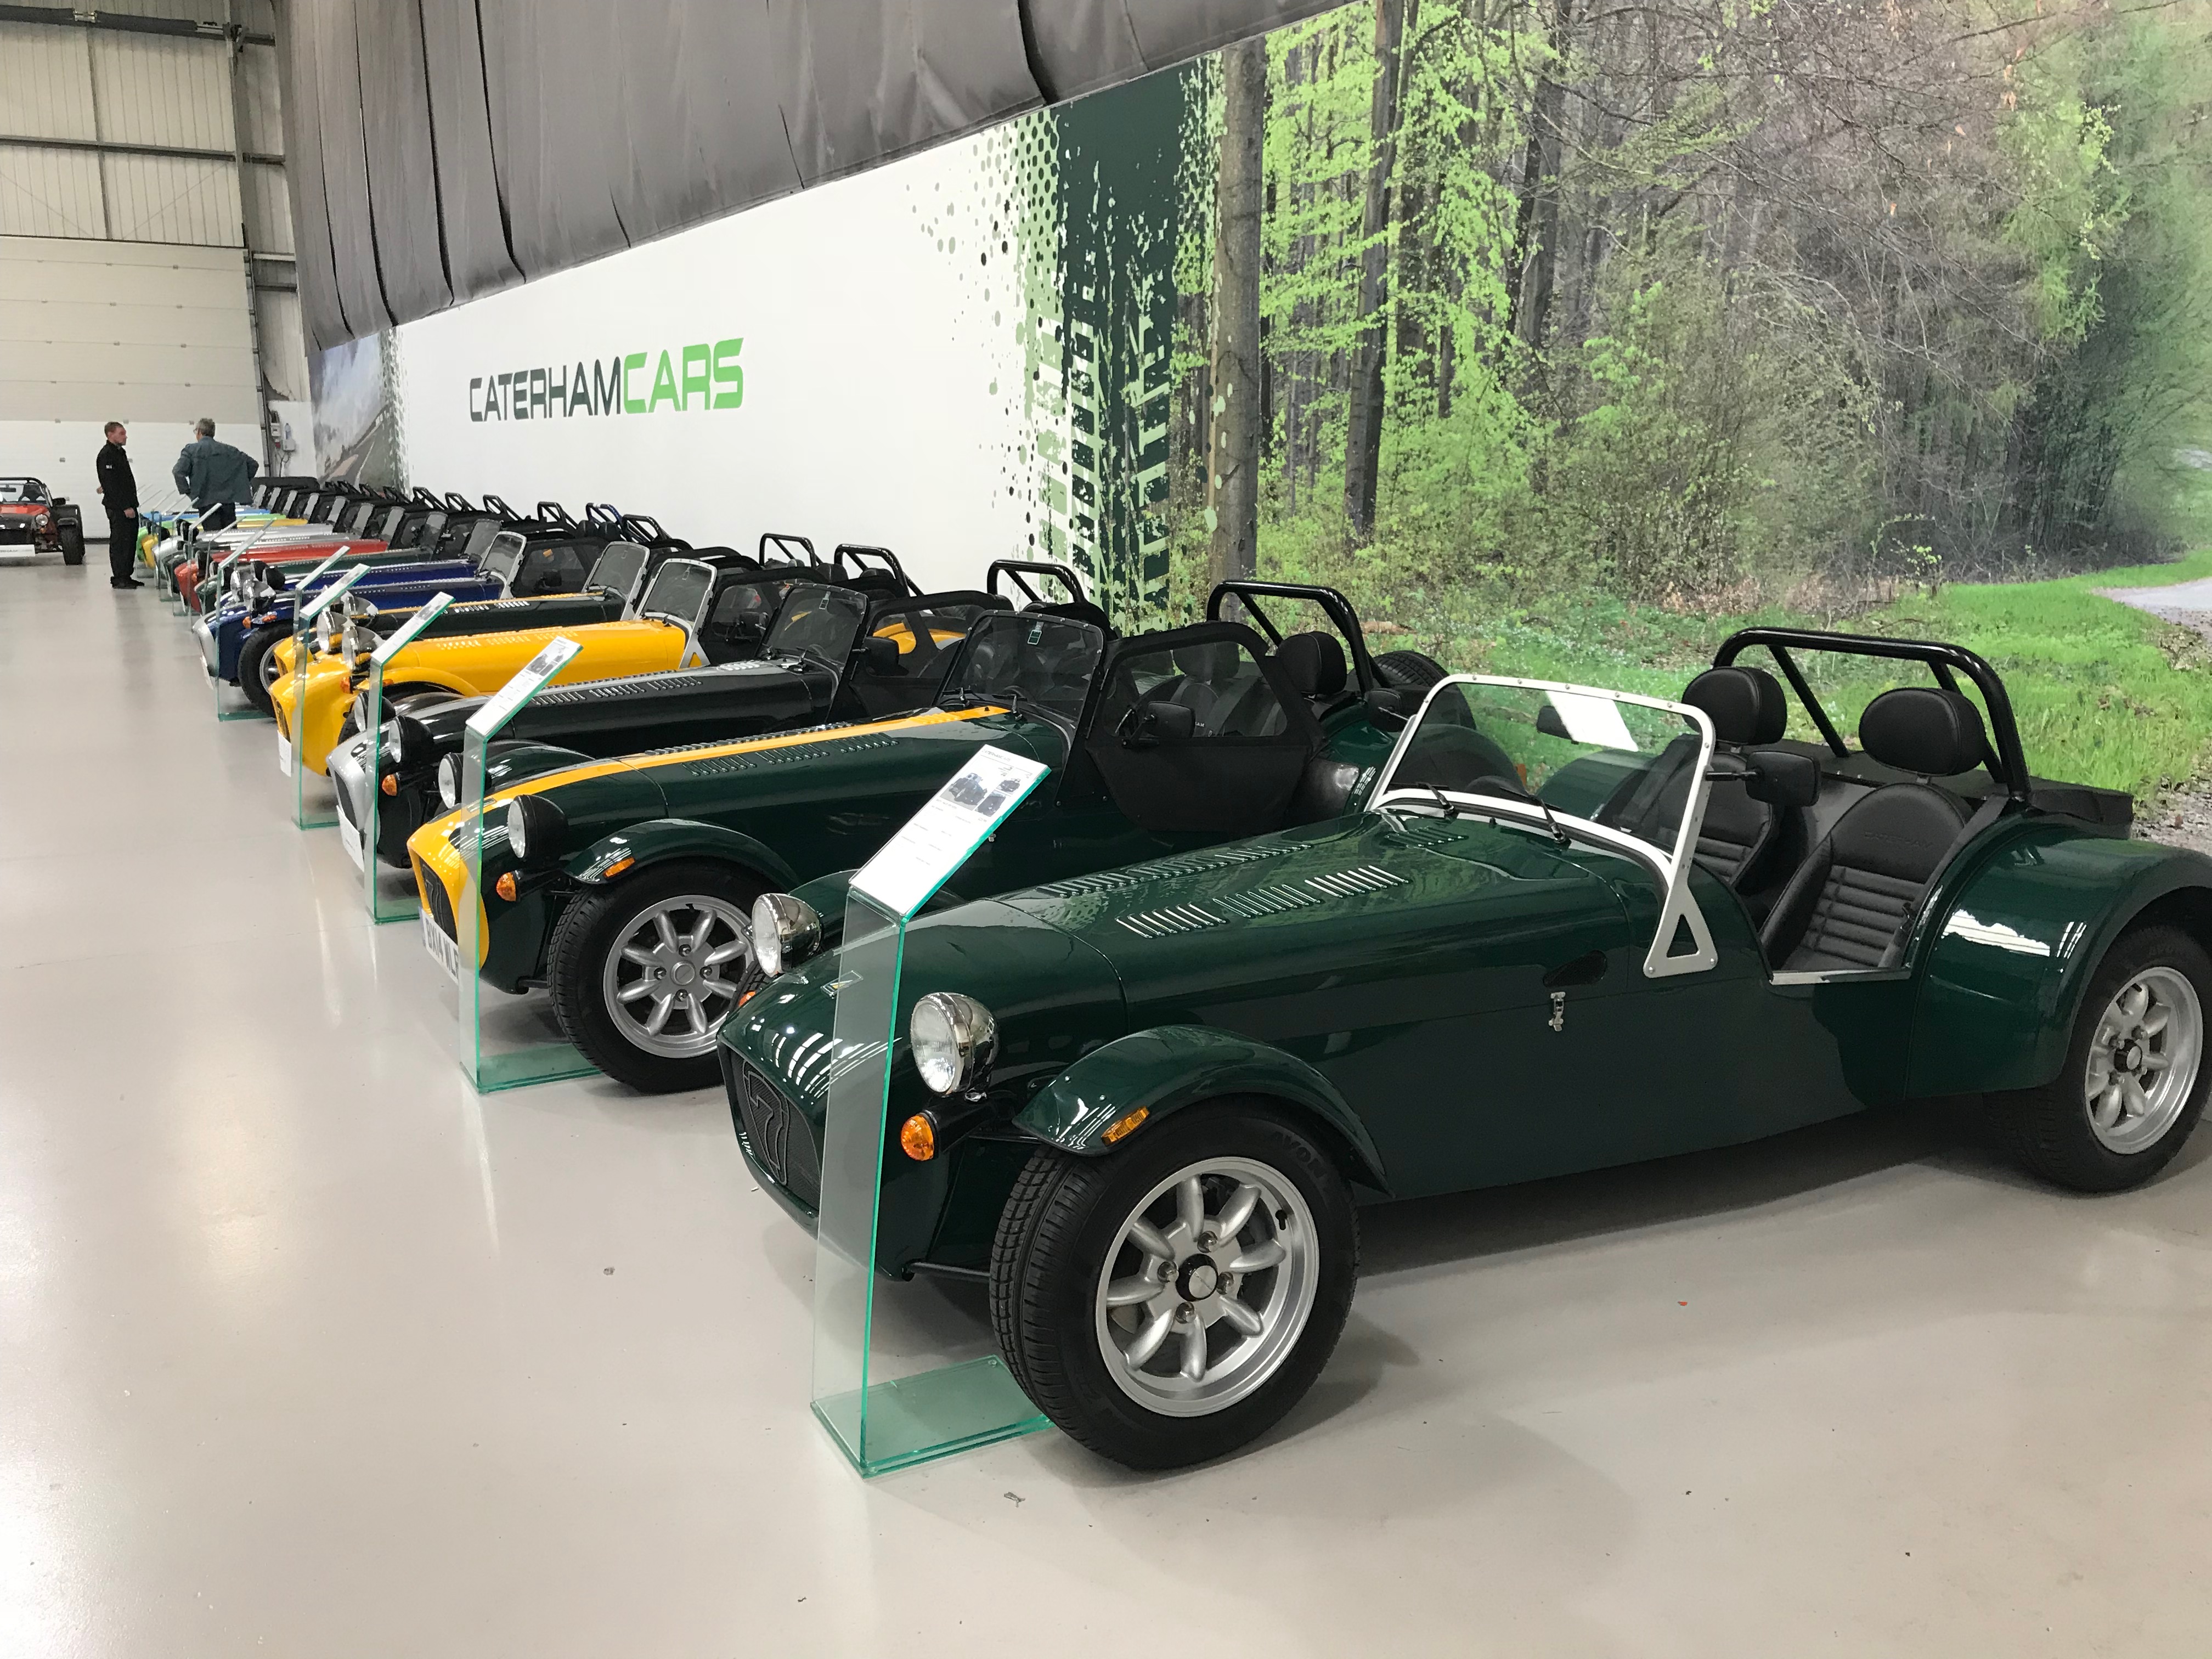
I then had a wander around the showroom and introduced myself to a Caterham engineer and a self-builder (Steve) who were finishing their discussion on some self build questions next to a 420R. We then had a 10 minute chat about progress and various issues we’d come across.
In the end I learnt two things in the discussion:
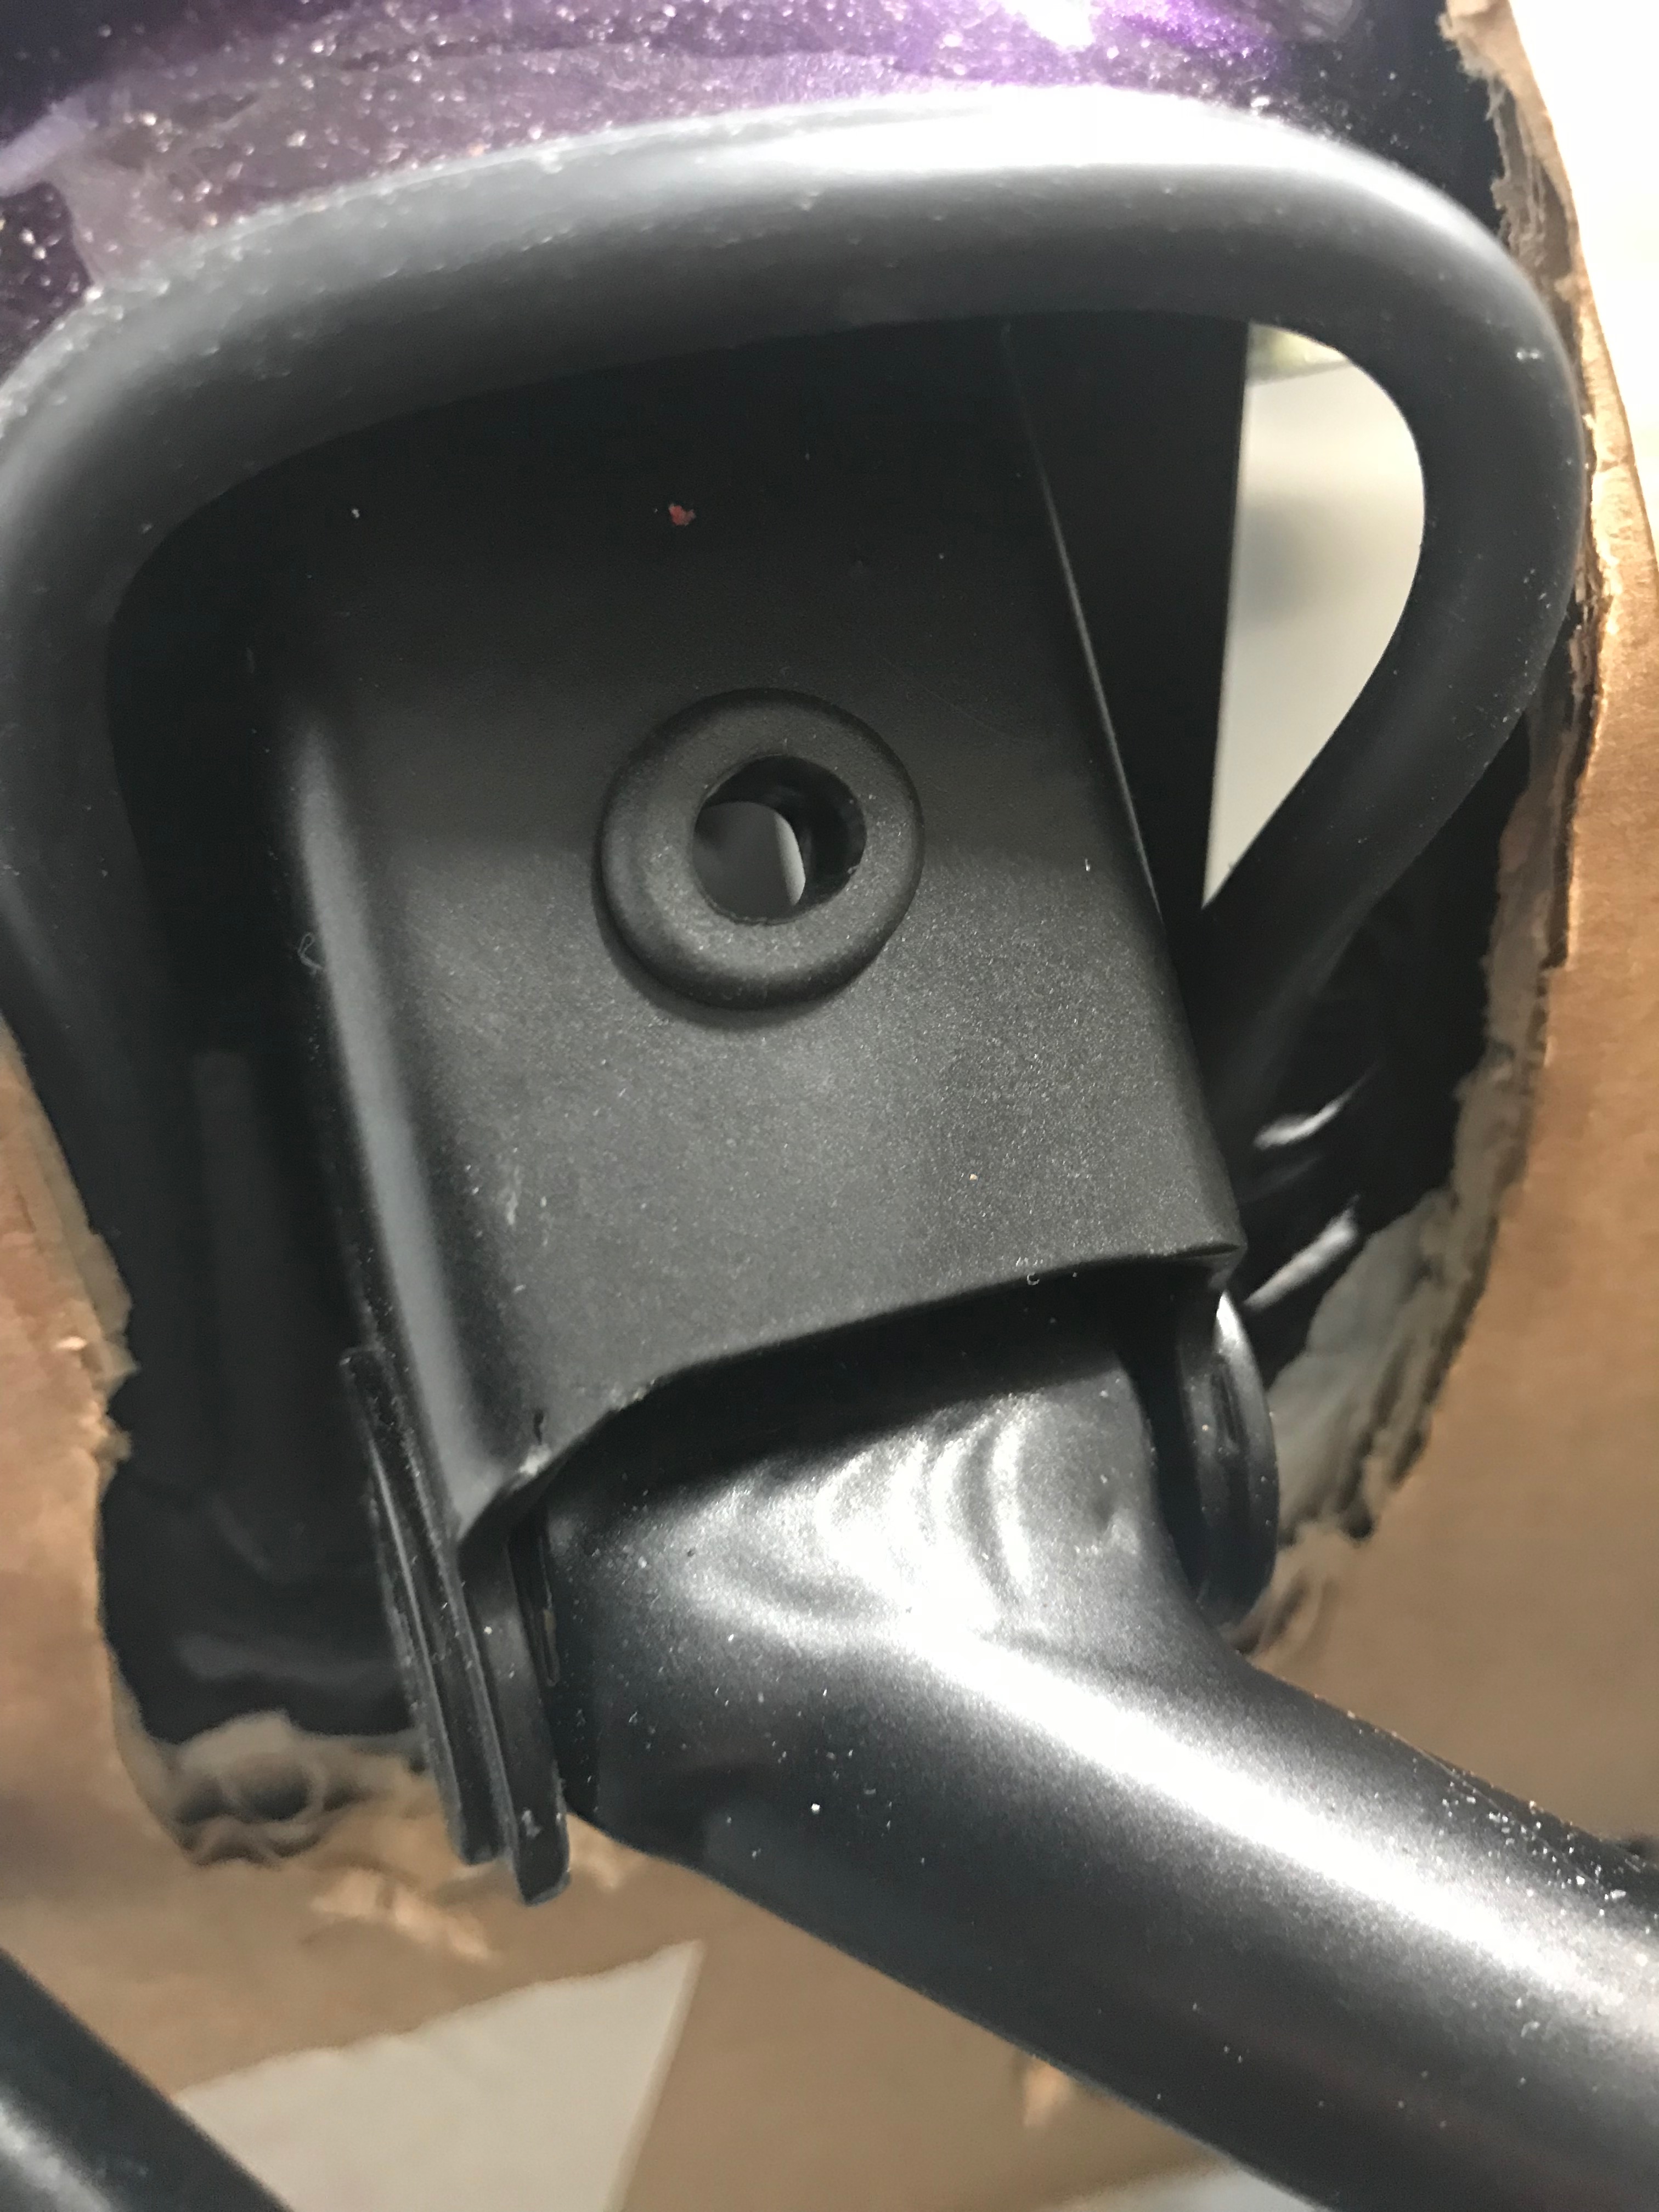
- It’s really important to add the grommets in the headlamp stay and the chassis mount where the headlamp sits. Bugger! Going to need to pull the headlamp assemblies off
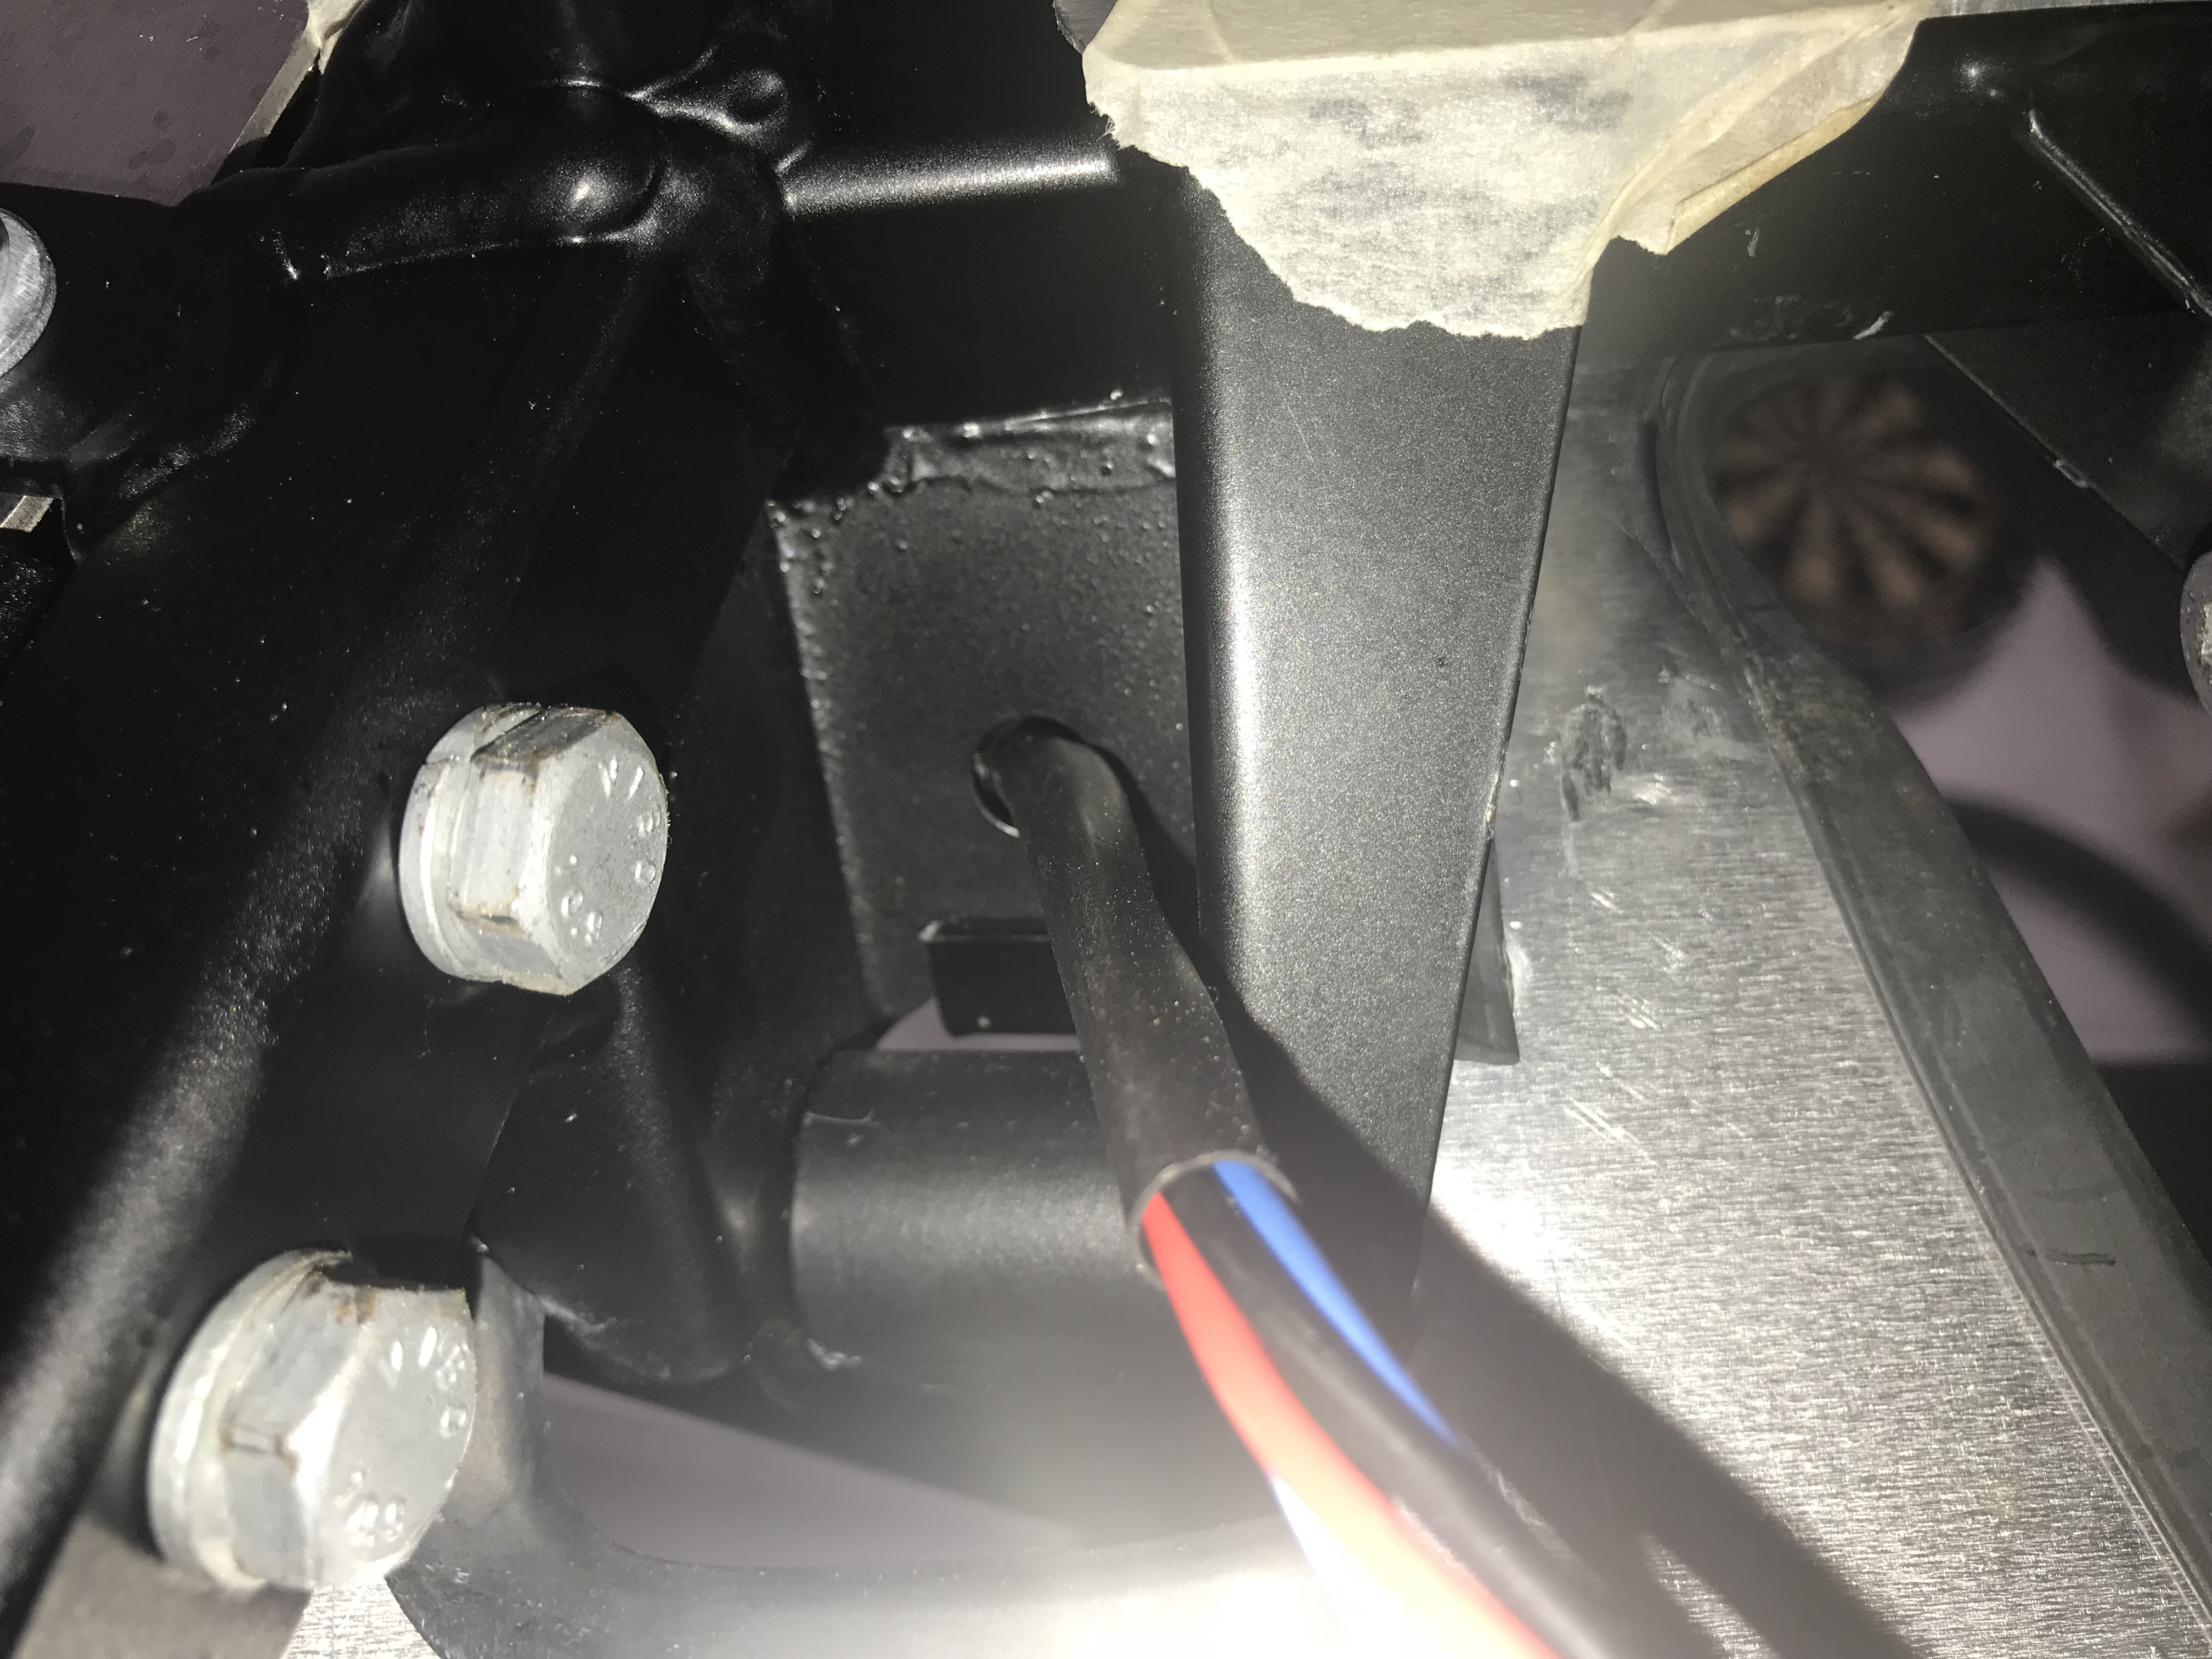
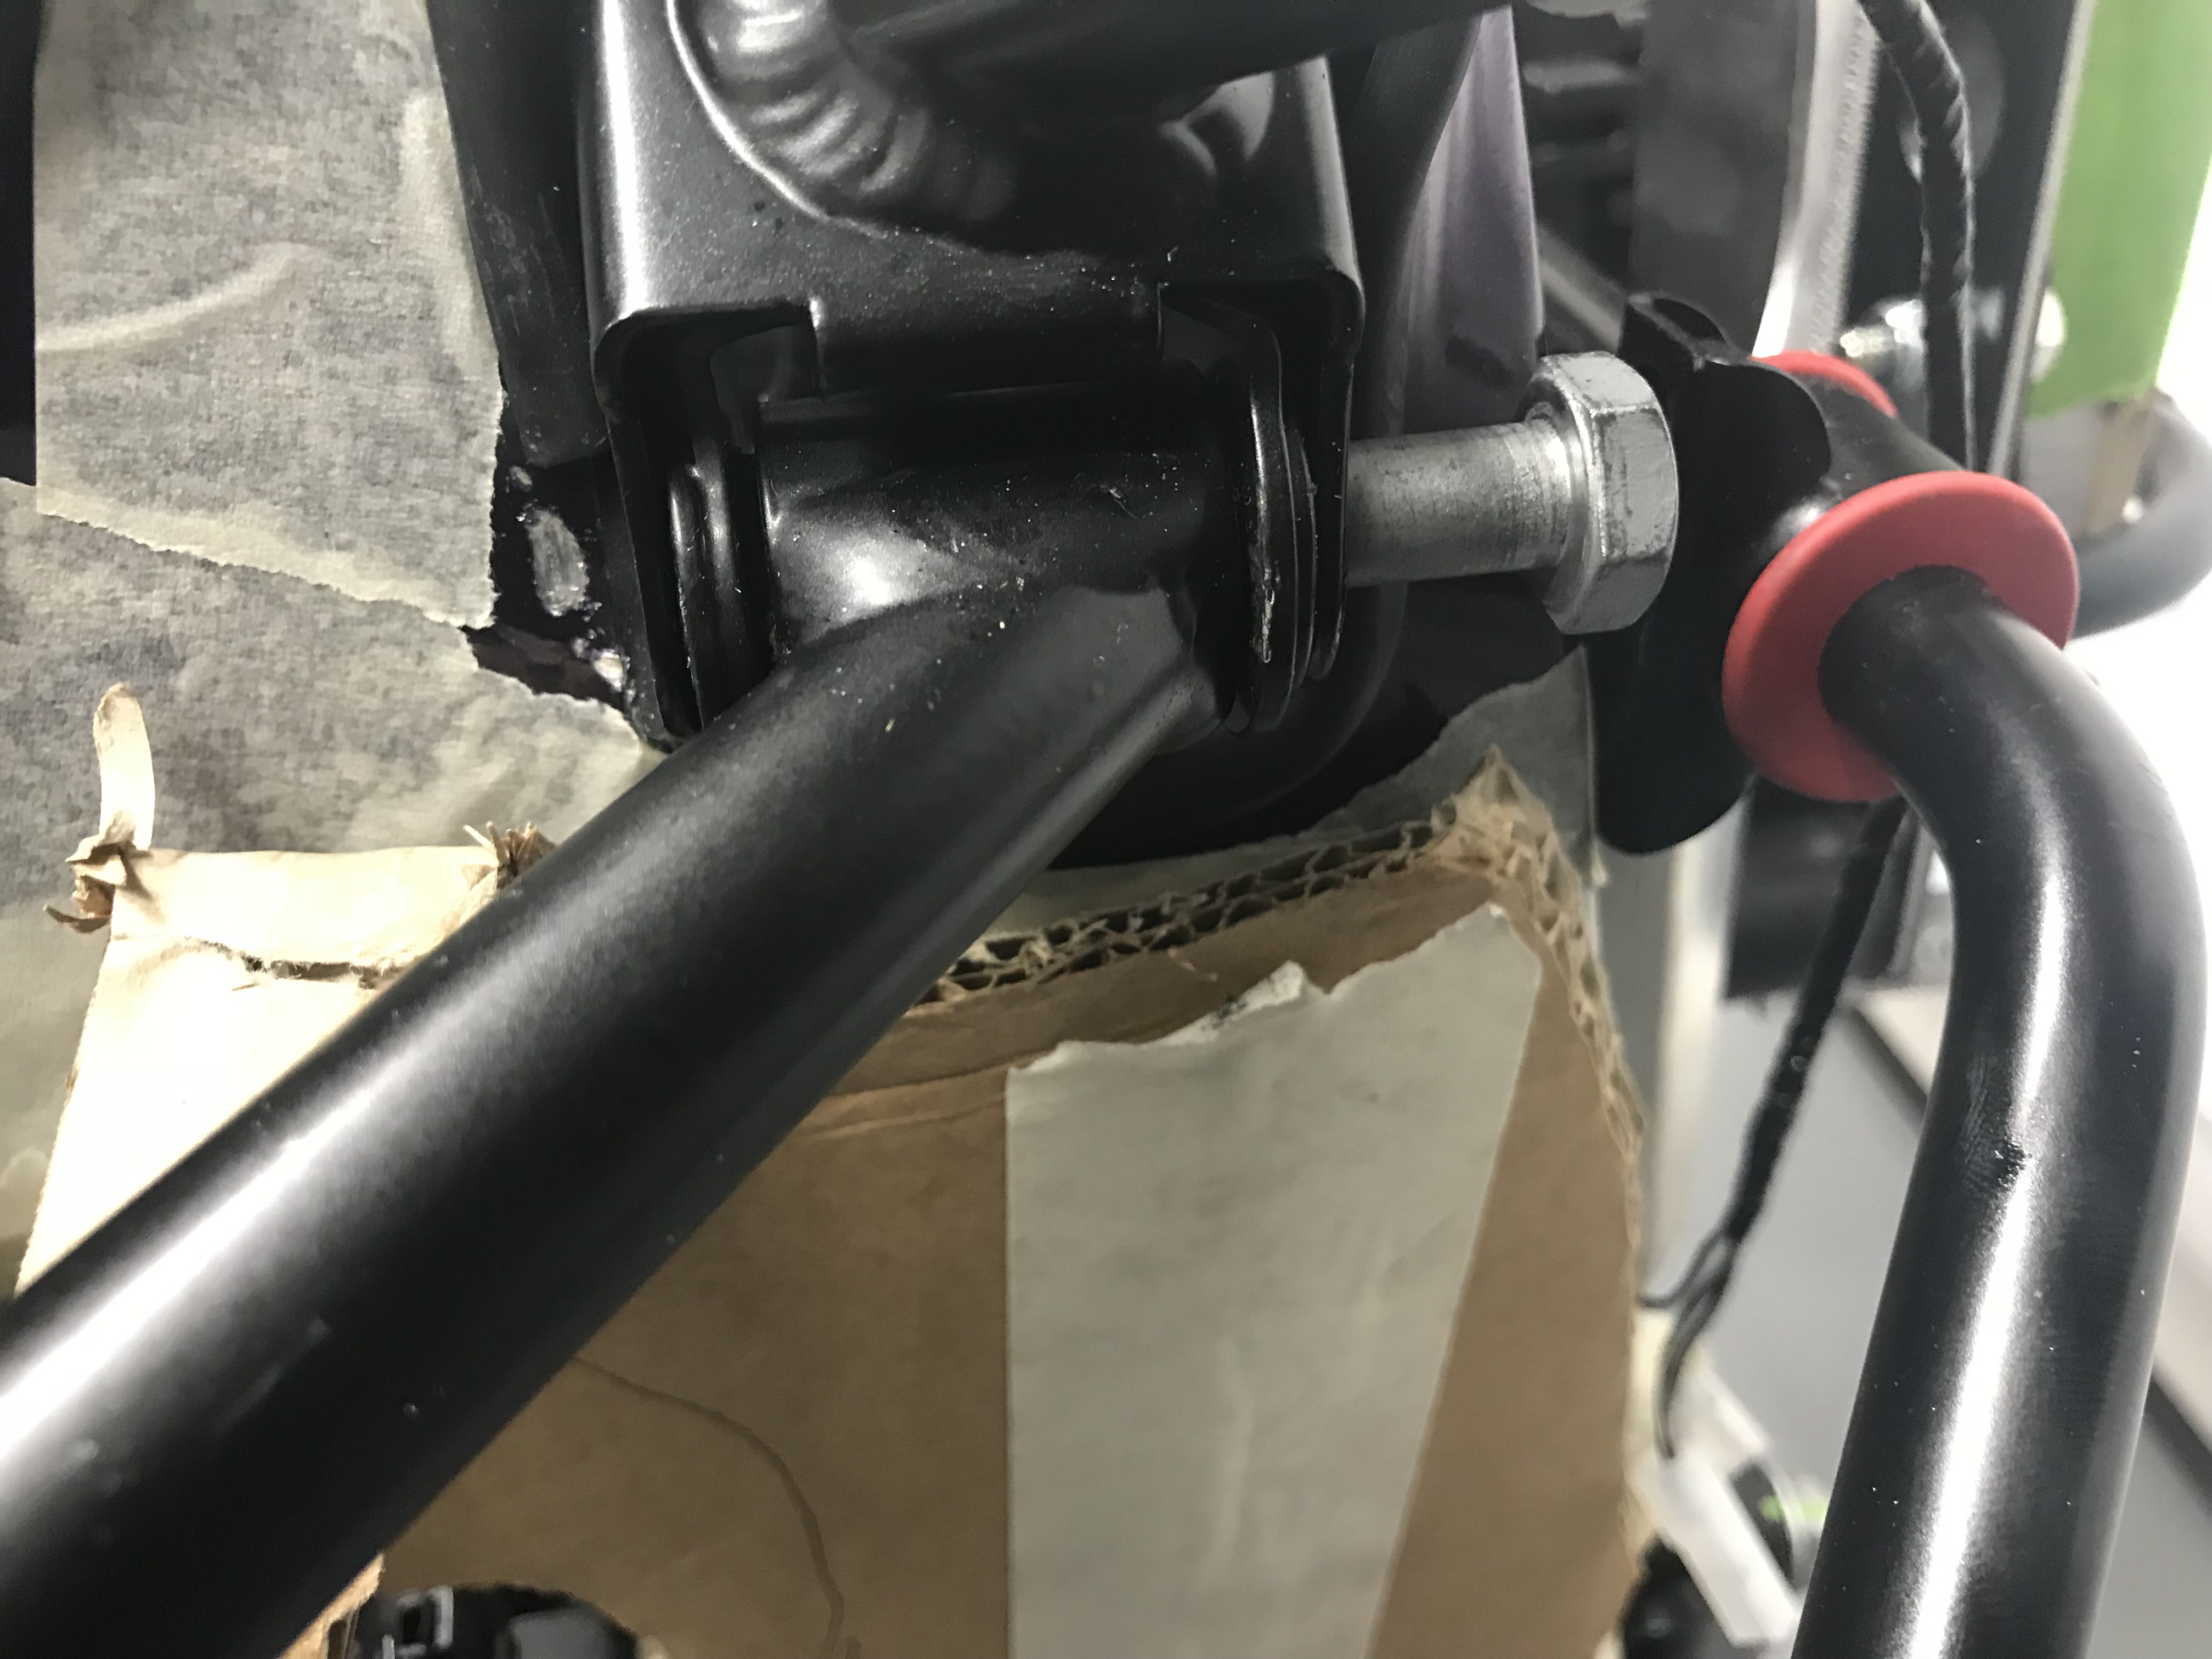
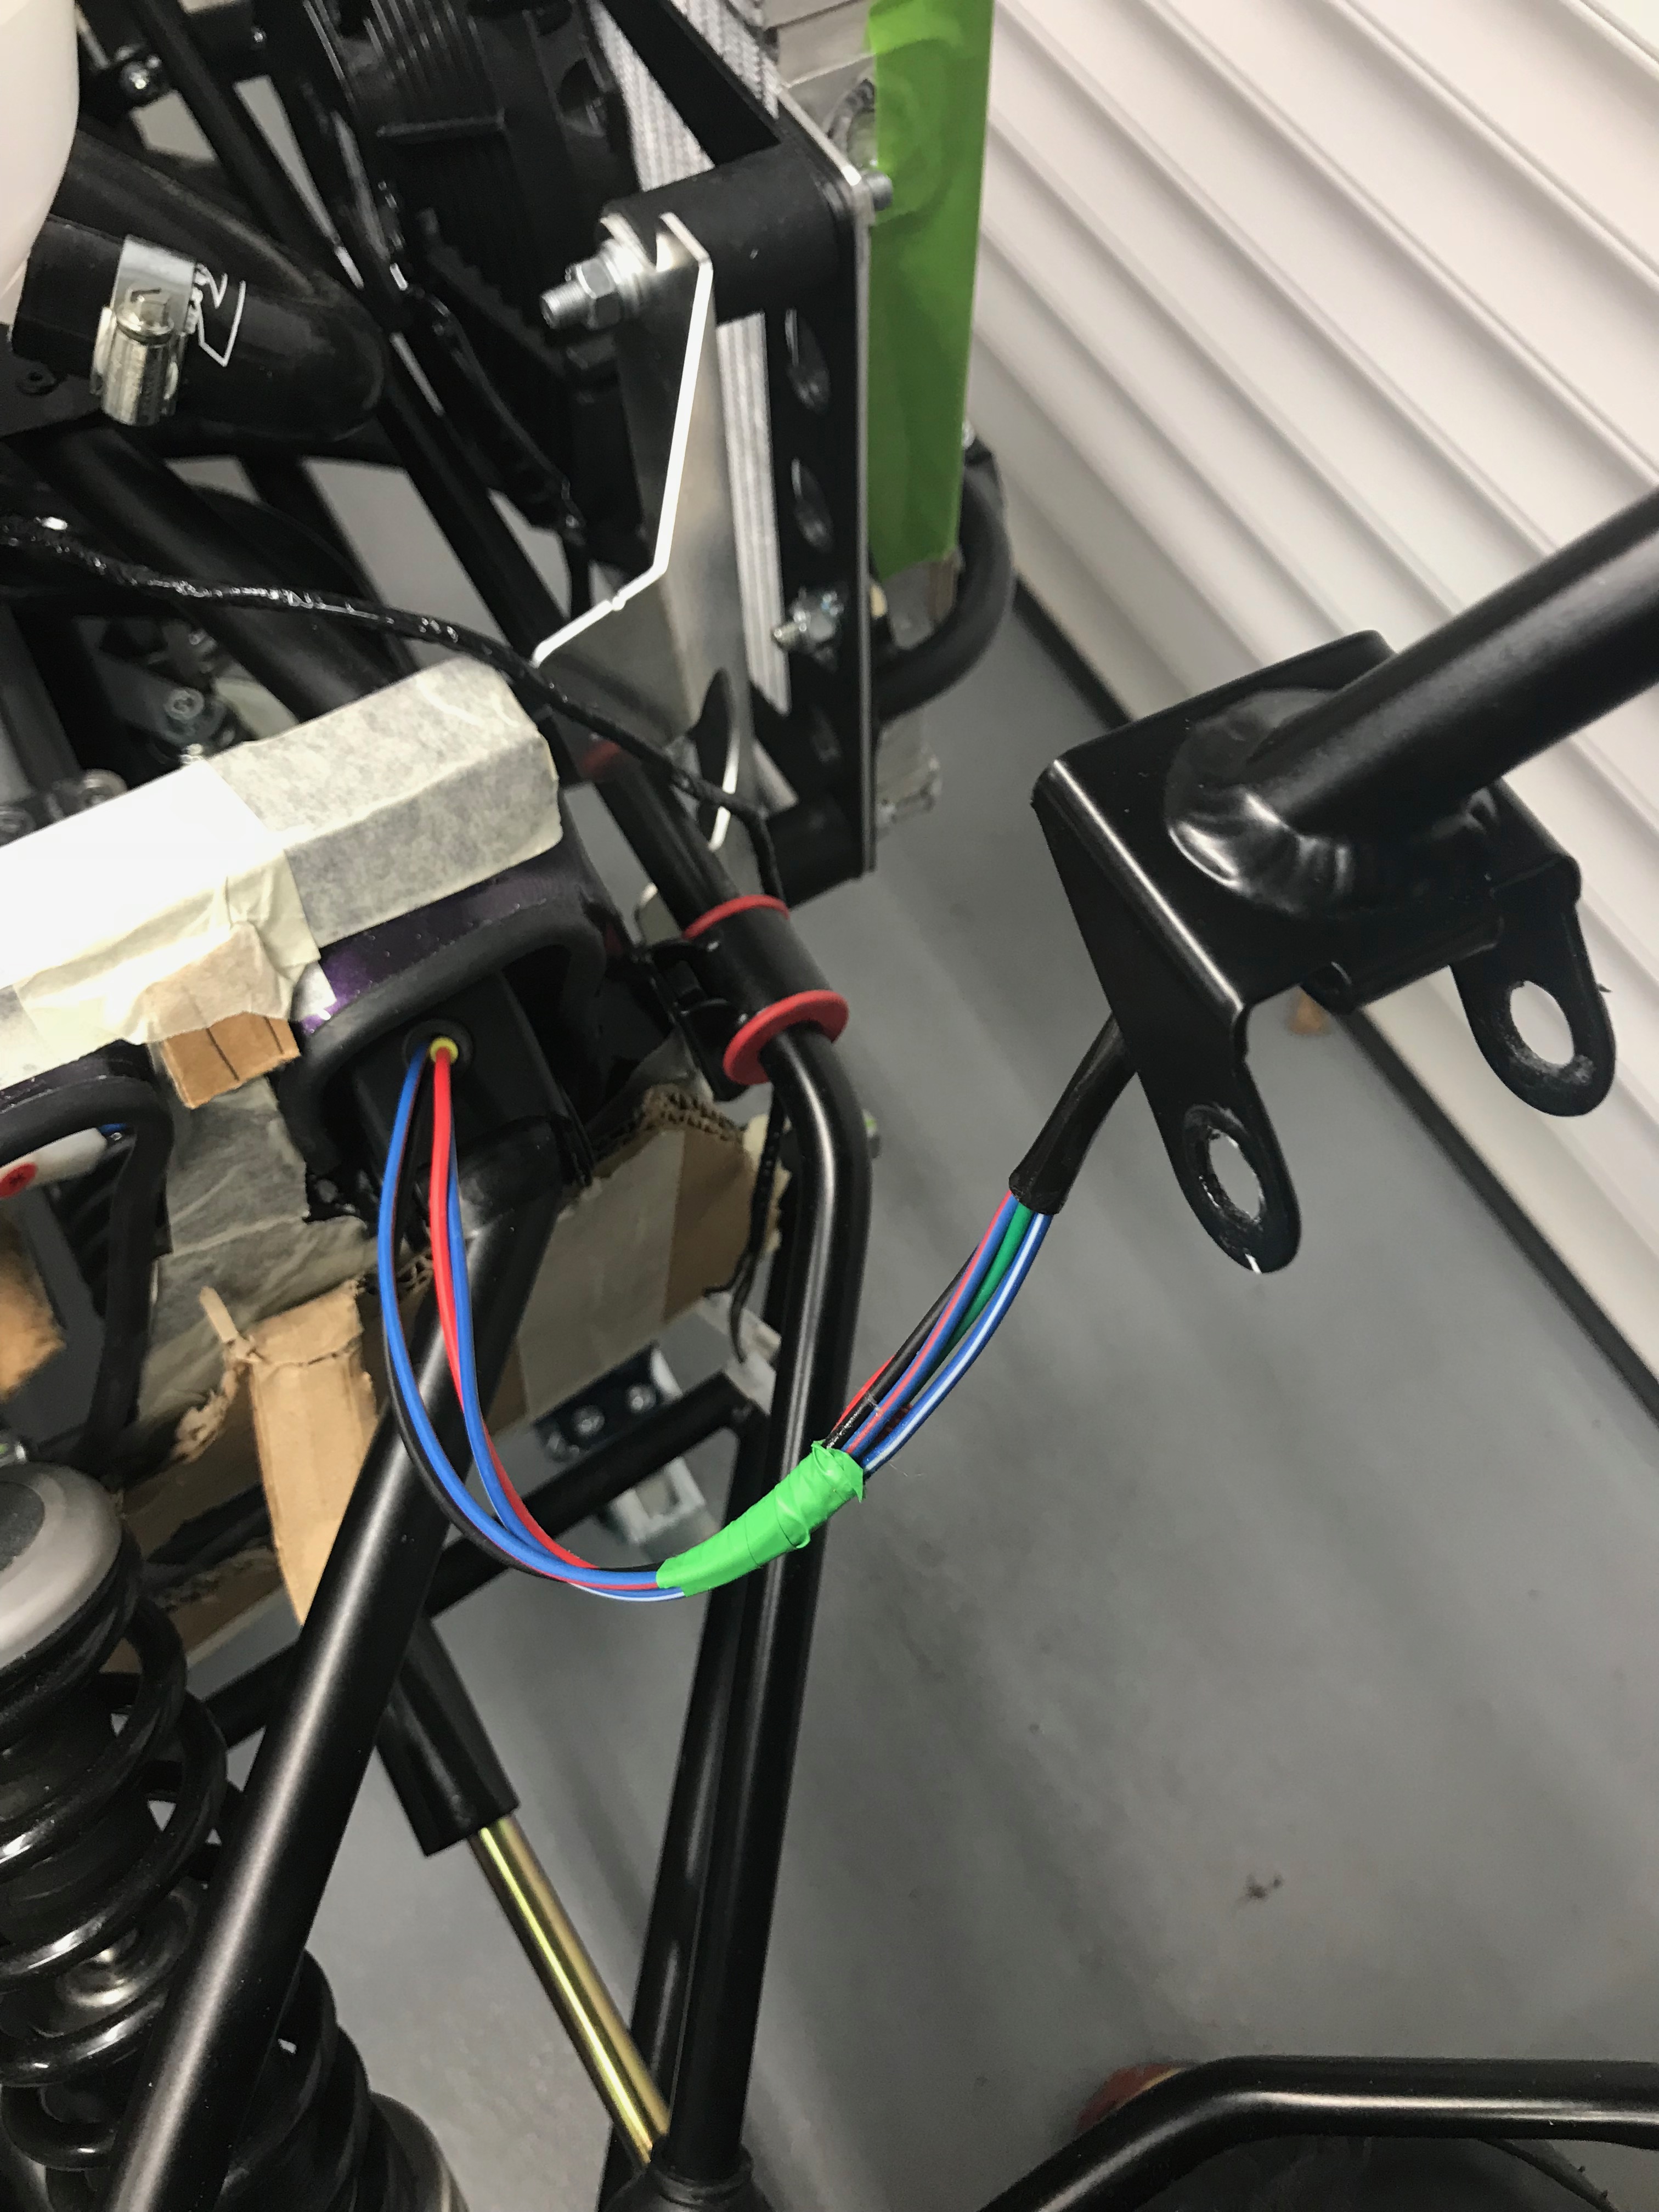
- I’d been wondering how to route the oil pressure sensor cabling and so I took a photo of how a factory build is done around that area, see below.
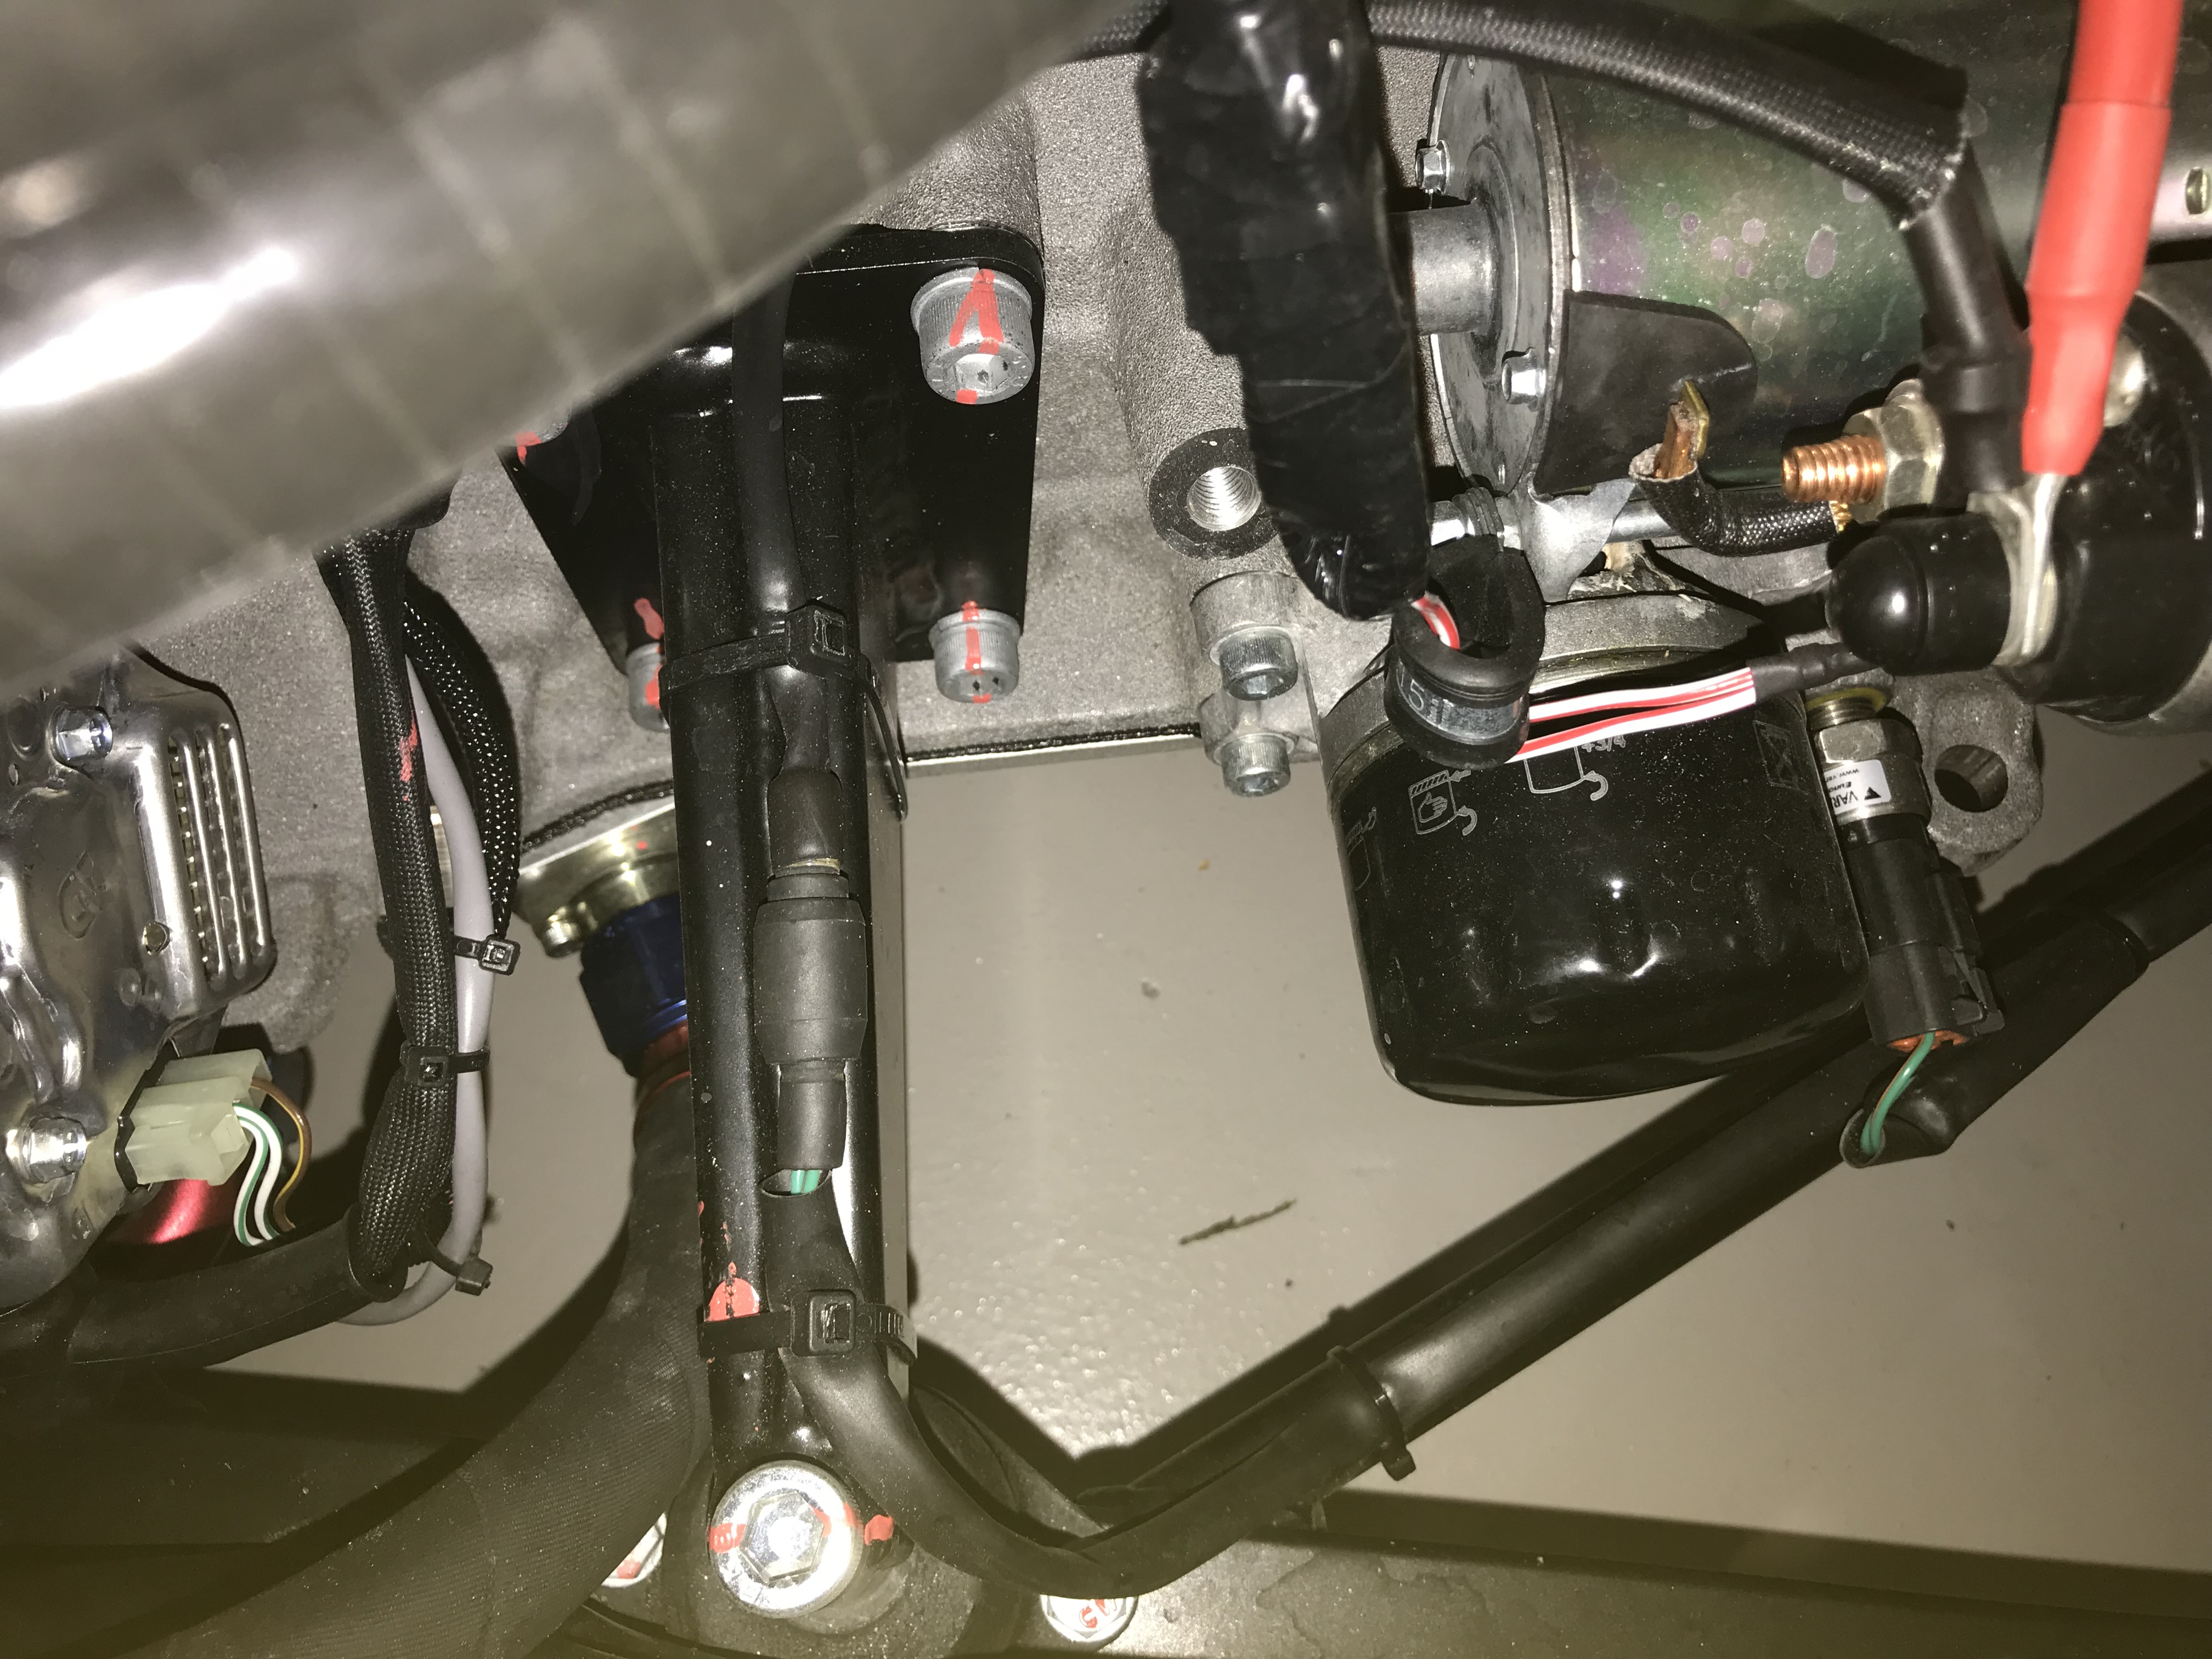
In the picture above you can see the oil pressure cable is routed across the engine mount strut (there’s a connector sat on the strut) and down onto the chassis rail. It then runs along the chassis rail, doubles back on itself to lose some of its length (out of shot on the right) and then up into the pressure sensor. I’d been wondering how to lose all that cable neatly – now I know.
Other things to note in this picture:
- Must remember to put IVA cap on the starter motor 12v supply nut and bolt
- There’s a p-clip used to keep the white/red cables tidy coming off of the starter motor
So, really pleased I took the time to go to the showroom. Michaela gave me a run through on what to expect from IVA and I got to have a chat about my build with an engineer. The downside, I’m going to have to pull the headlamp assembly off the chassis and fit some grommets.
Here’s some pictures from my visit:


Headlamp Assembly
No time like the present… I had a couple of meetings cancelled this evening when I’d got back from Caterham and so had an hour from 9 until 10 to take a look at this.
I started off thinking I could add the grommets whilst the headlamp assembly was in place…
… after a couple of minutes on my back under the car I decided this wasn’t going to work… so off with the headlamp.
This turned into a bit more of a job than I thought it was going to be. In the end I had to:
- Remove the ARB gators and cable ties (I knew I shouldn’t have put the cable ties on so soon)
- Remove the front ARB from its sockets on both ends (to get access to the headlamp chassis bolt, the ARB won’t allow the bolt to exit its hole) and chassis mounts
- Slacken off the radiator extensions (the ARB won’t come out of its sockets because it hits the extensions before it will pop out)
- Remove the headlamp chassis bolt

It was then just a case of putting it all back together and order some 2.5mm x 200mm cable ties to fix the gators back on with.
Two steps back and then two steps forwards! Is that progress?

Leave a Comment