
Having left the boot unfinished, after fitting the boot carpets, it was time to get and finish fitting the Washer Bottle and therefore the boot.
Some Fuel
.. but first some fuel. We had put enough fuel in the car to get it started, but it was going to need to be fully filled for the IVA test. So, out with the Jerry can again and a trip to the local filling station.
I used the same old t-shirt to filter the petrol coming from the jerry can into the 1 gallon plastic tank. And thankfully I did, look at the debris left in the t-shirt…

I’ll still need to fill the car to the brim before the IVA (Individual Vehicle Approval) inspection but I can do that with a furtive sneak-drive once the PBC (Post Build Check) is done and I’m ok’ed to drive it to the IVA.
Note: from what I can tell, you can drive a car to and from a booked appointment that is related to getting your IVA passed. I take that to mean that I could technically drive the car to both the PBC and IVA. If I booked a slot at a filling station then I think I could also drive it to fill it up with fuel – but that’s academic seeing as nowhere will do such a booking. It’s also a long way to Williams (15 miles) for the PBC and I’m not keen to drive the car there given nobody else will have checked it for “crazies” that that point.
Washer Bottle Bracket
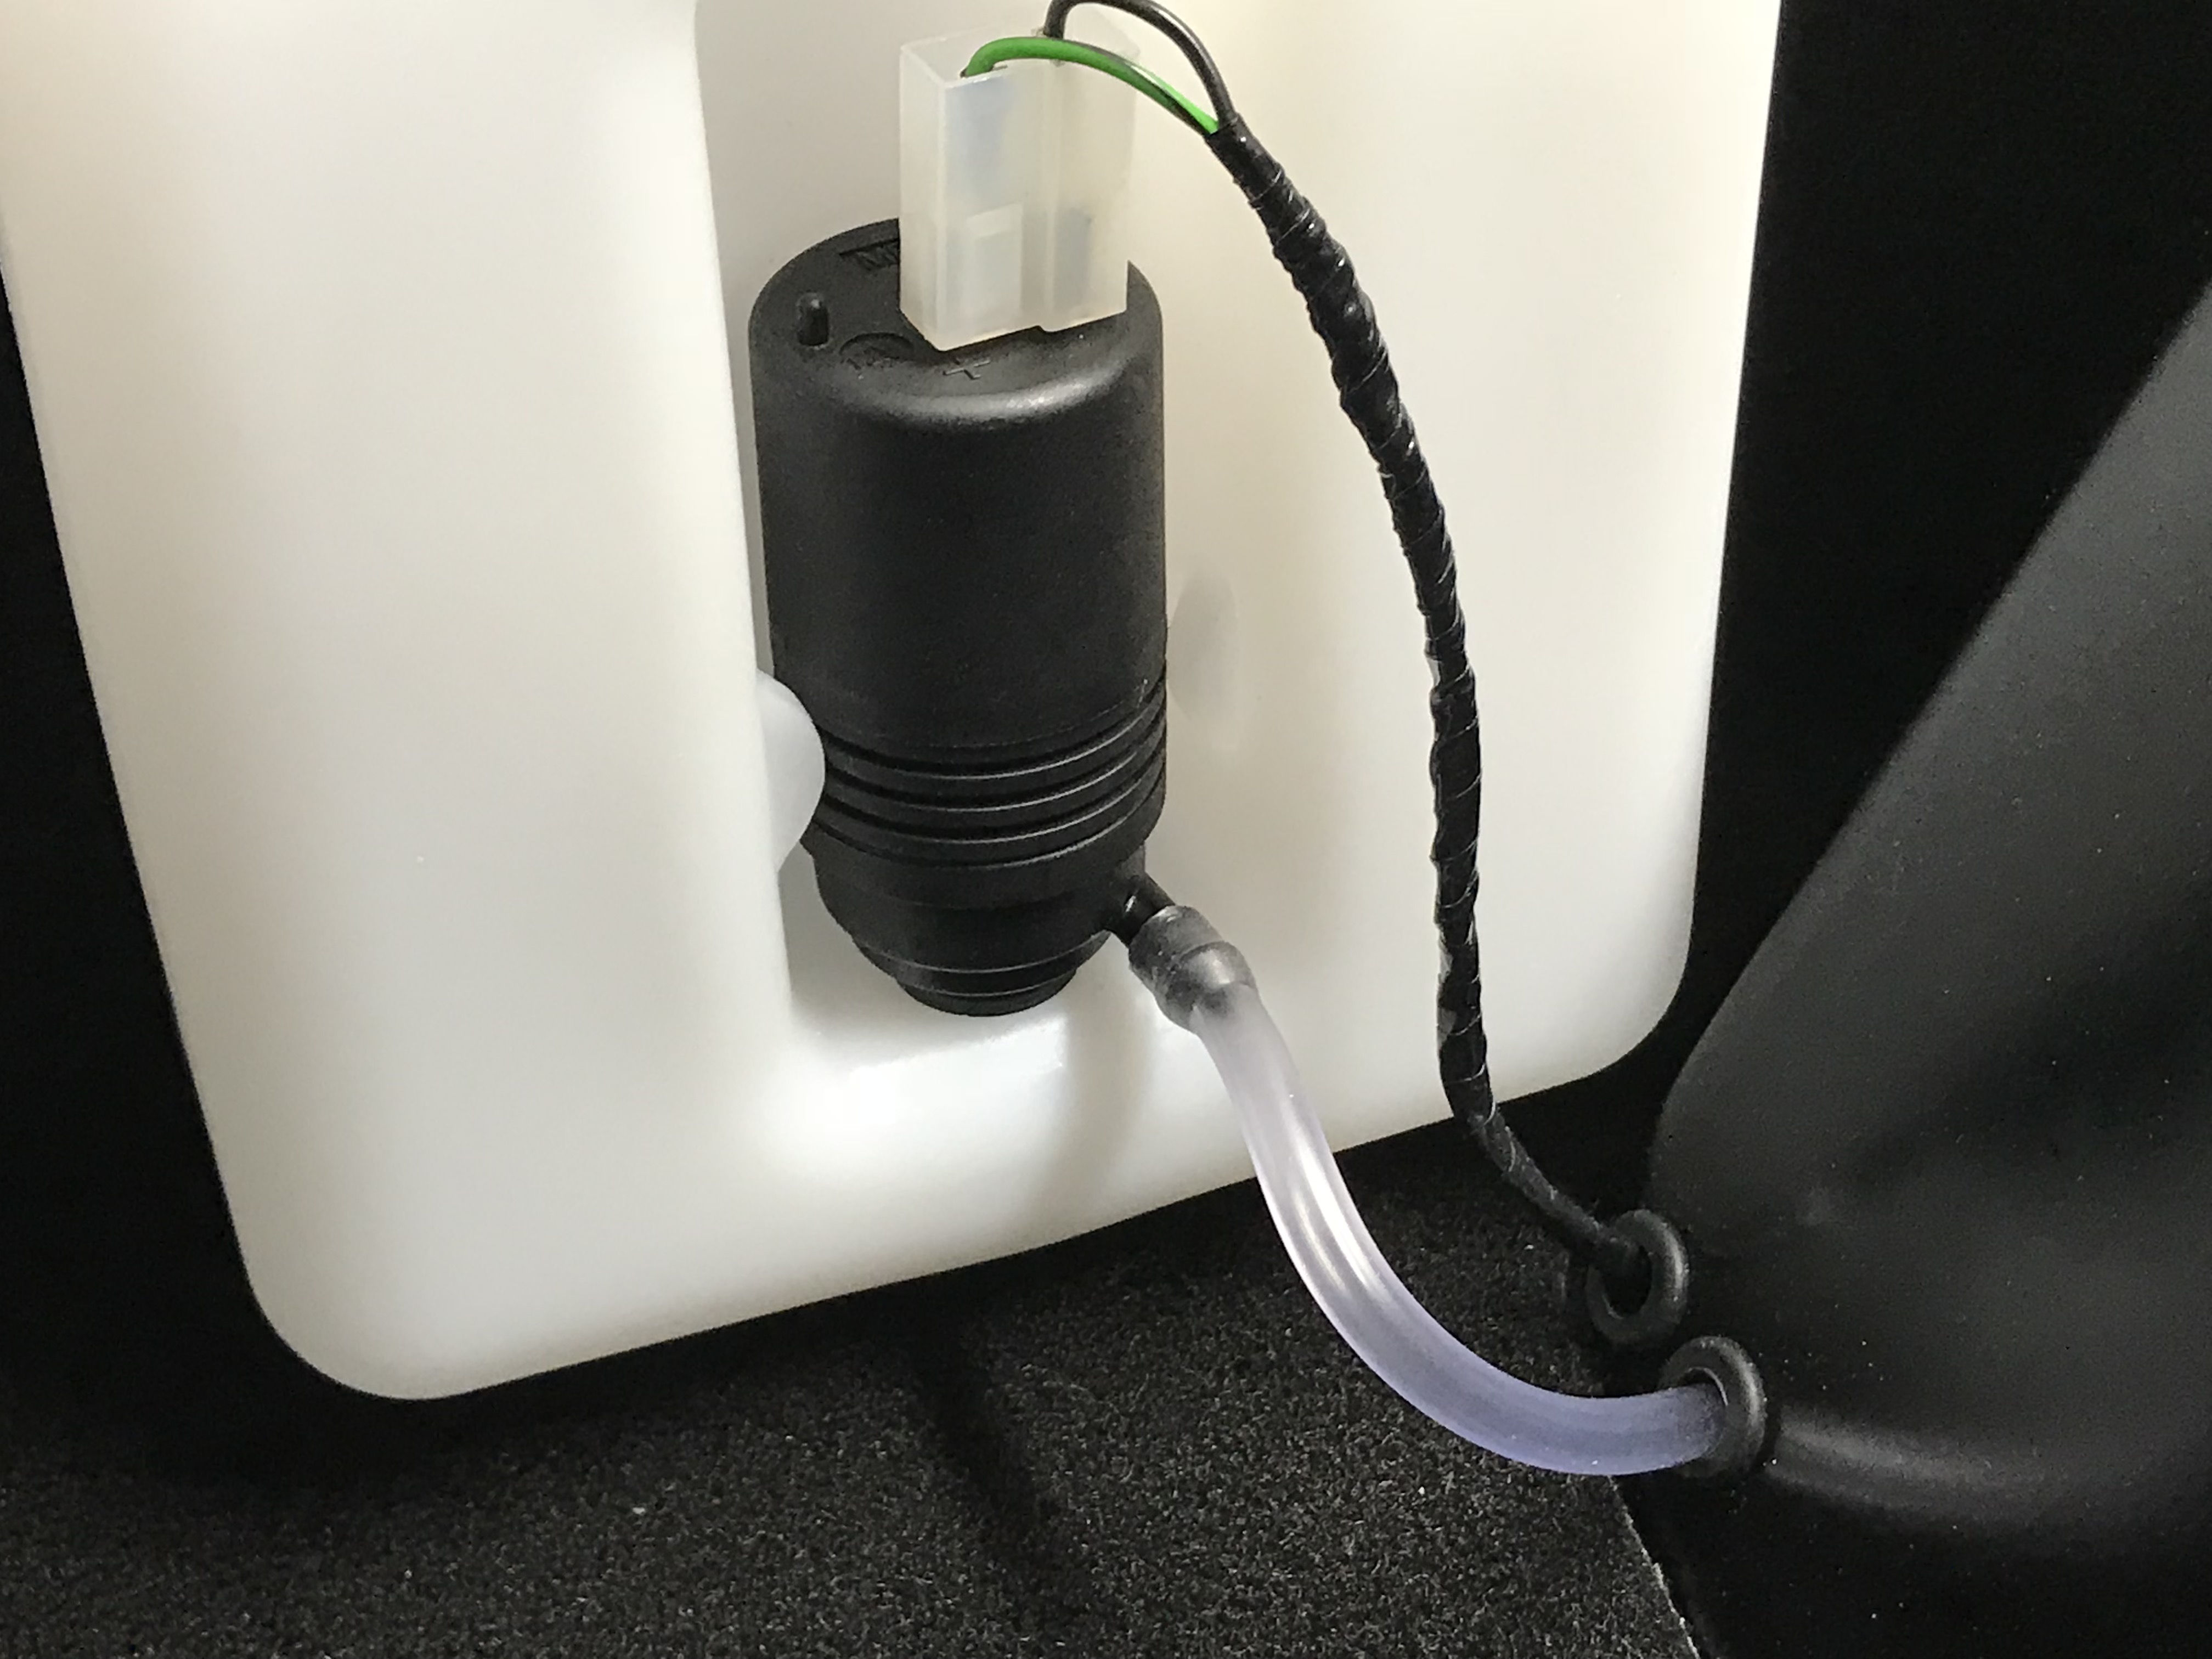
With the tank mostly full it was time to turn to the washer bottle again. I’d got as far as fitting the fuel filler shroud along with the washer pipe and electors fed through the fuel filler shroud. I’d also got some pointers about fitting the washer bottle in the boot from Derek a few weeks earlier. He had sent me three images of how Caterham do the washer bottle now but their fixing looked a little flimsy to me – a single fixing point – and with a different bracket than the one they’d sent me.

Caterham use a single rear-wing mounting bolt to attach the bottle. I thought I could make up a bracket from extruded bar Aluminium and have a little more control over where the bottle sits on the side panel and that would use the bracket I had got.
I started with some extruded Aluminium bar…
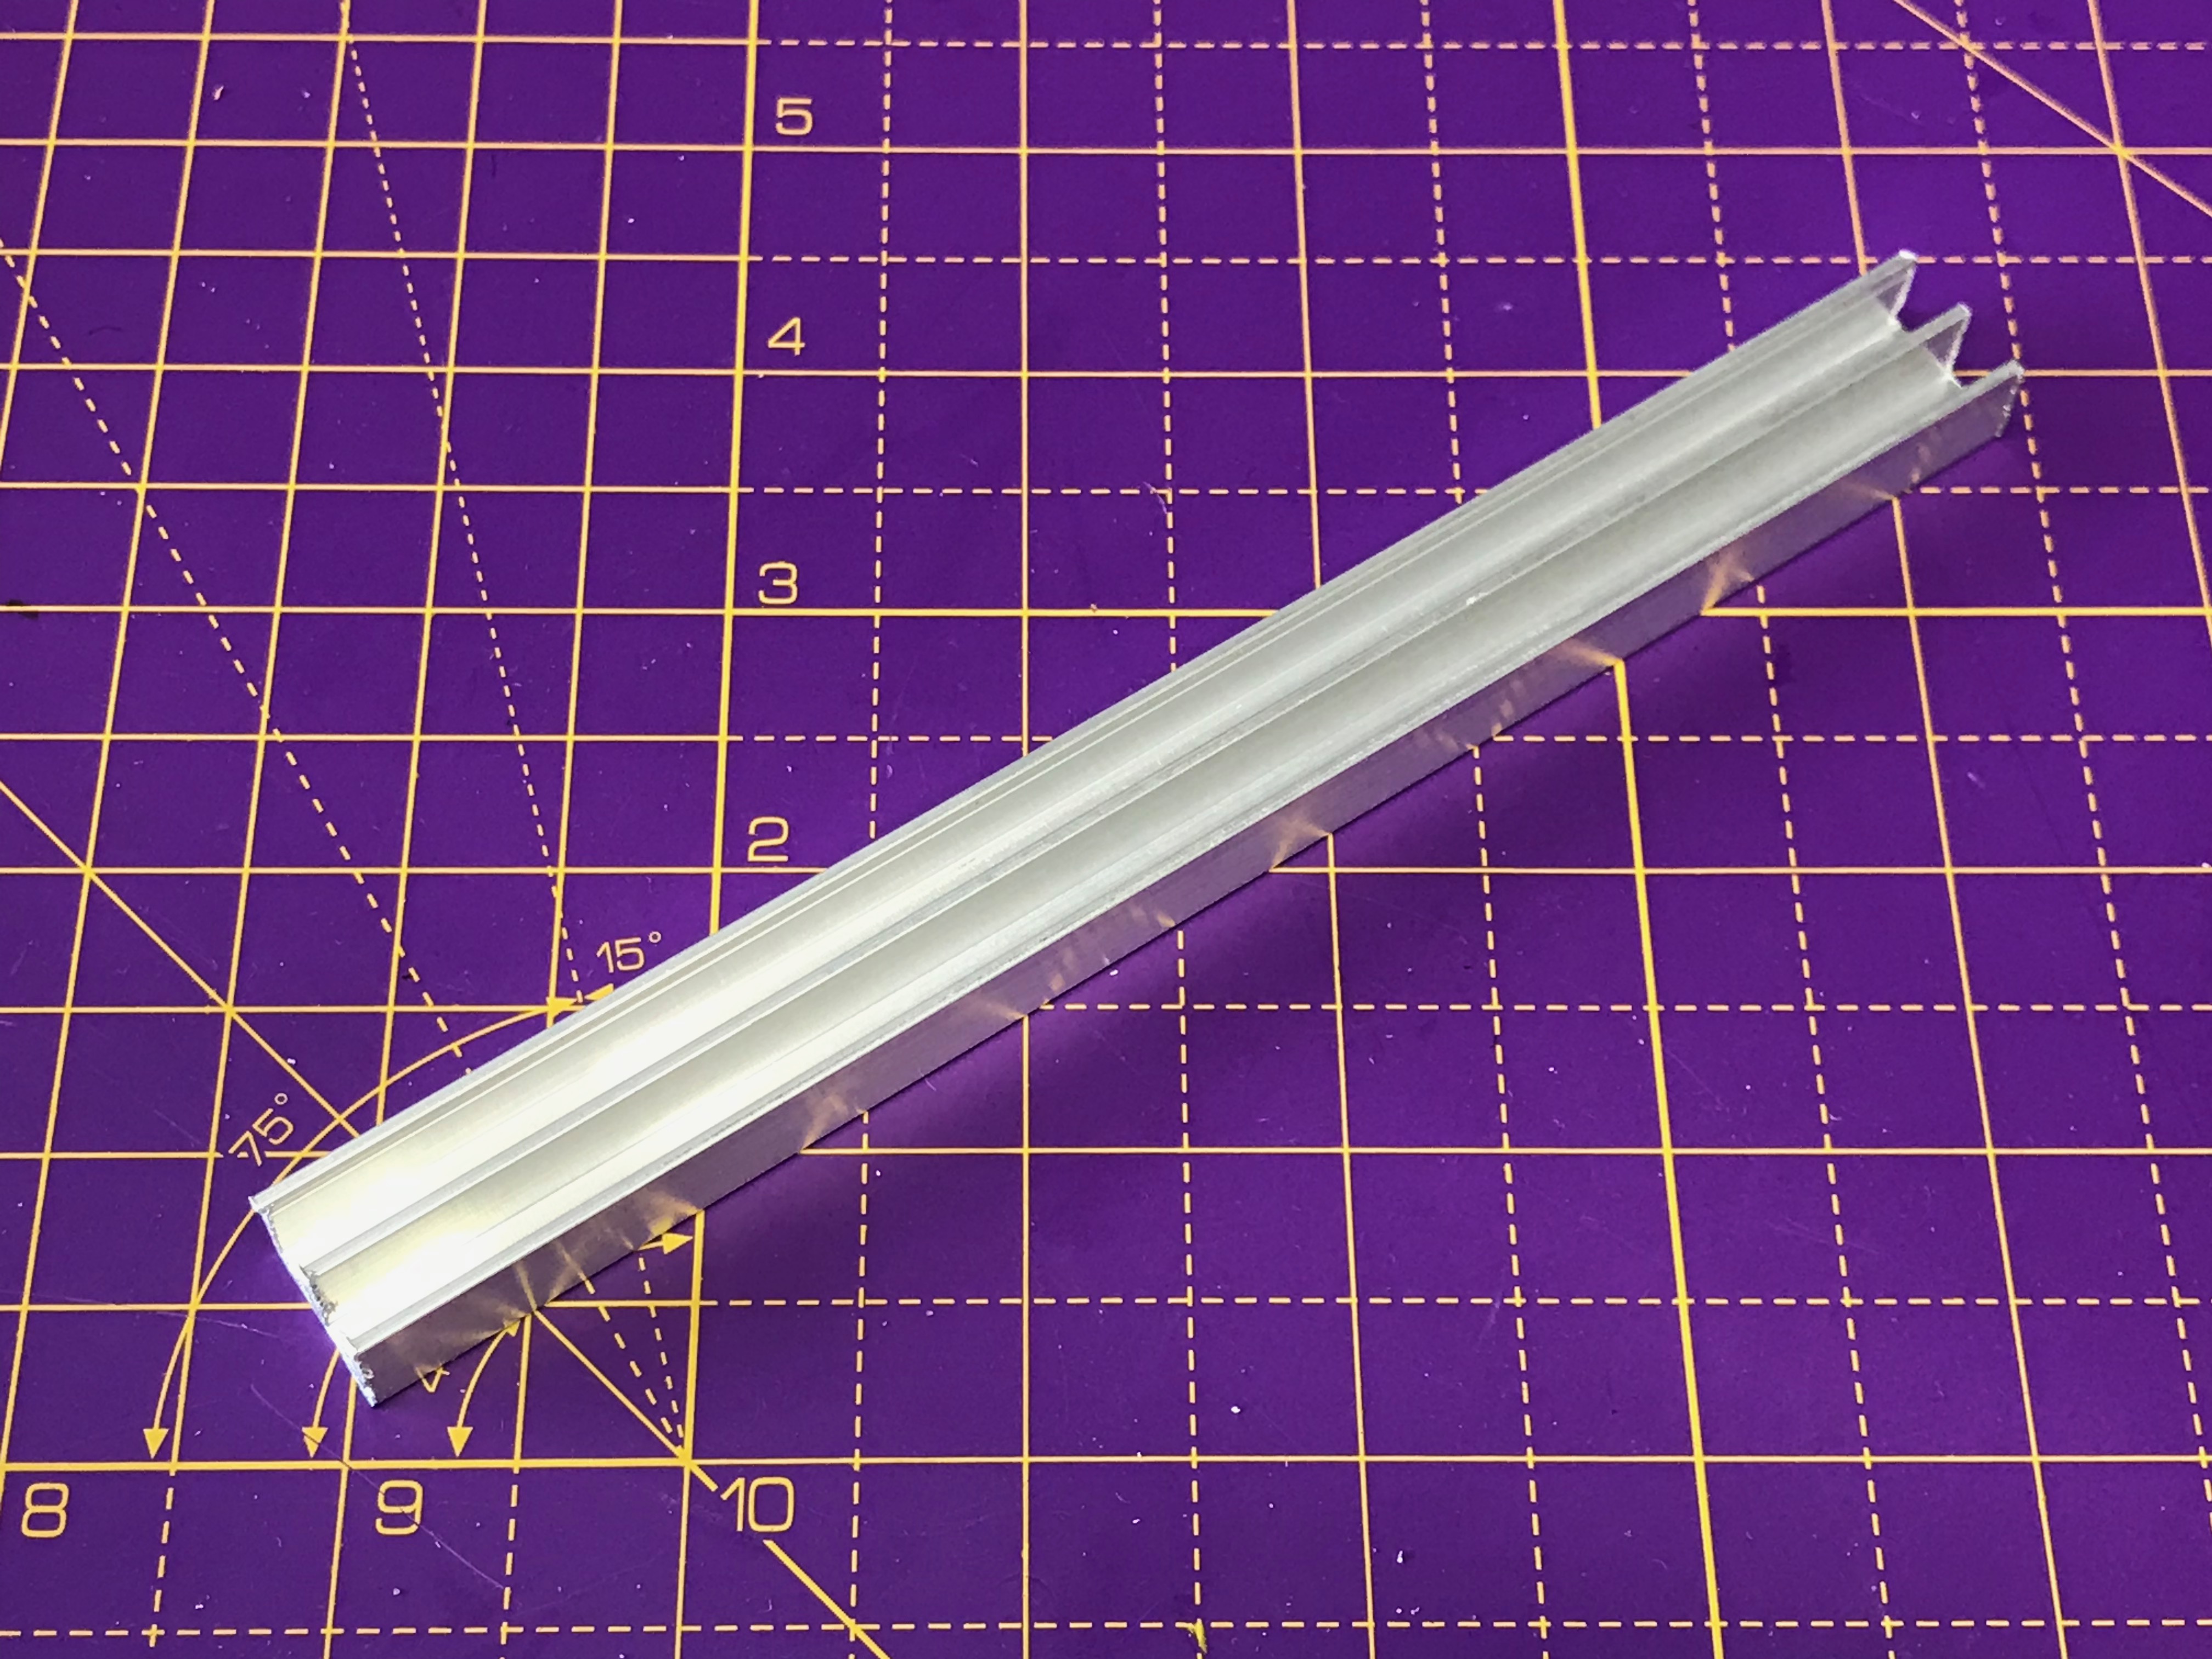
I then proceeded to reduce it’s depth by grinding off about half of the fins. The bracket is going to fit something like this…

And this is how it finished…

Plumbing a Washer Bottle
[ Note from the future: see the bottom of this post for an update on the washer bottle valve ]
Once the washer bottle was in place I could start to look at adding the tube and electrics to its motor.
The tube that is pre-fitted to the washer bottle is larger in diameter than the tube on the car that is fitted between the windscreen nozzle and the rear of the car. The tube on the car from the windscreen nozzle to the boot is pre-installed by Caterham in the chassis when the car arrives. It was clear in the images provided by Derek though that they use this smaller diameter tube to connect directly to the washer bottle motor.
Therefore, I took off the pre-fitted washer motor tube and cut the tube fitted to the car to the right length (plus a bit to make sure I can adjust it if needed).
So, out with a hair-dryer and heat up the mouth of the smaller tube so it’s soft enough to stand a chance of fitting over the motor nozzle…
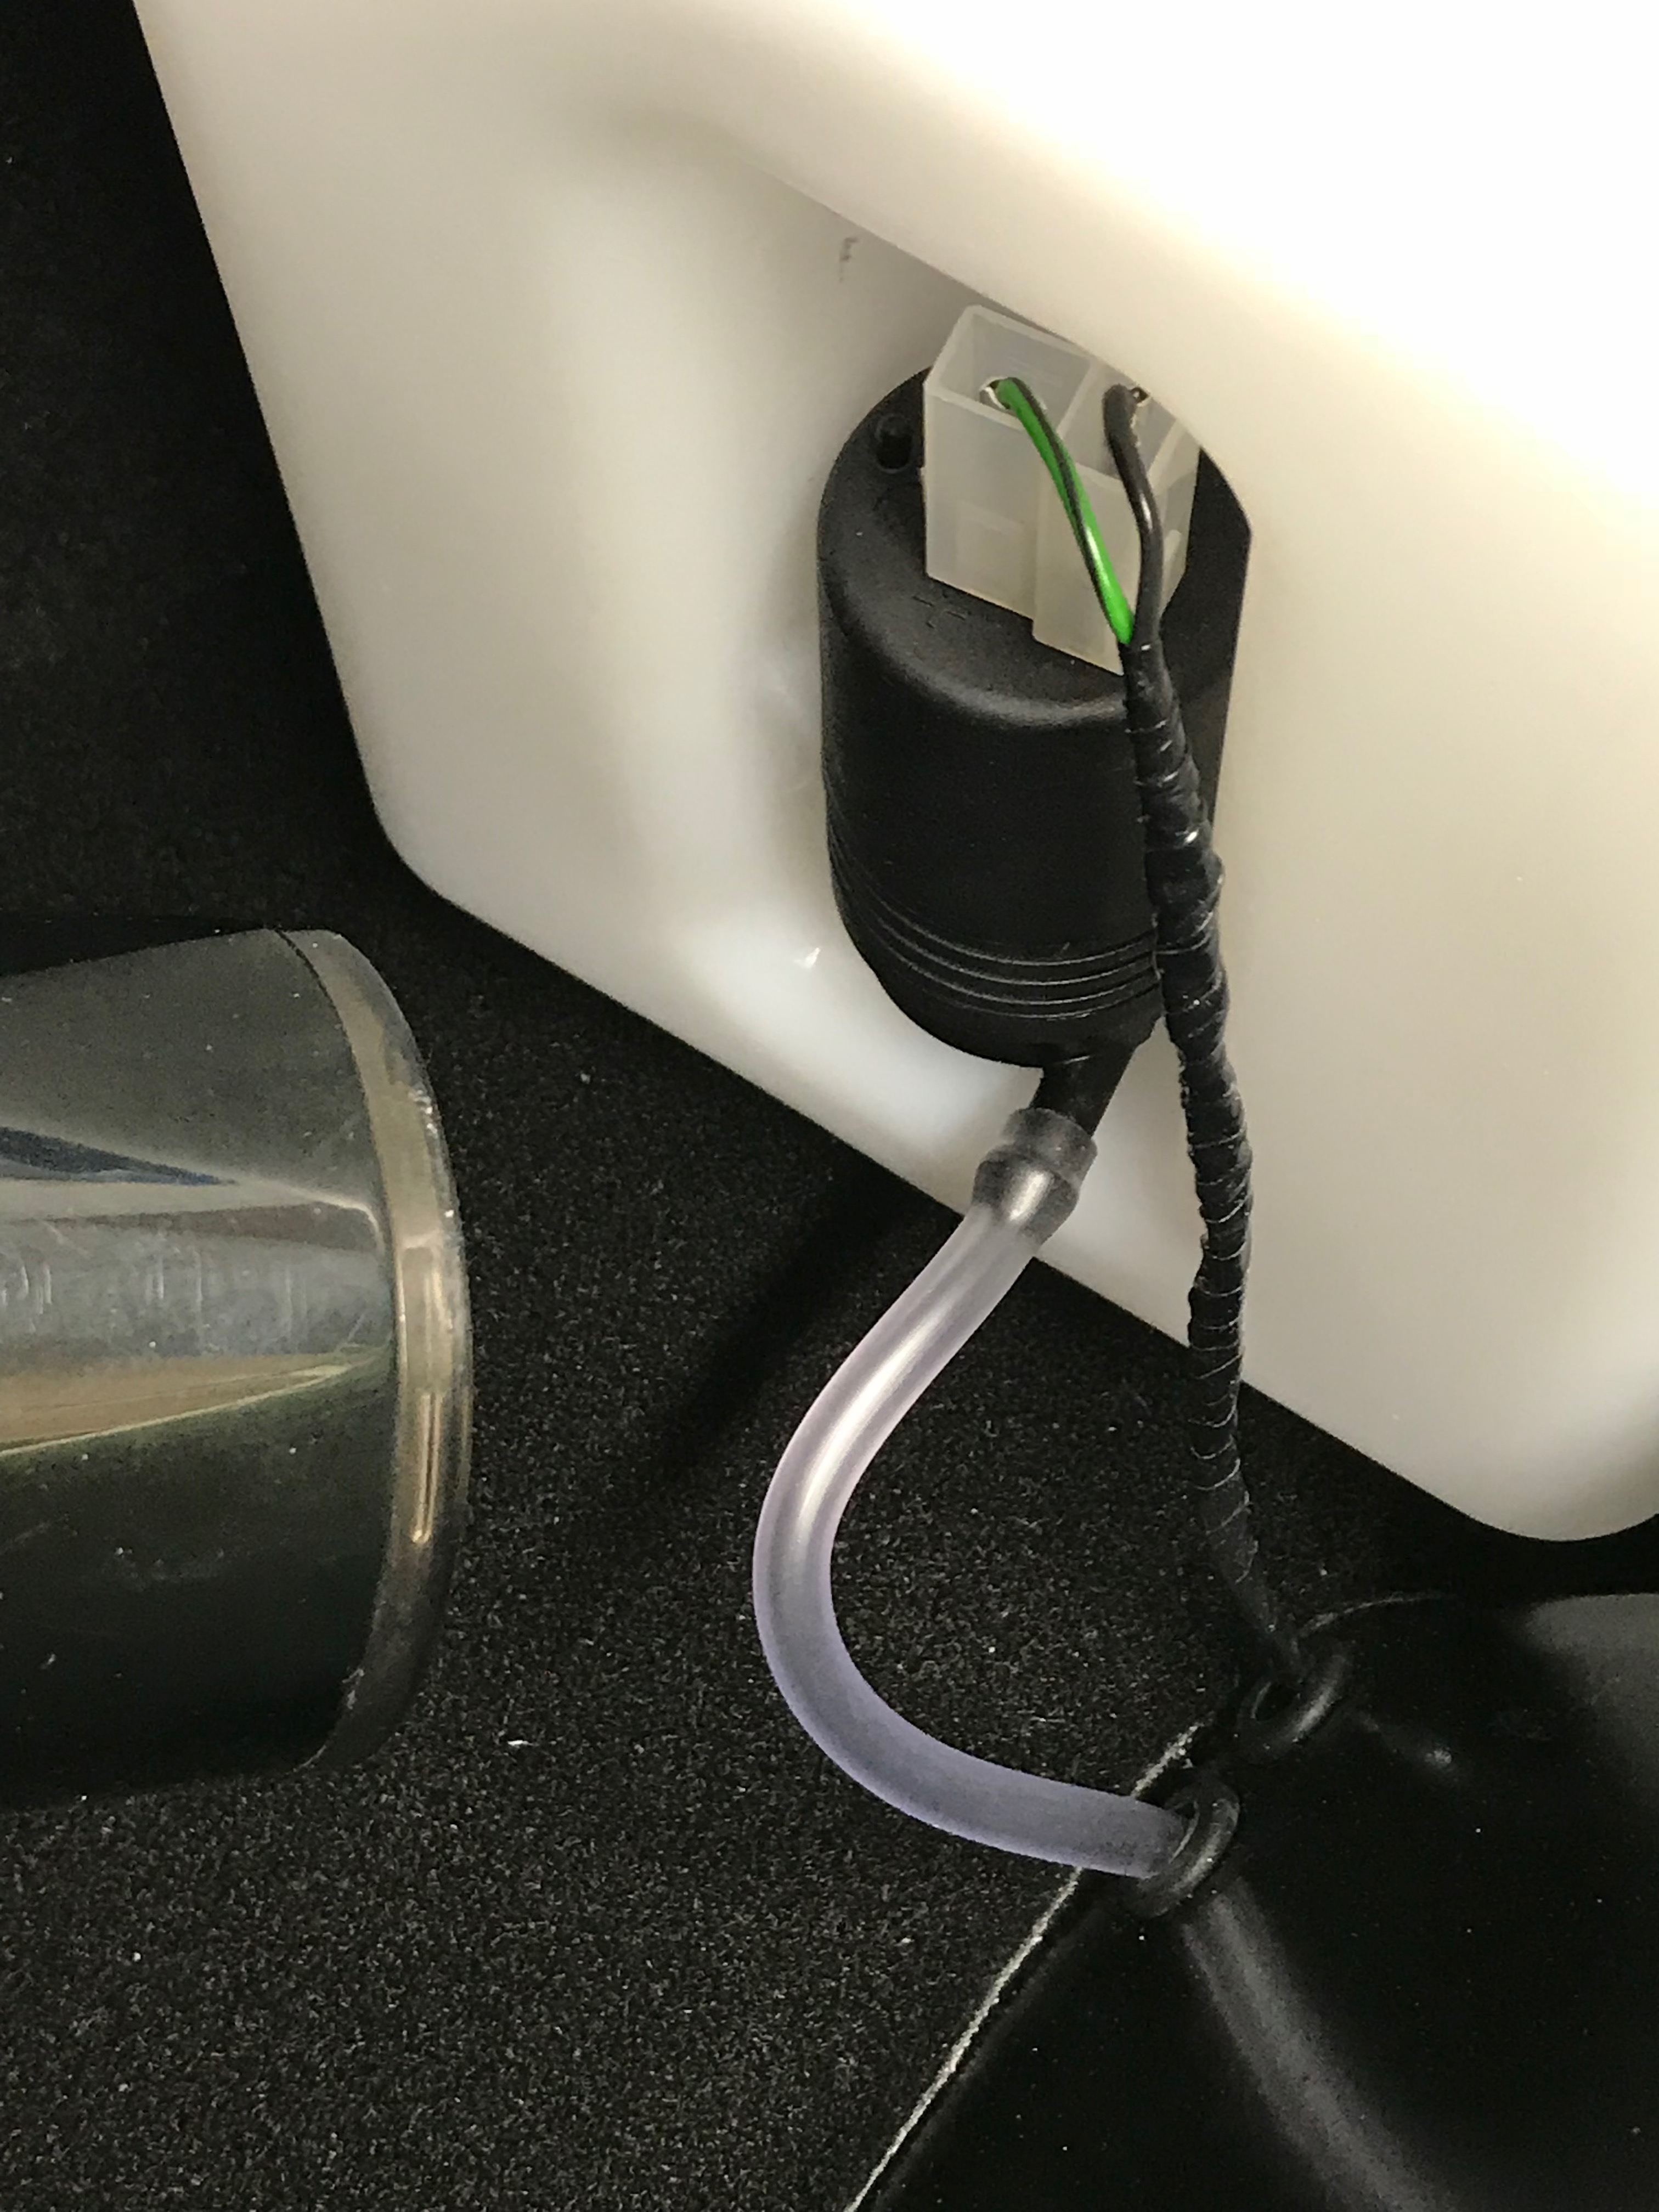
So in the end it looked like this…
That was a simple job in the end. If I did it again I’d make the Aluminium bracket I fabricated a little thicker. But overall I’m happy with how that worked out.
We’re getting to the end of the build now. Doesn’t seem like there are that many things to do. [Note from the future: dream-on!]
2018-04 Update on Washer Bottle Install
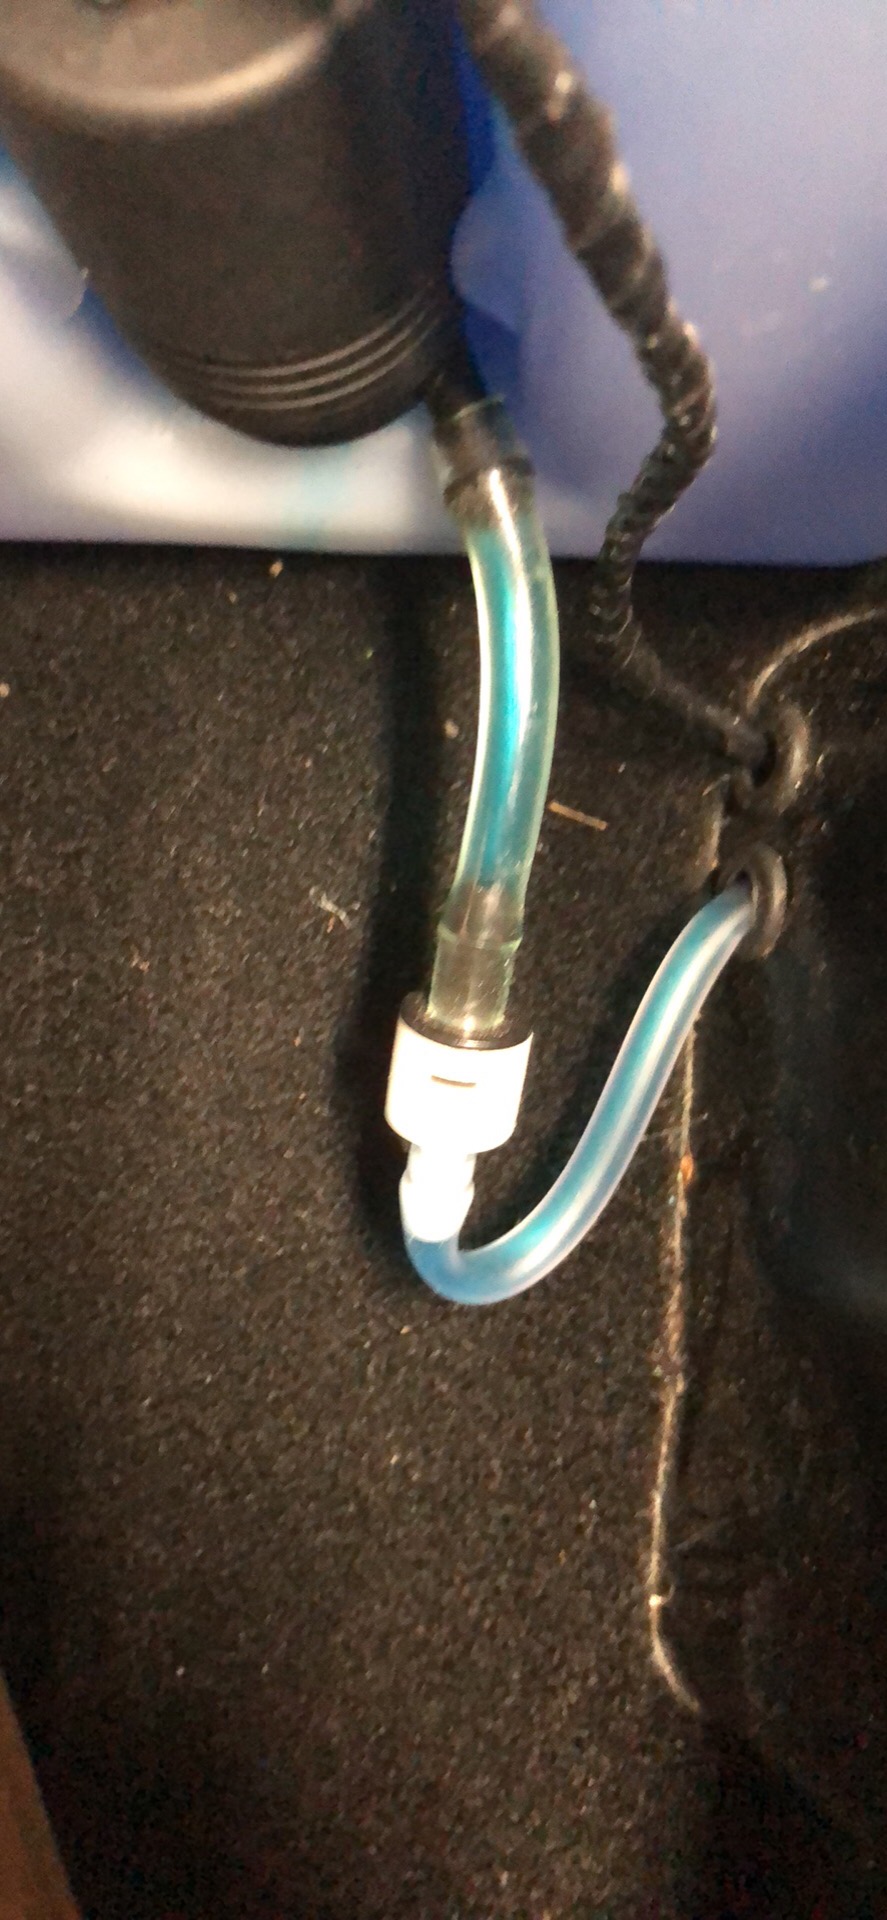
So, after running the car for a few hundred miles I’ve realised I missed a component in the washer install.
I think I mentioned elsewhere that when I’d filled the washer bottle and jacked up the rear of the car, I would get a dribble from the washer jets. And under heavy braking there would be a real jet of water gush from the washer jet as water was forced forwards from the washer bottle in the boot to the washer jet on the windscreen.
I kept on meaning to take a look at it and suspected that it was due to a valve that I’d missed from the install. The washer bottle came with a white valve attached to a small piece of tubing on the motor of the washer bottle. The pictures I’d got from Derek showing the new boot install method didn’t have the white valve, so I thought I’d follow Derek’s lead and leave it off – it made the install neater to leave off the valve IMHO.
I couldn’t figure out what the valve actually did by inspecting it. Sucking some air through it seemed to provide some restriction but it didn’t seem to do a great deal. I was sort of expecting it to be a non-return valve for some reason but that didn’t make a lot of sense either.
Anyways, it seemed to me that the missing valve was causing my dribble, and so I duly pulled the hose off the washer bottle and inserted the white valve inline.
Problem fixed.
Now I neither get the dribble when the rear of the car is raised, nor when braking. Here’s the final result…


Leave a Comment